bon BXM-183L3G Manuel utilisateur

Multi-Format Broadcast Monitor
BXM-183L3G, BXM-243L3G,
BXM-243T3G, BXM-323L3G
User’s Guide

Contents
Safety Instructions.......................................................................................................................3
Front............................................................................................................................................4
Rear.............................................................................................................................................6
MENU Description.....................................................................................................................7
VIDEO........................................................................................................................................8
DIS LAY 1.................................................................................................................................9
DIS LAY 2...............................................................................................................................10
DIS LAY3................................................................................................................................12
COLOR.....................................................................................................................................14
ADDITIONAL COLOR MENU for BXM-243T3G ...............................................................15
MARKER..................................................................................................................................16
OSD...........................................................................................................................................18
AUDIO......................................................................................................................................20
G I............................................................................................................................................22
SYSTEM...................................................................................................................................24
USB Firmware Update..............................................................................................................26
External Remote Control..........................................................................................................27
List of Compatible Video Formats (HDMI/Composite)...........................................................29
List of Compatible Video Formats (SDI)..................................................................................30
Specifications............................................................................................................................32
Dimensions................................................................................................................................35
Troubleshooting........................................................................................................................36
Warranty Information................................................................................................................38
Modification of roduct............................................................................................................38
Caution on Menu Operation......................................................................................................38
Caution for Monitor lacement.................................................................................................38
Caution for Usage.....................................................................................................................38
2

afety Instructions
•To help avoid damaging your monitor, connect only one power (AC or DC) in
operation.
•Rough handling of product may cause physical damage or malfunction.
•Never insert anything metallic into the monitor openings. Doing so may create
the danger of electric shoc .
•To avoid electric shoc , never touch the inside of the monitor. Only a qualified
should open the monitor’s case.
•Openings in the monitor cabinet are provided for ventilation. To prevent
overheating, these openings should not be bloc ed or covered.
•Put your monitor in a location with low humidity and a minimum of dust. Avoid
places li e damp basement or dusty hallways.
•Place the monitor on a solid surface and treat it carefully. The screen is made of
glass and can be damaged if dropped or sharply hit.
•Do not attempt to remove the bac cover, as you will be exposed to a shoc
hazard. The bac cover should only be removed by qualified service personnel.
•Unplug the monitor power before you connect external devices to the monitor.
•If your monitor does not operate normally, or if there are any unusual sounds or
smells coning from it, unplug it immediately and contact us.
•Please do not disassemble the monitor. No service will be provided in that case.
•Displaying fixed picture for a long time may cause an afterimage or dead spots.
To recover LCD pixels, display whole white picture on screen for a n hour or
two and pixels will be recovered.
•No service will be provided for user’s own color calibration.
3

Front
BXM-183L3G, 243L3G, 243T3G Front
BXM-323L3G Front
1) Power ( tandby)
2) HDMI/DVI Input
3) Analog
Switches to an analog input in the order of CVBS1, CVBS2, CVBS3, SVIDEO, RGB,
YpbPr, VGA by pressing the button.
4) WF/V
Displays Waveform or Vector Scope. The scope sizes such as normal size and
double size are rotated by pressing the button.
4

5) Audio Level Meters Display
6) Marker
Displays a mar er. Mar er type can be selected on the Menu.
7) Function Keys
User can assign a function on each function ey on the Menu.
8) Enter
Selection button on the Menu.
9) can
Change scan mode in the order of Zero(Normal) Scan, Under Scan, Over Scan, and
Pixel to Pixel.
In SD mode, the order is Zero Scan, Under Scan, Over Scan, Zoom Scan.
10) H/V Delay
Displays auxiliary data for monitoring by H/V delay. This function displays for SDI,
CVBS, S-Video, YpbPr, RGB Input Only.
11) R/G/B Gray
Displays R,G,B or Gray only.
12) Focus Assist
Mar focus area to help focusing.
13) Video Attribute
Brightness, Contrast, Chroma, Volume adjustment nobs.
14) MENU
15) False Color
Displays False Color to help user inspect exposed area.
16) Audio Out
17) Remote ensor
Infrared remote control sensor. (Should not be bloc ed)
5

Rear
1) AC Power
2) DI Input
3) DI Loop-Through Out
4) Component YPbPr/RGB or CVB 1,2,3 Port
5) Component YPbPr/RGB or CVB 1,2,3 Port Loop-Through Out
6) External ync
7) External ync Loop-Through Out
8) DVI
9) HDMI Port
10) Ethernet Port
External control via PC is able with this port by using 'Wall Control Program'.
6

11) Update Port
The Serial communication terminal that for changing the operating
program(Firmware) of the body or controlling the monitor.
12) Remote Ethernet Port
13) U B Update Port
14) Audio In/Out Port
MENU Description
General Cautions for O D menu or Display
The menu may not be displayed even when user pressed Menu button if there's No
Signal, or in unclear signal status.
The menu selection may be saved for each input signal mode, so sometimes user
should do menu selection again.
7
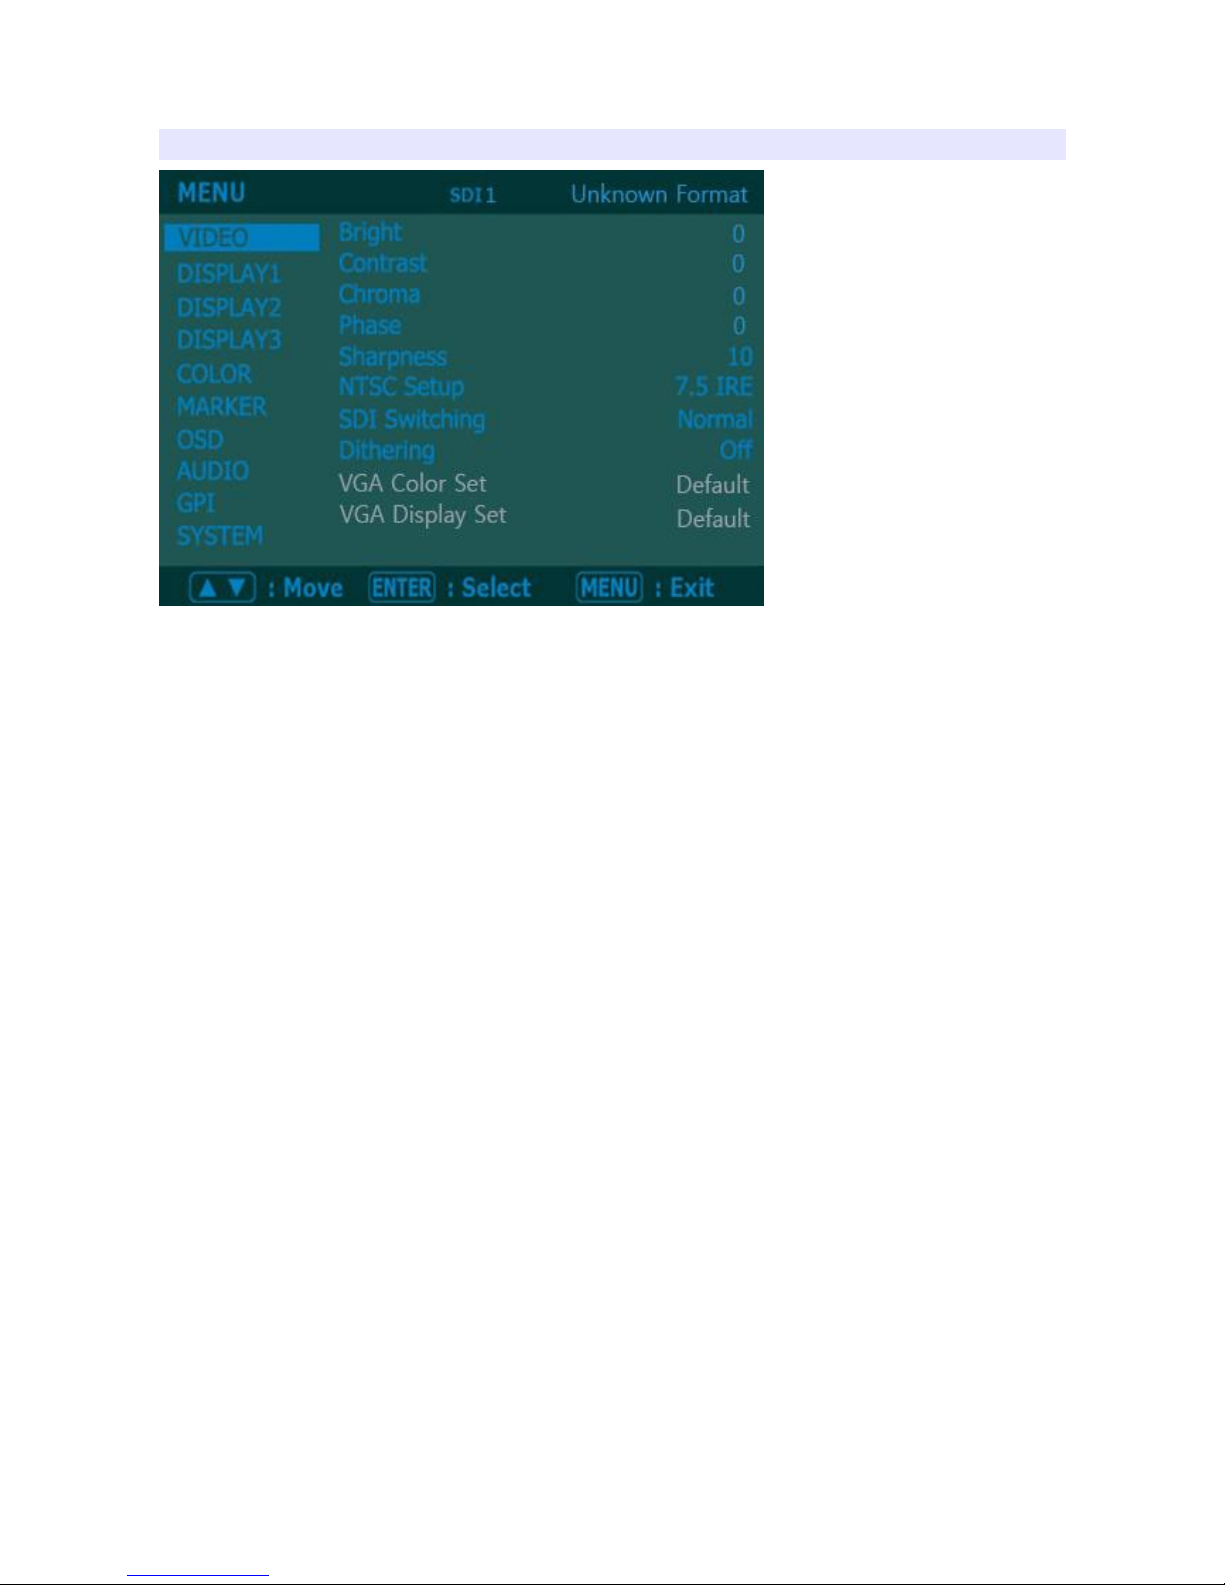
VIDEO
Brightness, Contrast, Chroma, Phase, harpness
Adjust color representation values.
NT C etup
Select IRE among 0 or 7.5 (Default)
DI witching
Normal : Use Normal in general condition but the screen might be blin ing on
screen change when you use Matrix or Routing Switcher.
Fast : Use Fast to minimize blin ing on screen change.
Dithering
Turn this mode on to view motion pictures smoothely when the source has low
quality.
8
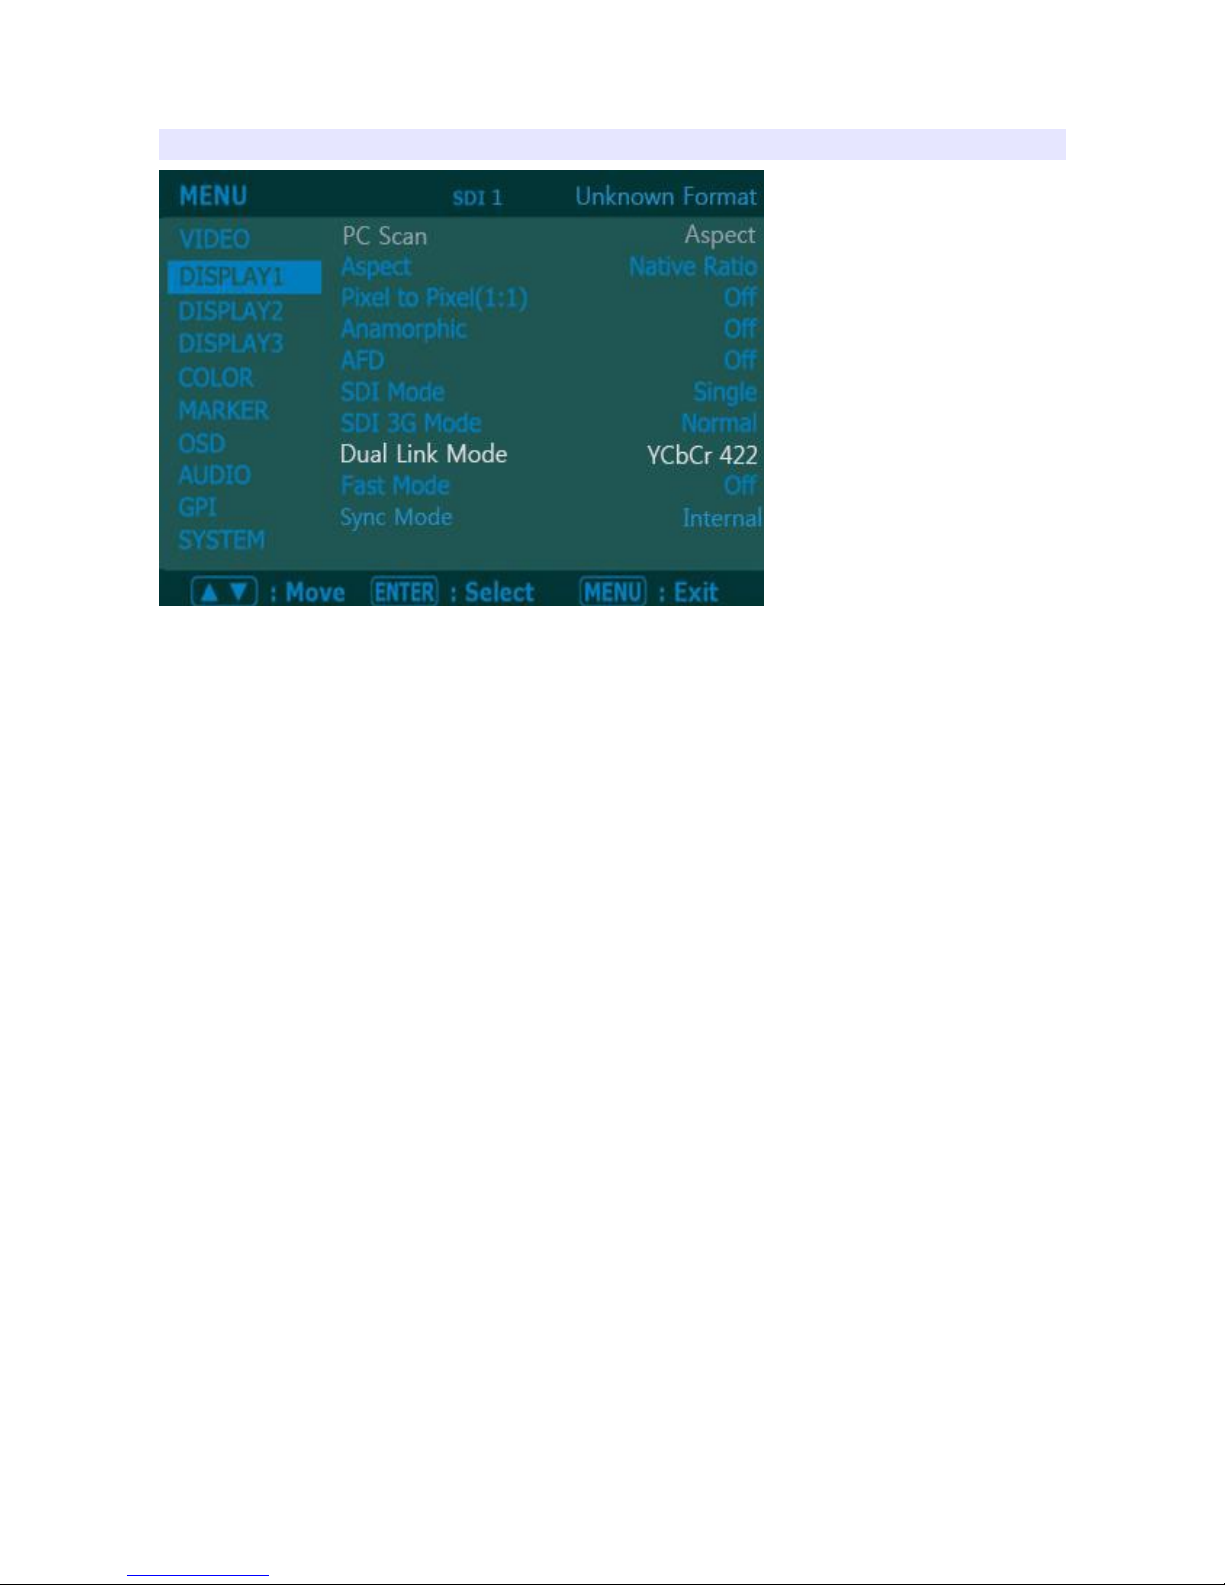
DI PLAY 1
Aspect
Set the aspect ratio of the screen. 16:9, 4:3, Native(Original) are selectable.
Pixel to Pixel 1:1 can
Set this on to display picture in 1:1 pixel mapping.
AFD
Set this mode to set aspect ratio.
DI Mode
Select Single Mode normally. Select Dual Mode for using two SDI(SDI1/SDI2) input
ports for a single screen.
DI 3G Mode
Turn it on for 3G SDI.
Dual Link Mode
Select waveform display mode. Choose Normal to analyze whole screen, choose
Line Select to analyze a specific line of the screen.
Fast Mode
Turn this on to ma e smoother movement on fast motion in an interlace input.
9

DI PLAY 2
P&P MENU
Displays two pictures in a screen in the way of Picture in Picture, Picture by
Picture, or Blending.
On its sub menu, user can select Main picture and Sub picture, and the position for
Picture-in-Picture mode. Blending transparency can be adjusted when Blending
selected.
Some signals cannot be used for P&P function. Refer to the combination table on
the bottom of the section.
Waveform Display Mode
Select whether to display waveform for whole picture or for just for a line.
Waveform Line elect
Select waveform line to display among Y, Cb, Cr.
Wide/Full WF elect
Switches to wide waveform scope or full screen waveform scope.
Waveform Color Mode
Select Single color or Mixed color.
10
Ce manuel convient aux modèles suivants
3
Table des matières
Autres manuels bon Moniteur

bon
bon BSM-093N3G Manuel utilisateur

bon
bon BLM Series Manuel utilisateur

bon
bon BSM-182i Manuel utilisateur

bon
bon FM-055F Manuel utilisateur

bon
bon BXM-170LS Manuel utilisateur

bon
bon BQM-170LS Manuel utilisateur

bon
bon FM-052SC Manuel utilisateur

bon
bon FM-055F Manuel utilisateur

bon
bon FM-073SCH Manuel utilisateur


