6
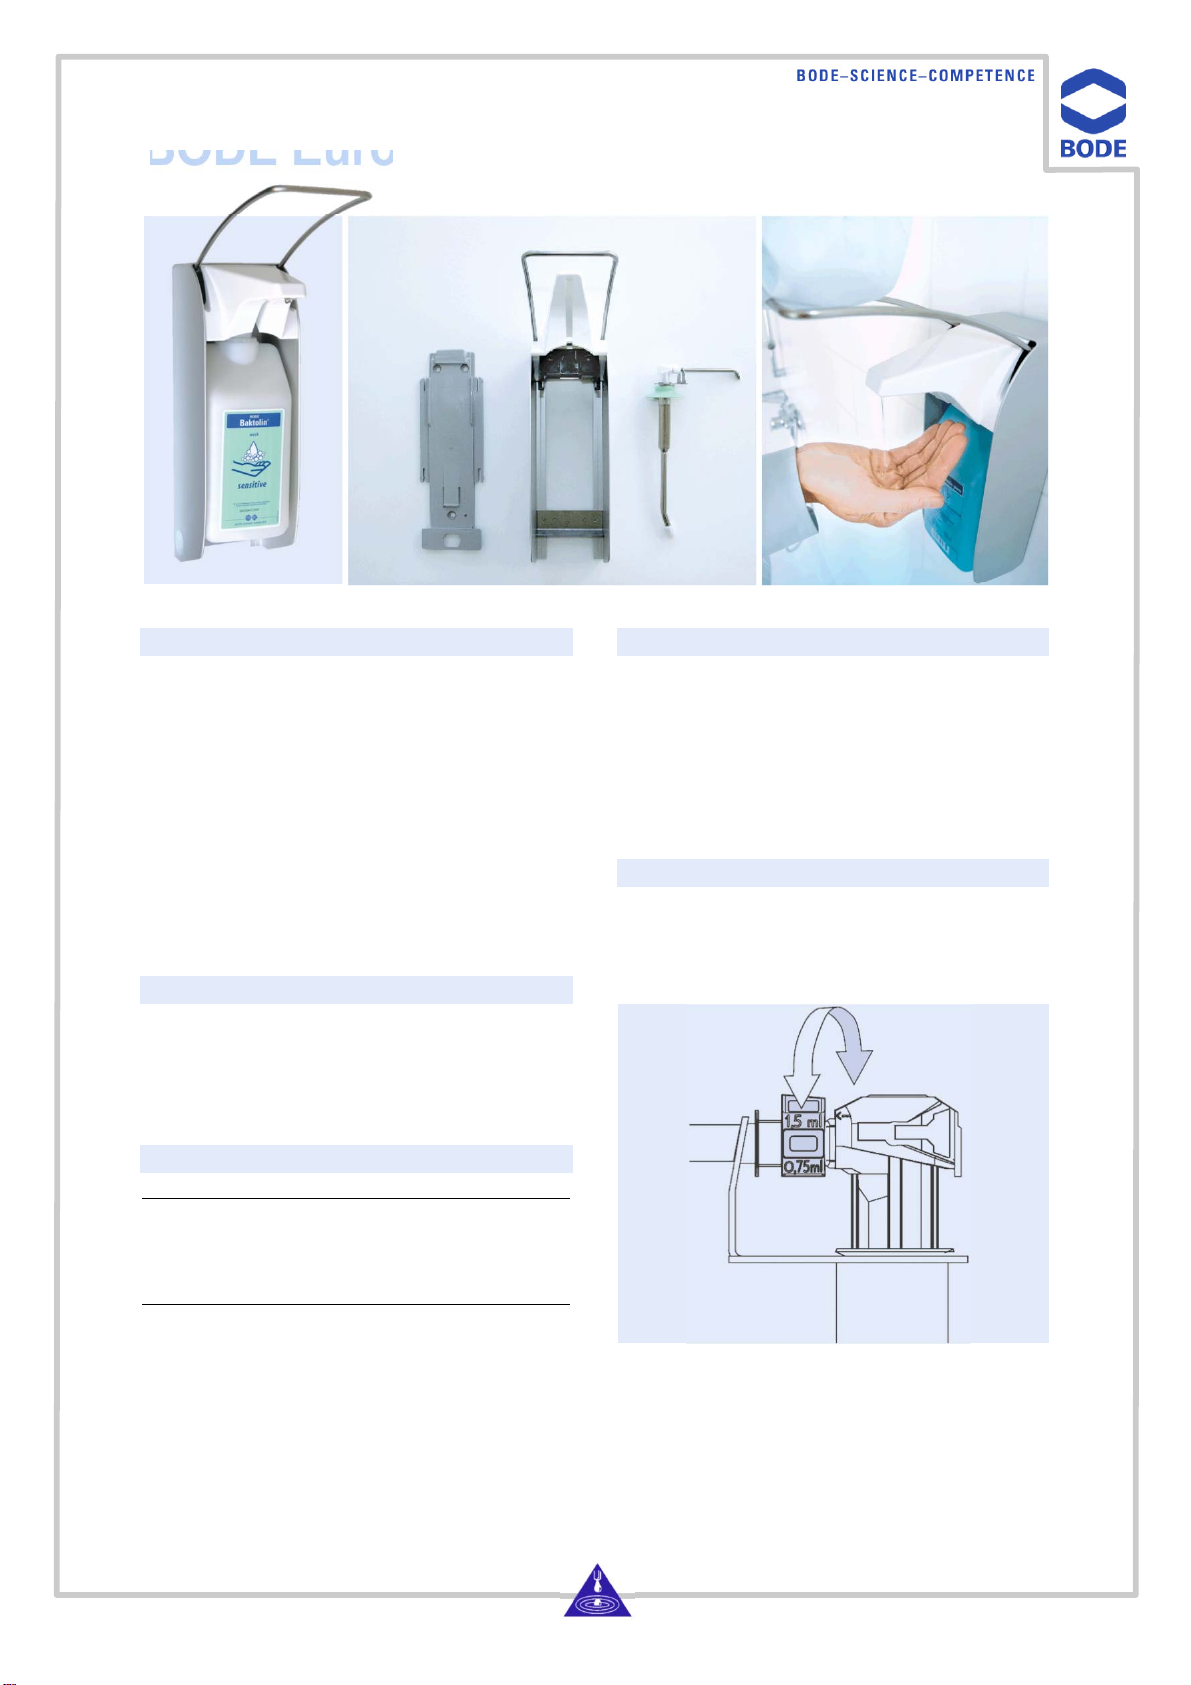
BODE Eurodispenser 1 plus
Mounting instructions
Preparation of the mounting location
When selecting the mounting location, the following
points have to be considered:
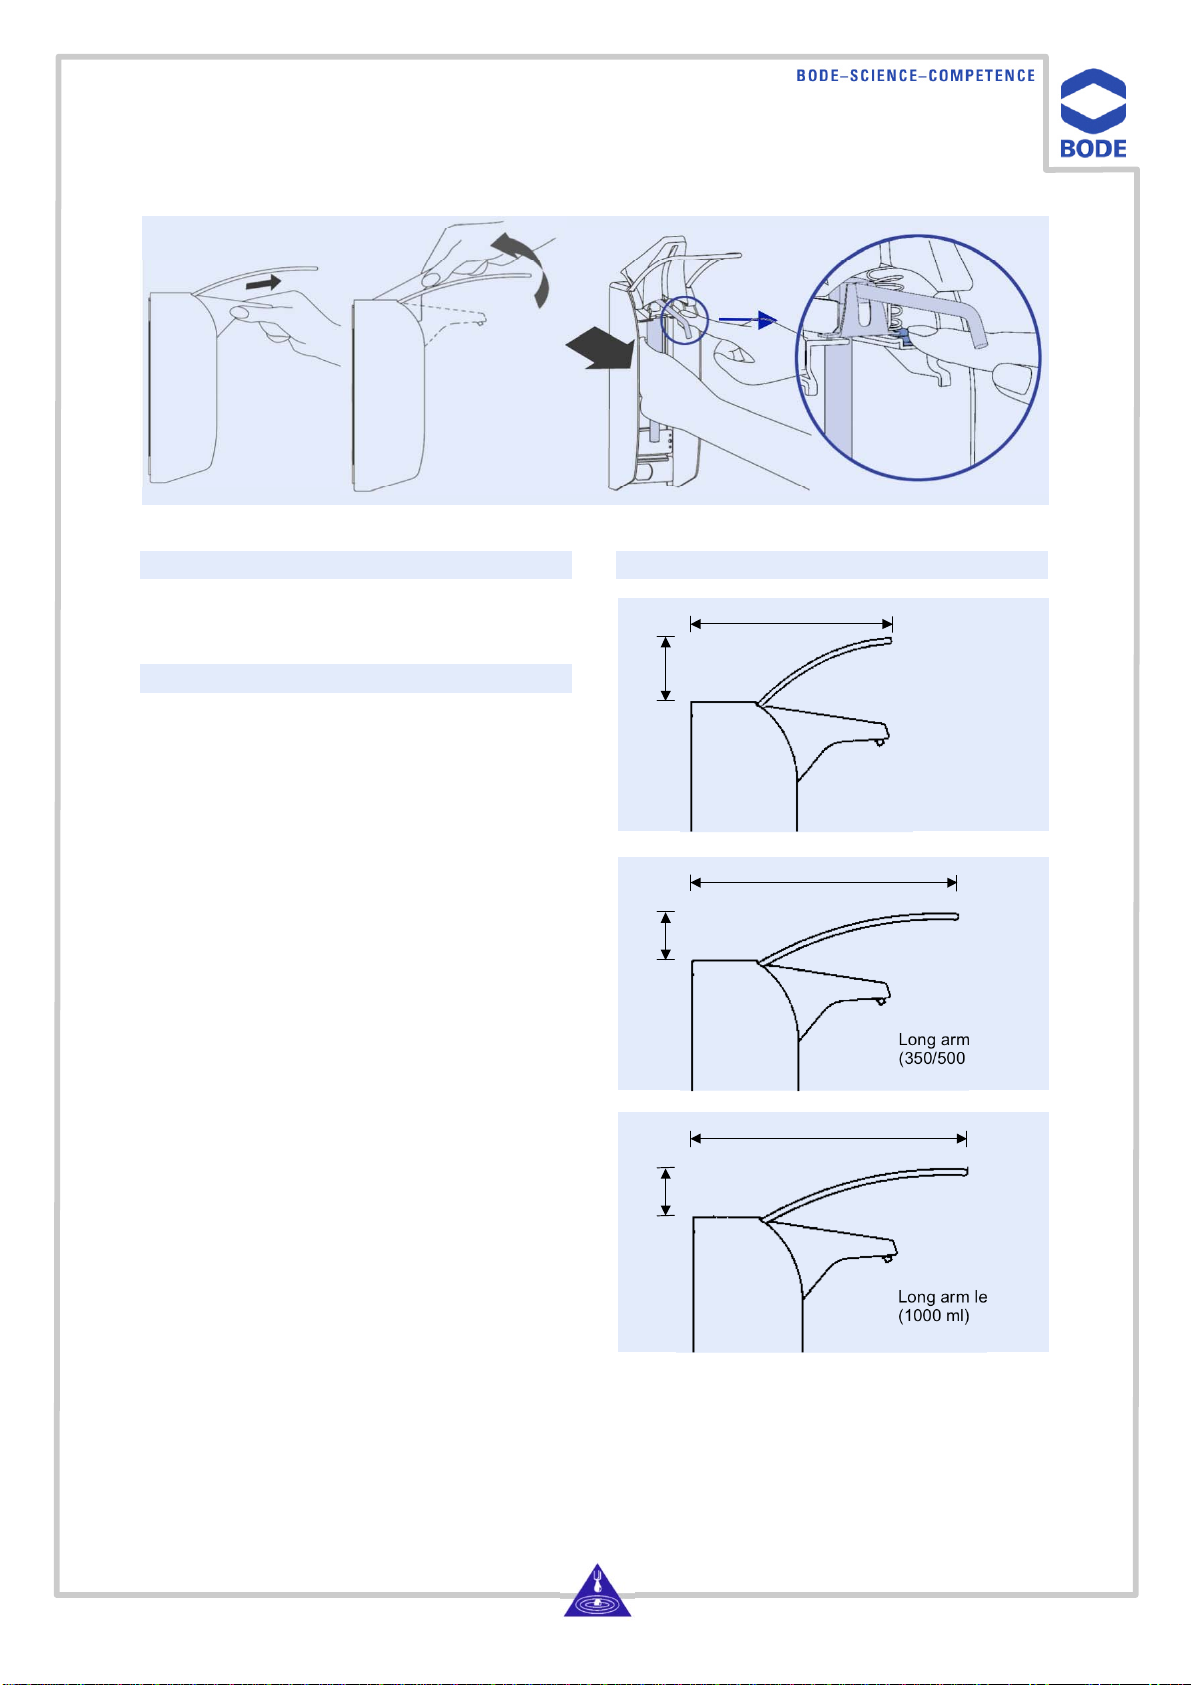
irrespective of dispenser type, provide for a space of
approx. 50 mm (necessary for dismounting the
dispenser)
keep a minimum distance between dispenser and top
edge of wash basin or work space (for trouble-free
bottle exchange)
the wall should be clean, dry and even
mind the bearing capacity: besides weight of
dispenser, pump and product bottle, the load of arm
lever actuation has to be considered. Therefore,
please only use the provided mounting material for
attaching the Eurodispenser to the wall
make sure that no electric cables, gas mains or other
utility cables and pipes are damaged by drilling
Warning: the BODE Eurodispenser 1 plus cannot be
attached to the wall with Powerstrips. For secure
mounting use the provided mounting material.
Mounting
For mounting you need a drilling machine, a 6 mm drill
(type depends on wall material), and a screwdriver or a
cordless screwdriver. All other mounting material (wall
anchors, screws, shims) is included in delivery. Data on
dispenser dimensions, necessary minimum distance to
washbasin/work space, etc. you will find in the
aforementioned detail drawings.
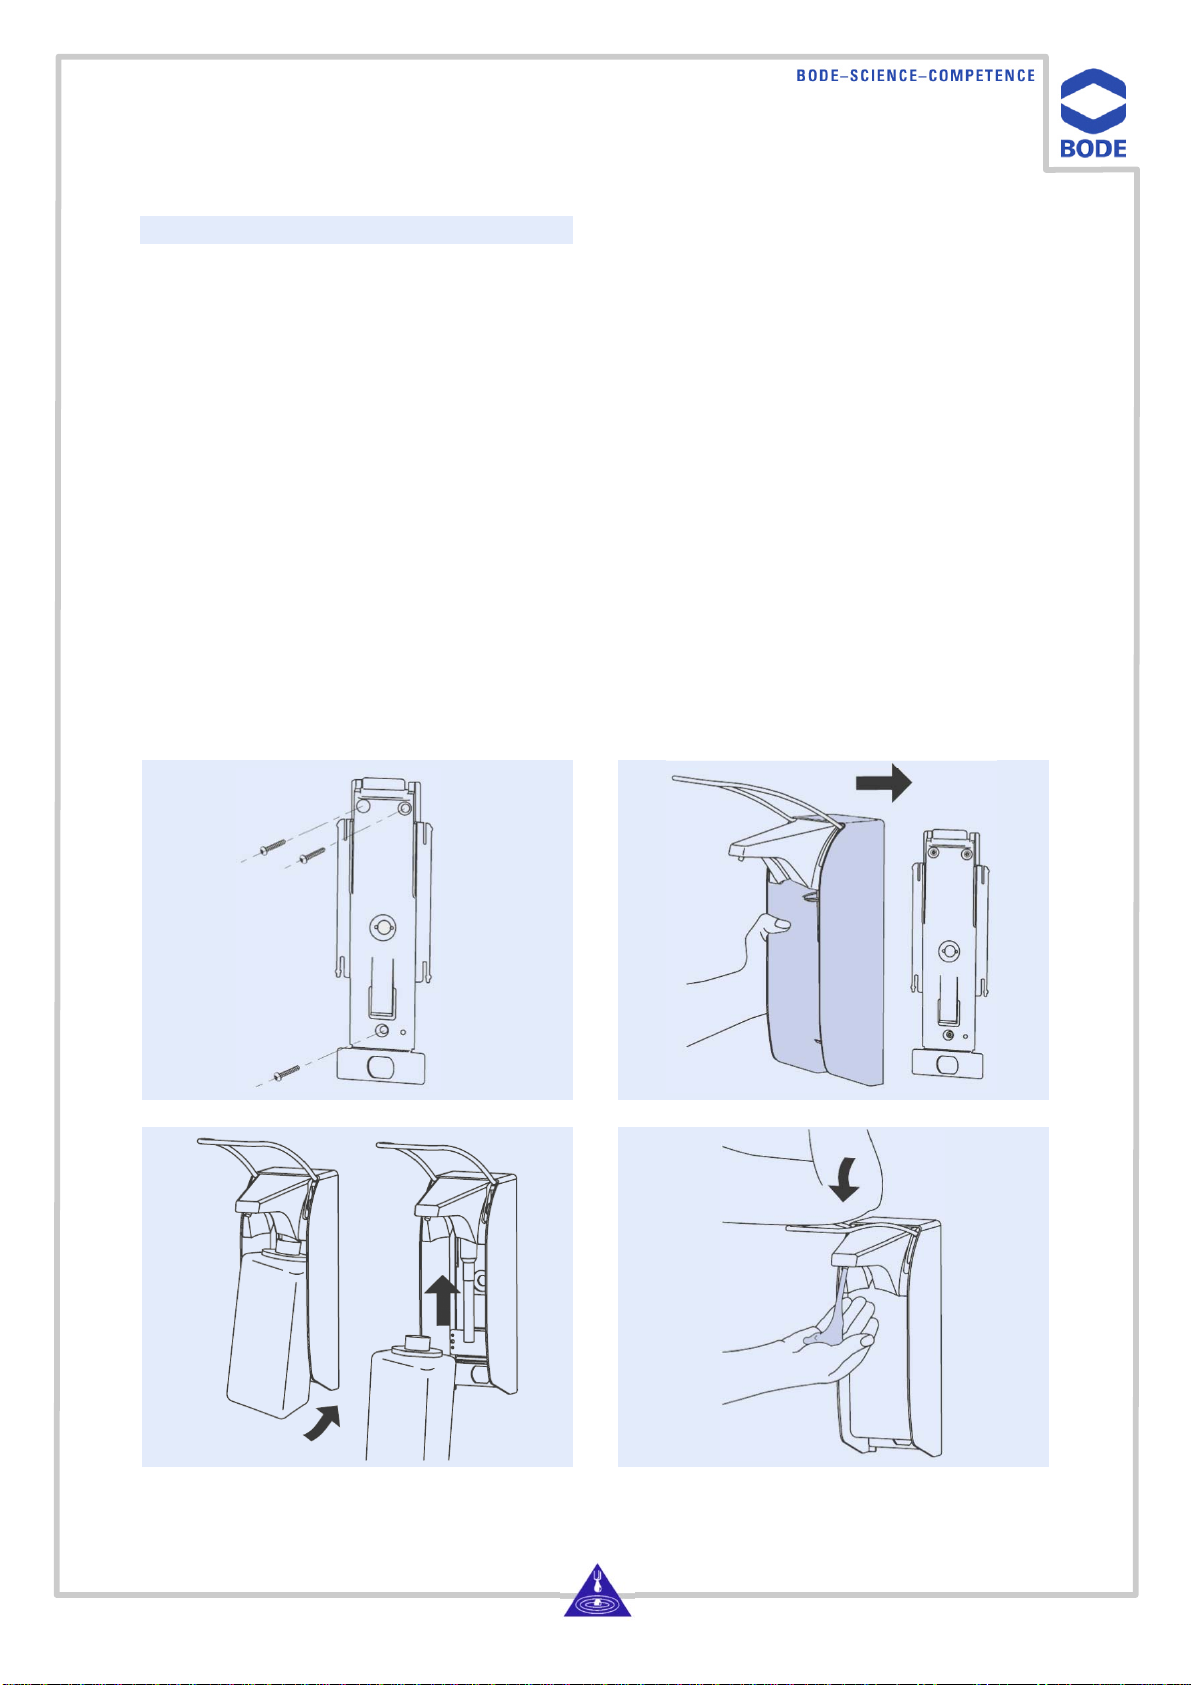
Mark drill holes on the wall, carry out drilling and put wall
anchors in. Take dispenser out of the cardboard box:
1. Press locking tongue and pull wall holder off the
housing
2. Mount backplate with wall anchors and screws at the
designated location
3. Slide dispenser on the backplate (top down) until the
locking tongue snaps in
4. Put bottle in dispenser (bottom-up)
5. For activation press arm lever several times, so that
the dip tube sucks in the product. In doing so, hold
your hand under the outlet