FUSELAGE
Cut a hole in the wing seating so that a receiver can be inserted. Glue the wing seating
plates using 5min epoxy. The wing seating plates can be shaped to a slight V angle to
accommodate the wing dihedral. Assemble the wing halves and drill 4mm holes in the
fuselage (and wing seating plates) using the wing holes as guides. Double sided tape can be
used to hold the wing during this operation. Take off the wing and rebore the fuselage holes
to 5.5mm and insert the provided nuts. Place the wing on top of the fuselage again and trial
fit the wing bolts. It is important for the nuts to fit tightly inside the fuselage holes up to the
collar. Lock the nuts in place using CA glue.
Should you have opted for a removable tail, glue a plywood reinforcement to the tail seat
(inside the fuselage). Drill 2 4mm holes in the V-tail mount. Place the tail on top of the
fuselage and drill 4mm holes using the tail holes as guides. Make sure that the tail is
correctly aligned. Rebore the fuselage holes to 5.5mm and insert the provided nuts. Lock
the nuts in place using CA glue. Install the supplied control horns.
If required, install a tow hook using 2-3 layers of fibreglass as reinforcement.
Bowden cables can be glued at 2-3 places inside the fuselage using CA or epoxy glues.
Alternatively, they can be glued to a 3mm piece of balsa shaped to conform to the inside
contour of the fuselage. The entire assembly is then glued inside the fuselage.
Cut a hole for the receiver battery in the inner nose part. Insert through this hole a 36mm
plate cut from the supplied plywood. This plate will act as a closure for the ballast
compartment. Drill a hole on top of the ballast compartment so that small pieces of lead can
be inserted.
Cut holes for the servos. It is recommended to reinforce with plywood the areas where the
servos will be bolted down. Drill holes for the bowden cables.
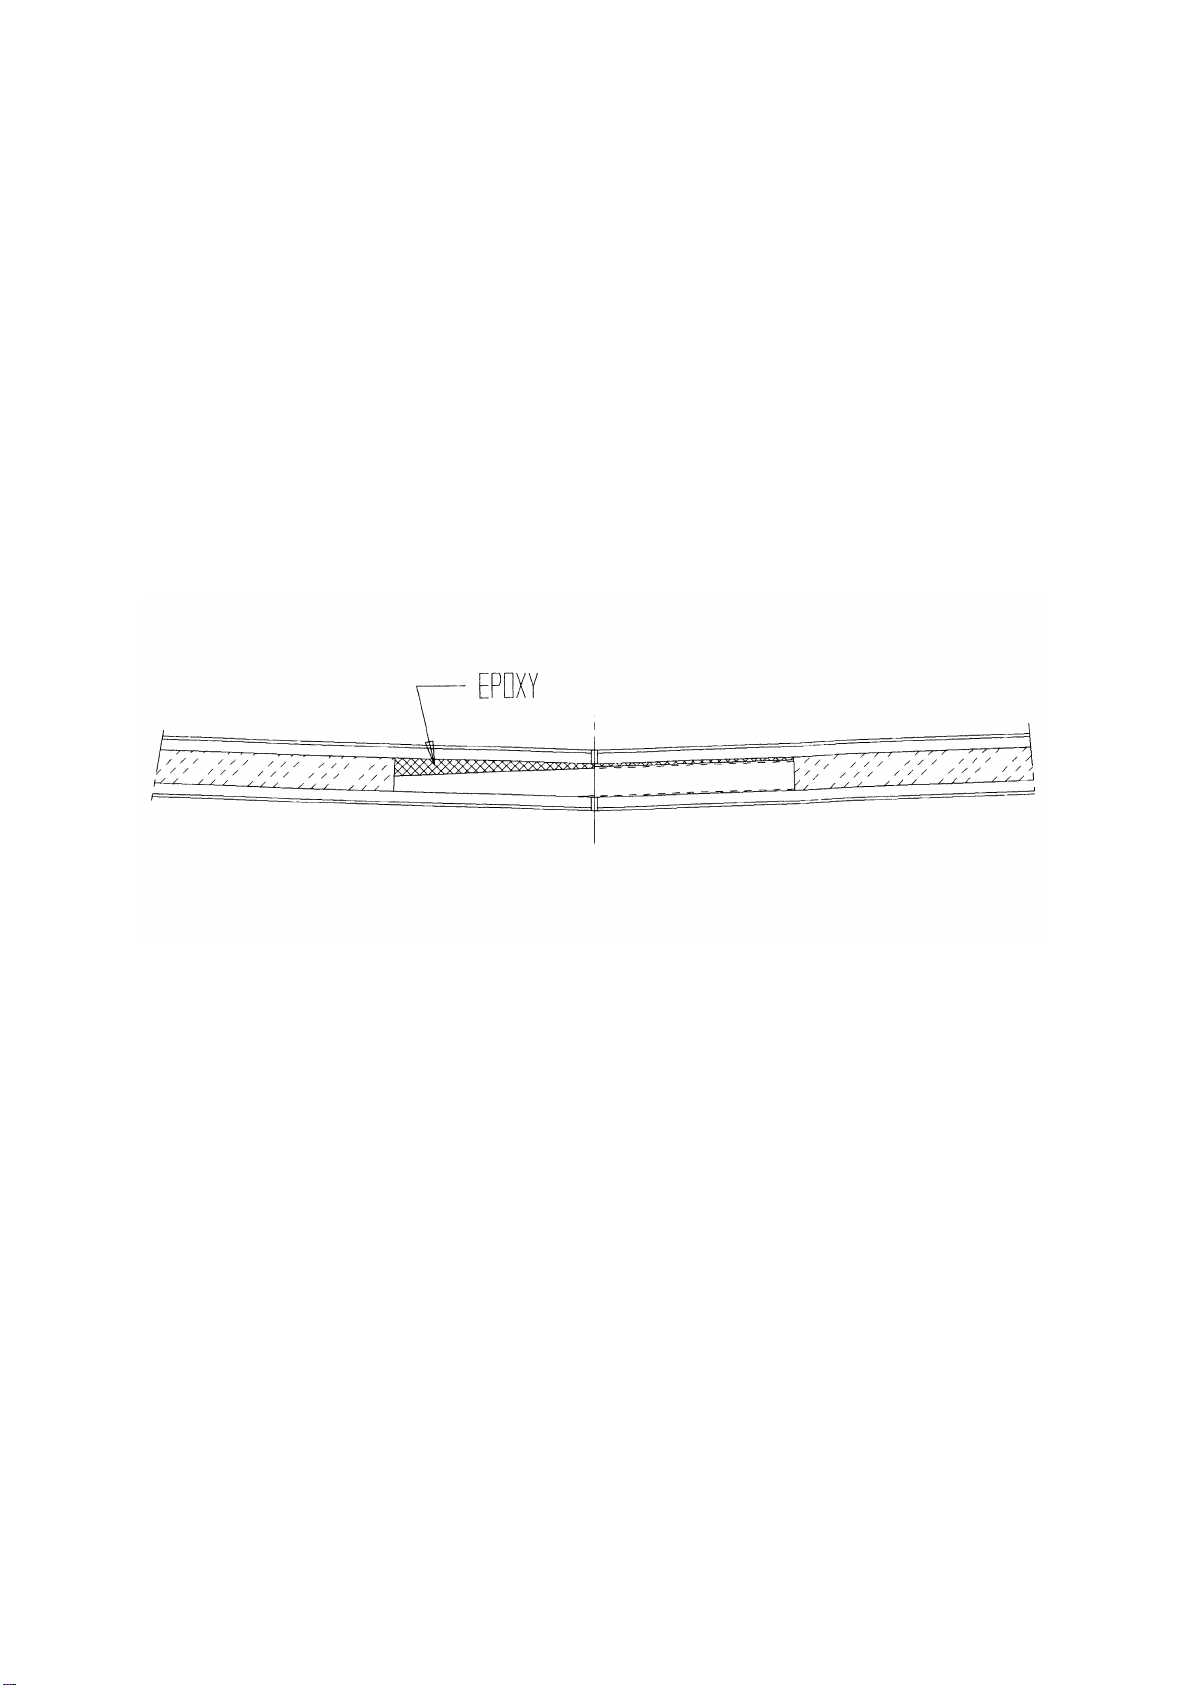
Drill 4 4mm holes around the circumference of the inner nose cone, 7 mm from the edge.
These holes will allow excess glue to drain away as well as provide a better bond. Insert the
inner nose cone deeply into the sheath nose. Trial fit it into the fuselage. Light sanding may
sometimes be required in order to obtain a good fit inside the fuselage. Sand the outside of
the inner nose cone and the inside of the fuselage (the areas to be glued together) with a fine
sandpaper. Smear the inside of the fuselage with 5min epoxy and push in the sheath
nose/inner nose assembly into the fuselage. Carefully align the sheath nose with the
fuselage and tape the joint line. Use a liberal amount of epoxy for this operation but be
careful not to glue the sheath nose to the inner cone.
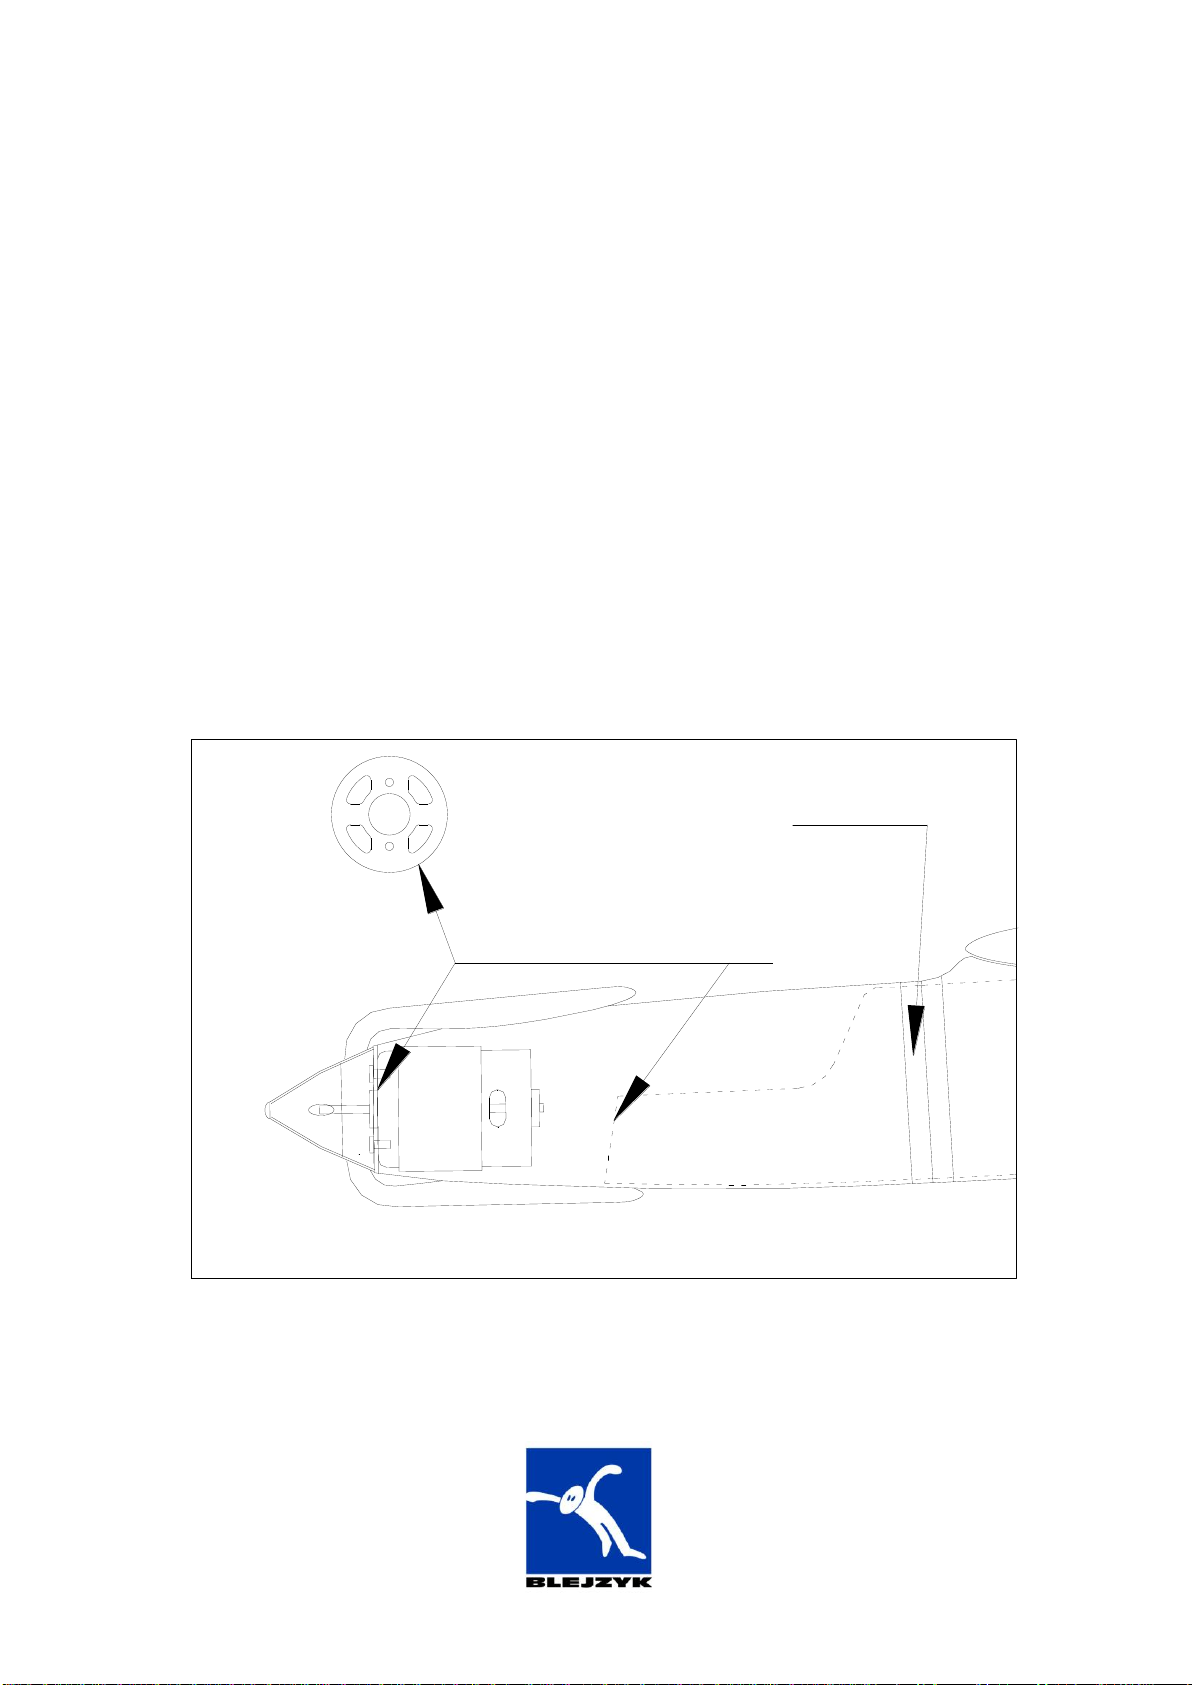
EQUIPMENT
This model can be flown with a rudder/elevator/aileron or just elevator/aileron.
Standard size or smaller servos can be used in the fuselage. Wing servos can be installed
using a small amount of silicon sealer. Before gluing the servos into the wings, wrap them
around with an electrical insulating tape.
Insert 350-800mAh battery into the fuselage.
The receiver is positioned behind the servos and the aerial can be routed inside the fuselage.
Recommended Control Throws: