Axon TASER StrikeLight 2 Stun Manuel utilisateur

Models TS1023
IMPORTANT SAFETY INSTRUCTIONS
Read all warnings and instructions. Save these instructions.
The most up-to-date warnings and instructions are
available at www.axon.com
MMU0081 Rev: A
March 2022
TASERStrikeLight2StunFlashlight
User Manual

Contents
i
1 Chapter 1: Warnings
1Important TASER Product Safety and Health Information
2 Chapter 2: Introduction
2What is the TASER StrikeLight 2 Stun Flashlight?
2Ownership
2Basic Self-Defense Stun Flashlight Electrical Theory
3StrikeLight 2 Stun Flashlight Features
4Safety Switch
4ARMED Status LED
4Trigger Button
5Electrodes
5Warning Arc Display
5Flashlight Button
7 Chapter 3: Using the StrikeLight 2 Stun Flashlight
7Installing the Lanyard (Optional)
8Contact Stun for Self-Defense
10 Chapter 4: Maintenance and Support
10 Flashlight Maintenance and Care
10 Function Test
10 Recharging the Battery
11 Dropped or Wet Device
11 Product Support
12 Product Returns
12 Legality
12 Warranty
12 Warnings
12 FCC Compliance Statement

1
Chapter 1: Warnings
ImportantTASERProductSafetyandHealthInformation
These safety warnings are for your protection as well as the safety of others. Disregarding this
information could result in death or serious injury.
! WARNING
Read and Obey
Signicant dierences exist between dierent TASER products. Do not use or attempt to
use any TASER product unless you have read, understood, and are following all current
instructions, warnings, and relevant TASER training materials before using the product.
Failure to do so could increase the risk of death or serious injury to the user or others.
Obey Applicable Laws
Use of stun devices must be legally justied and comply with applicable federal, state, and
local laws and regulations.
Store In A Secure Location
Store the StrikeLight stun ashlight in secure locations inaccessible to children and other
unauthorized persons to prevent inappropriate access or use. The StrikeLight stun ashlight
is a weapon and not a toy.
Can cause death, serious injury or pain.
Obey all warnings, instructions and all laws.
See www.axon.com.
! CAUTION
Before using your StrikeLight stun ashlight, charge the ashlight for 8 hours to ensure the battery
is fully charged. See the Recharging the Battery instructions for more information.

2
Chapter 2: Introduction
What is the TASER StrikeLight 2 Stun Flashlight?
The TASER StrikeLight 2 is a ashlight that also can produce an electrical arc and be used as a stun
weapon.
Ownership
Taking a TASER brand ashlight with a stun capacity out of the United States (U.S.) without the proper
export license is prohibited by U.S. law (similar prohibitions may exist in other countries).
Do not point the device at any law enforcement ocer or do anything that would cause law enforcement
ocers to feel threatened by your use of the device.
The StrikeLight 2 stun ashlight is a defensive weapon and should be treated accordingly. When used
as directed, stun devices are weapons designed to provide a force option that may temporarily repel
a person while reducing the likelihood of death or serious injury. The stun function of the StrikeLight2
stun ashlight is not designed to cause incapacitation like some other TASER products. Any use of
force, including the use of a stun device, can cause physical pain or exertion and involves risks that a
person may get hurt or die. For a full list of warnings, see the product warnings.
The stun ashlight’s arcing feature is to be used only for lawful purposes, including lawful self-defense
or in the defense of others. Check your state and local laws for applicable regulations. Depending
on local and state laws, the device may be kept in the house for home protection, or carried in a car,
a purse, or a backpack for personal protection when you are away from home. Be sure to research
each state’s applicable laws prior to possessing or transporting the device, including laws concerning
transporting the device across state lines and into other states where laws may vary. For a list of
known laws related to stun devices and conducted energy weapons, go to buy.taser.com.
Basic Self-Defense Stun Flashlight Electrical Theory
• The front of the stun ashlight must be in contact with the attacker for electricity from the stun
function to be delivered.
• Electricity will generally not pass to others in contact with the attacker.

3
StrikeLight 2 Stun Flashlight User Manual
Chapter 2: Introduction
StrikeLight 2 Stun Flashlight Features
Your StrikeLight 2 package includes the StrikeLight stun ashlight, a lanyard, and a USB charging
cable:
Get to know the StrikeLight 2 stun ashlight.
Trigger button
Flashlight buttonBattery power LED
ARMED status LED
Safety switch
Electrodes

4
StrikeLight 2 Stun Flashlight User Manual
Chapter 2: Introduction
Top view of the StrikeLight 2 stun ashlight.
Safety Switch
The safety switch is used to determine whether the StrikeLight 2 stun ashlight can arc. With the
safety switch in the rearward (SAFE) position, the stun ashlight will not arc. When the safety switch is
in the forward (ARMED) position, the stun ashlight can arc when the trigger button is pressed.
ARMED Status LED
When the safety switch is in the forward (ARMED) position, the electrodes are placed in standby status.
The device can arc when the trigger button is pressed. Also, when the safety switch is shifted forward
the ARMED status LED will be uncovered and light up .
Trigger Button
After arming the stun ashlight, press and hold the trigger button to make electricity arc at the
electrodes on the front of the device. Press and hold the trigger button when applying a contact stun
to an attacker. The device will arc continually until you release the trigger button or the battery
depletes, whichever comes rst.
.
Safety switch Flashlight button
rearward (SAFE) forward (ARMED)

5
StrikeLight 2 Stun Flashlight User Manual
Chapter 2: Introduction
Green: full battery
Yellow: half charge
Red: below 10%
Electrodes
When you press the trigger button, electricity arcs (sparks) from the electrodes.
Warning Arc Display
Pressing the trigger button may be pressed as a warning before an assailant comes into contact
distance. The noise and sight of the electrical arc may discourage an attack.
Flashlight Button
Press the ashlight button to turn on the ashlight.
The button incorporates an LED that indicates the
battery level. Recharge the ashlight if the LED is red.
See Recharging the Battery (Chapter 4) for more
information
Besides being an on/o switch, pressing the button
multiple times cycles the ashlight through a
selection of light color and intensity. A short press
turns the light on and subsequent short presses take
you through the options. The StrikeLight 2 ashlight
oers red light, low light, and bright light. A long
press turns the ashlight o

6
Chapter 2: Introduction
StrikeLight 2 Stun Flashlight User Manual

7
Chapter3:UsingtheStrikeLight2StunFlashlight
Installing the Lanyard (Optional)
The body of the StrikeLight 2 stun ashlight incorporates an opening that accommodates the lanyard.
To install the lanyard:
1 Ensure the safety switch is in the rearward (SAFE) position.
2 Insert the small loop of the lanyard through the opening in the stun ashlight.
3 Insert the large loop of the lanyard through the small loop and pull it taught.
8
StrikeLight 2 Stun Flashlight User Manual
Chapter 3: Using the StrikeLight 2 Stun Flashlight
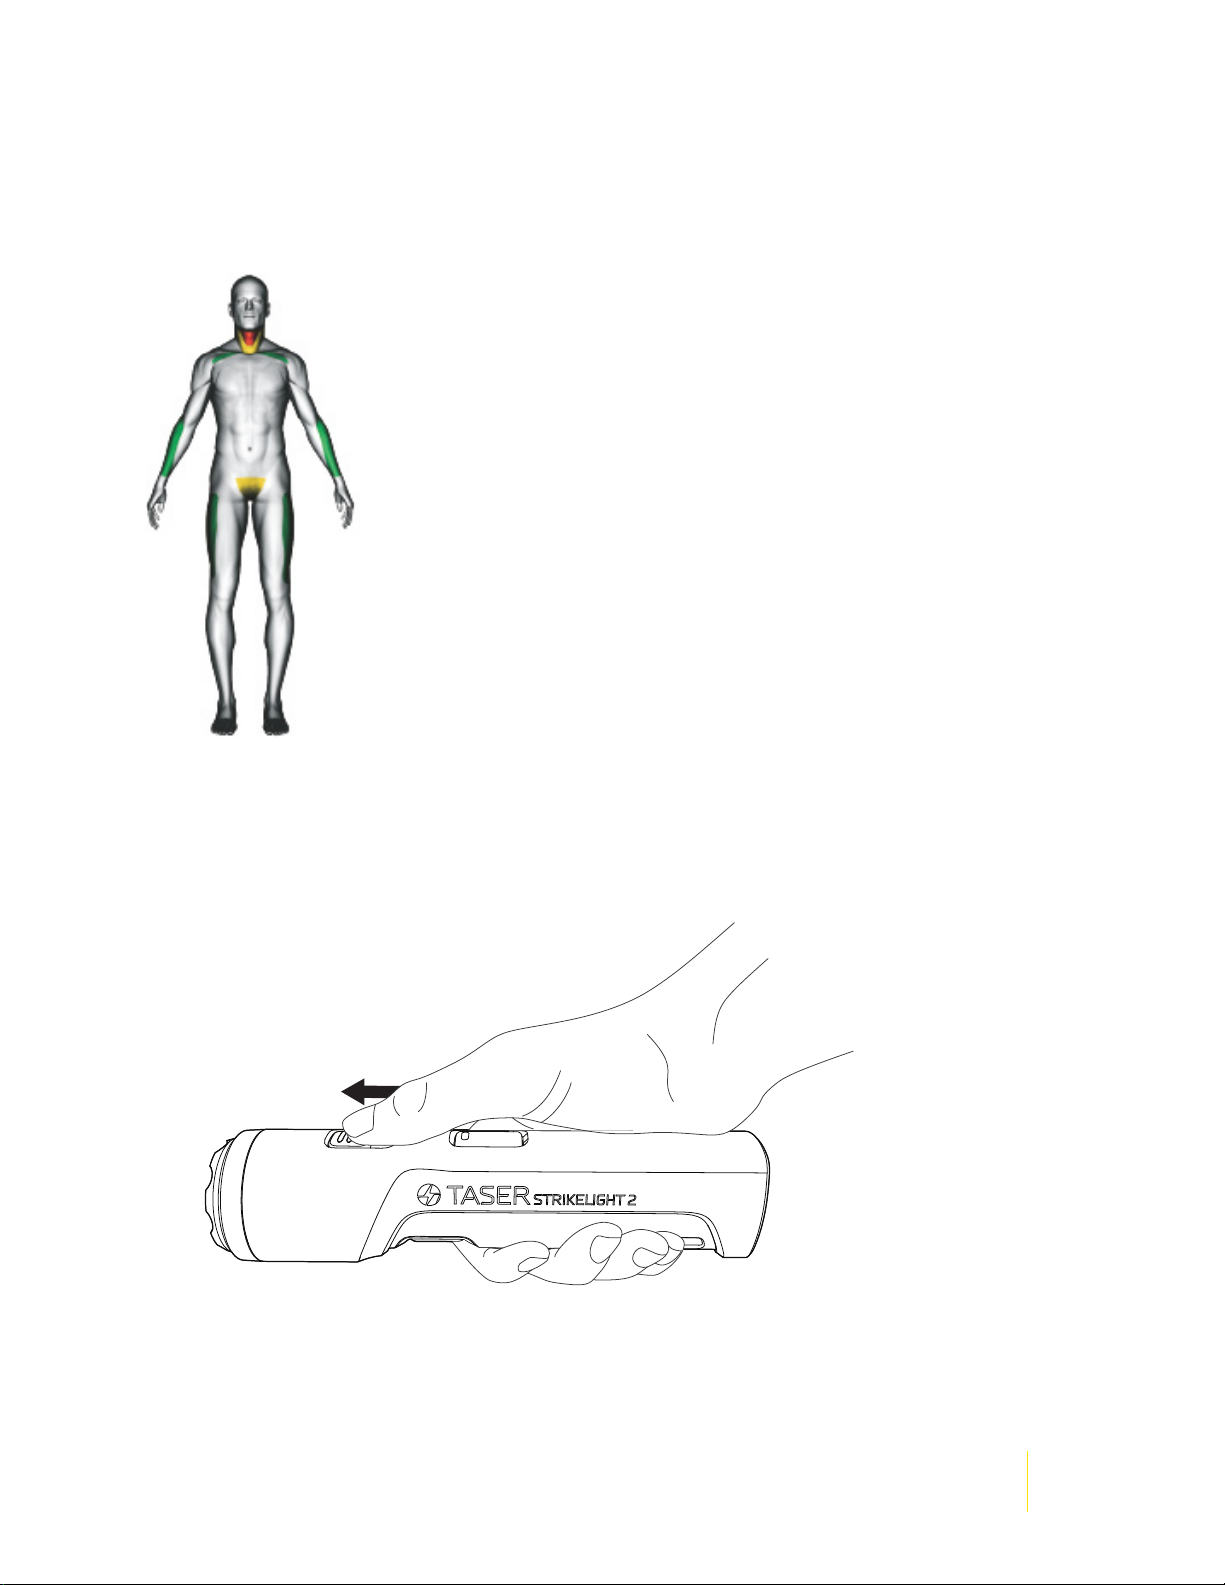
Contact Stun for Self-Defense
Suggested pressure points are highlighted in the green areas. Use care when applying contact stun to
the neck or groin (yellow areas).
A TASER StrikeLight 2 stun ashlight is not a substitute for other preventive self-protection actions
such as ensuring doors are locked, and parking in well-lighted areas.
To contact stun an attacker, perform these actions:
1 Shift the safety switch to the forward (ARMED) position.
Ce manuel convient aux modèles suivants
1
Table des matières


