Atola Bandura Manuel utilisateur
Bandura
High-speed disk duplicator
User’s Manual v1.4

1
Thank you for purchasing an Atola Technology product
The Atola Bandura is a stand-alone high-speed 1-to-1 disk drive duplicator built for
professional data recovery applications. t includes the following additional features:
disk diagnosis, disk comparison, and disk wipe/erase. This product is operated via a
color touch screen.
The Bandura is designed for data recovery applications where data may need to be
extracted from severely damaged hard drives. t comes equipped with a write-
protected Source channel for data security.

2
Table of Contents
Getting Started & Basic Operation
3
maging Hard Drive
s
4
maging Settings
5
Storing imaging progress and log files
10
Diagnos
ing Hard Drive
s
11
Erasing Hard Drive
14
Comparing Hard Drives
18
Updating Bandura Firmware
20
Calibrating Bandura Screen
2
1

3
Getting started and Basic Operation
Before using the Bandura, please verify that all required items are in the package:
2 x eSATA to SATA cable
2 x HDD power cable
2 x HDD SATA power adapter (cable)
Caution: to avoid overheating of the Bandura unit, do not cover the fan exhaust or
any ventilation holes.
Atola Bandura does not require connection with a PC. Simply plug the unit into the
wall outlet with any common voltage (100–240V AC 50-60Hz) and turn it on by
flipping the Unit Power switch on the back of the unit.
The unit will display the Atola Technology logo for about a minute (while unit boots).
Then, the Main Menu will appear:
Main Menu

4
Imaging hard dri es
To create an exact copy of a hard drive, tap the mage button on the Main Menu.
The following screen will then appear:
maging menu
To start imaging:
•Tap Start maging to immediately start the duplication process based on the
settings used during the previous duplication session
•To adjust parameters before starting duplication (optional), tap Settings. To
change a parameter, tap it one or several times until the desired option is
displayed.
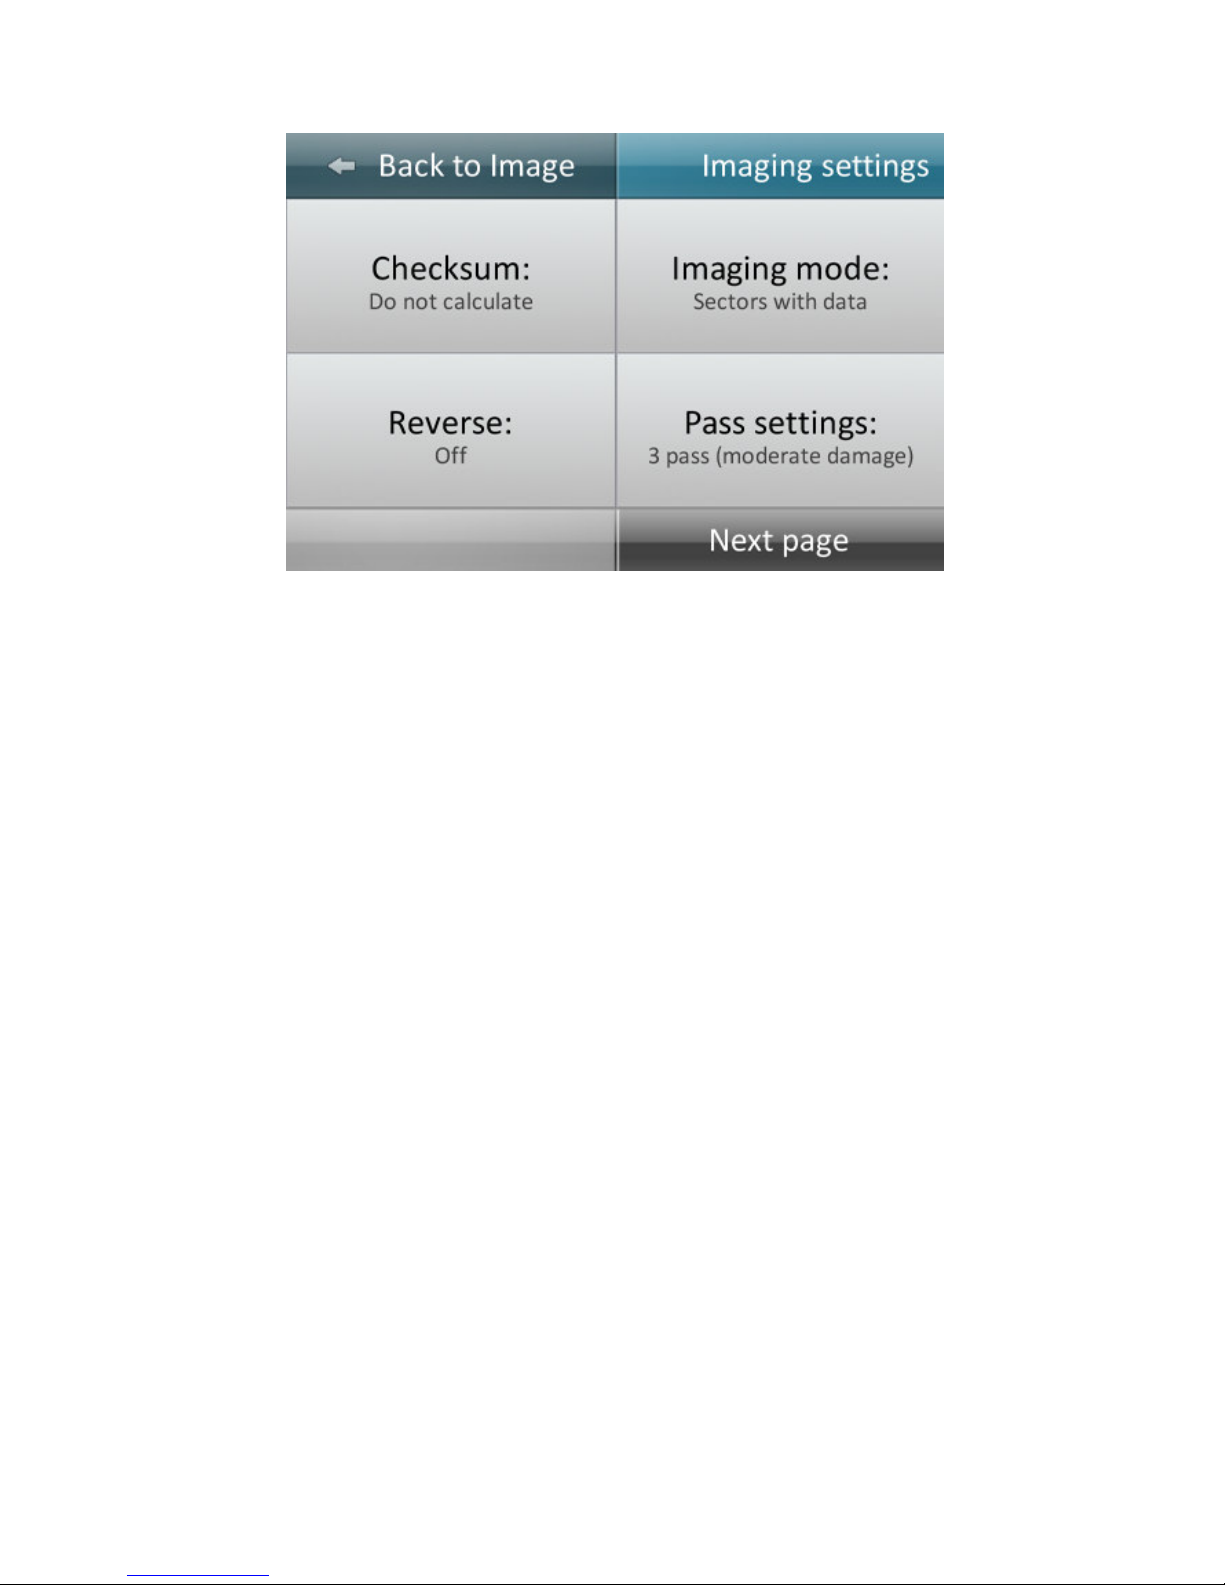
5
maging Settings Menu, page 1
Checksum: Select MD5, SHA1, SHA224, SHA256, SHA384, SHA512 or skip checksum
calculation (“Do not calculate”). This feature is provided for forensic computer
investigation and similar applications in order to meet procedural standards.
Checksum calculation will reduce imaging speed and disable certain data recovery
features (such as multi-pass imaging).
Imaging Mode: mage all sectors or only sectors that contain data (partition tables,
user files, file system structures, etc).
maging occupied sectors will significantly reduce imaging time; however, this mode
is only reliable when the file system on the Source hard drive is perfectly healthy.
When imaging a hard drive with critical data, or when the hard drive is damaged, we
strongly advise using the All Sectors option.
Re erse: mage sectors in reverse order. Last sectors of the hard drive will be
imaged first, and sectors at the beginning of the surface will be imaged last. This
mode sometimes improves success rates when imaging unstable hard drives.
Pass settings: The Bandura is capable of applying 1 to 5 imaging passes to
maximize data extraction. Each pass applies different values for the below settings in
order to suit different data recovery scenarios. Typically, multi-pass imaging options
are designed to apply a quick first-pass to pull data while minimize strain to the hard

6
drive, and later imaging passes apply slower, more precise settings in order to make
sure every possible bit of data is being extracted.
Timeout: length of pause after error encountered
Sector Skip: length of forward jump after read error or timeout encountered
2 pass (few or no defects): Works best for hard drives that do not have many
uncorrectable (bad) sectors.
Pass #1
Timeout:
20 seconds
Sector Skip:
1,000,000 sectors
Pass #
2
Timeout:
60 seconds
Sector Skip:
0 sectors (no skip)
2 pass (micro timeouts): Works best for certain hard drive models (for example BM
and Hitachi) with many bad sectors.
Pass #1
Timeout:
8 seconds
Sector Skip:
1,000,000 sectors
Pass #
2
Timeout:
2 seconds
Sector Skip:
0 sectors (no skip)
3 pass (moderate damage): Extracts data quickly in first pass, and then slows down on
subsequent passes to optimize data extraction.
Pass #1
Timeou
t:
20 seconds
Sector Skip:
1,000,000 sectors

7
Pass #
2
Timeout:
20 seconds
Sector Skip:
100,000 sectors
Pass #
3
Timeout:
60
seconds
Sector Skip:
0 sectors (no skip)
5 pass (unstable disk): Extracts data quickly in first pass, and then slows down on
subsequent passes to optimize data extraction.
Pass #1
Timeout:
20 seconds
Sector Skip:
1,000,000 sectors
Pass #
2
Timeout:
20 seconds
Sector Skip:
100,000 sectors
Pass #
3
Timeout:
20 seconds
Sector Skip:
10,000 sectors
Pa
ss #
4
Timeout:
20 seconds
Sector Skip:
1,000 sectors
Pass #
5
Timeout:
60 seconds
Sector Skip:
0 sectors (no skip)

8
More features are accessible on the second settings screen:
maging Settings Menu, page 2
Max number of power cycles: This setting limits the number of power cycles that
can be applied during imaging before the function is terminated. Power cycles are
applied when the Bandura fails to reset a frozen hard drive during imaging (Bandura
cuts power to the hard drive and restarts it). Setting options: 2, 5, 10, 100.
Pattern for unreadable sectors: When imaging, the Bandura copies every sector on
the source hard drive to the corresponding sector on the Target drive (sector with
same LBA). f there is an unreadable sector (bad sector) on the source drive, the
Bandura will write a HEX pattern to the corresponding sector on the Target drive.
This setting allows the user to specify the HEX pattern being written to the Target
drive. Custom patterns of any length up to 512 bytes can be set.
To specify a custom pattern:
1. Create a text file “Patterns.txt” using a PC
2. n the file, write one pattern per line HEX codes (no spaces)
3. Upload the file onto a USB flash device
4. Plug the USB flash device into Bandura’s rear USB port
5. Select the desired pattern in the menu.
9
Fill unreadable sectors: Whether to fill unreadable sectors with the specified
pattern. When disabled, Bandura will not write anything onto target media on source
read error. This feature was added in the firmware version 1.0.4.
Diagnose before imaging: Run a diagnostic sequence on the Source drive before
imaging is started. This feature is meant to inform the user about the state of the
hard drive in order to determine the best imaging approach.
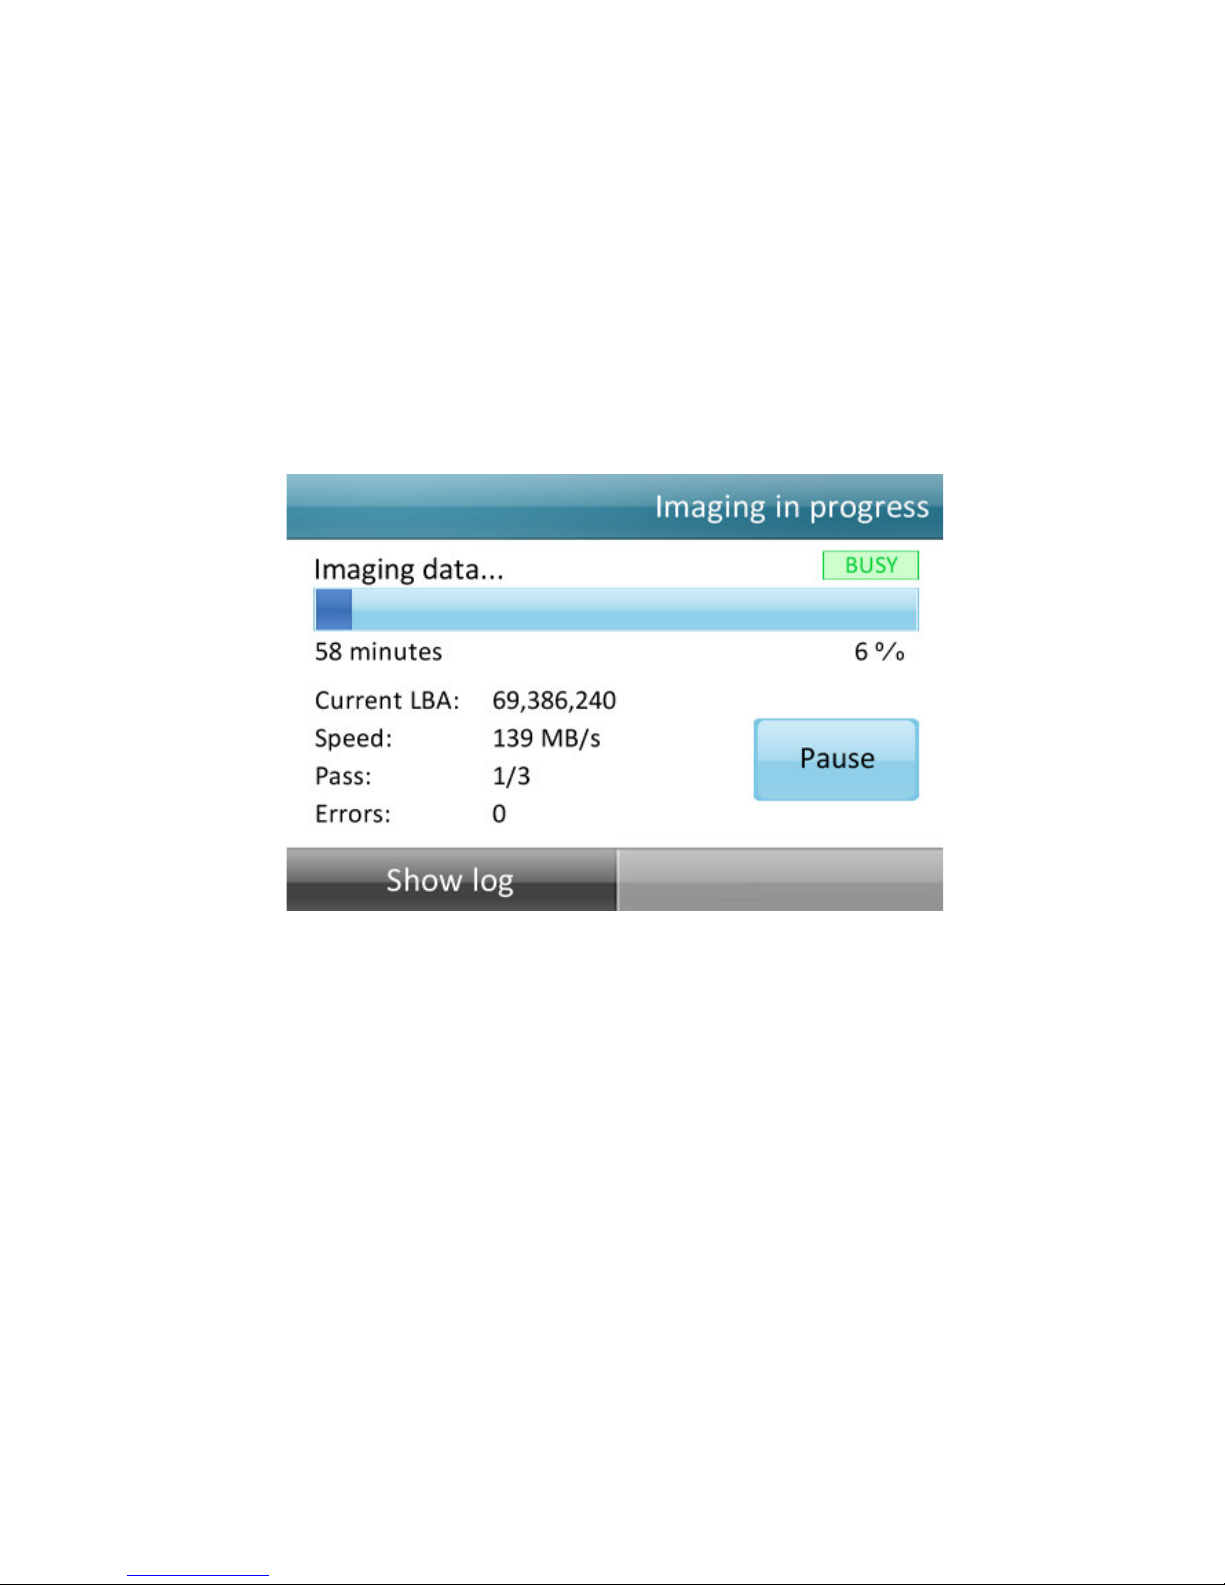
After imaging begins, the following screen is displayed:
maging in progress
This screen displays real-time status.
•Tap Show Log button to browse current log entries (will not stop imaging
process).
Table des matières
Manuels duplicateur de disques populaires d'autres marques


Kanguru
Kanguru U2-DVDDUPE-S Manuel utilisateur

StarTech.com
StarTech.com 8STSATDUP11 Manuel utilisateur

DUPLO SEIKO CORPORATION
DUPLO SEIKO CORPORATION Duprinter DP-460 Manuel utilisateur

Addonics Technologies
Addonics Technologies UDFH7 Manuel utilisateur

Vinpower Digital
Vinpower Digital MiniLoader VDX-1 Manuel utilisateur

Addonics Technologies
Addonics Technologies CFASTD5 Manuel utilisateur