
Astin Trew AT 3000 Manuel utilisateur
ASTINtrew
6 Varnell Terrace
Hambleden Oxfordshire RG9 6SA
Telephone: +44 [0]1491 414494
Facsimile: +44 [0]1491 413303
Email: sales@astintrew.co.uk
Website: www.astintrew.co.uk
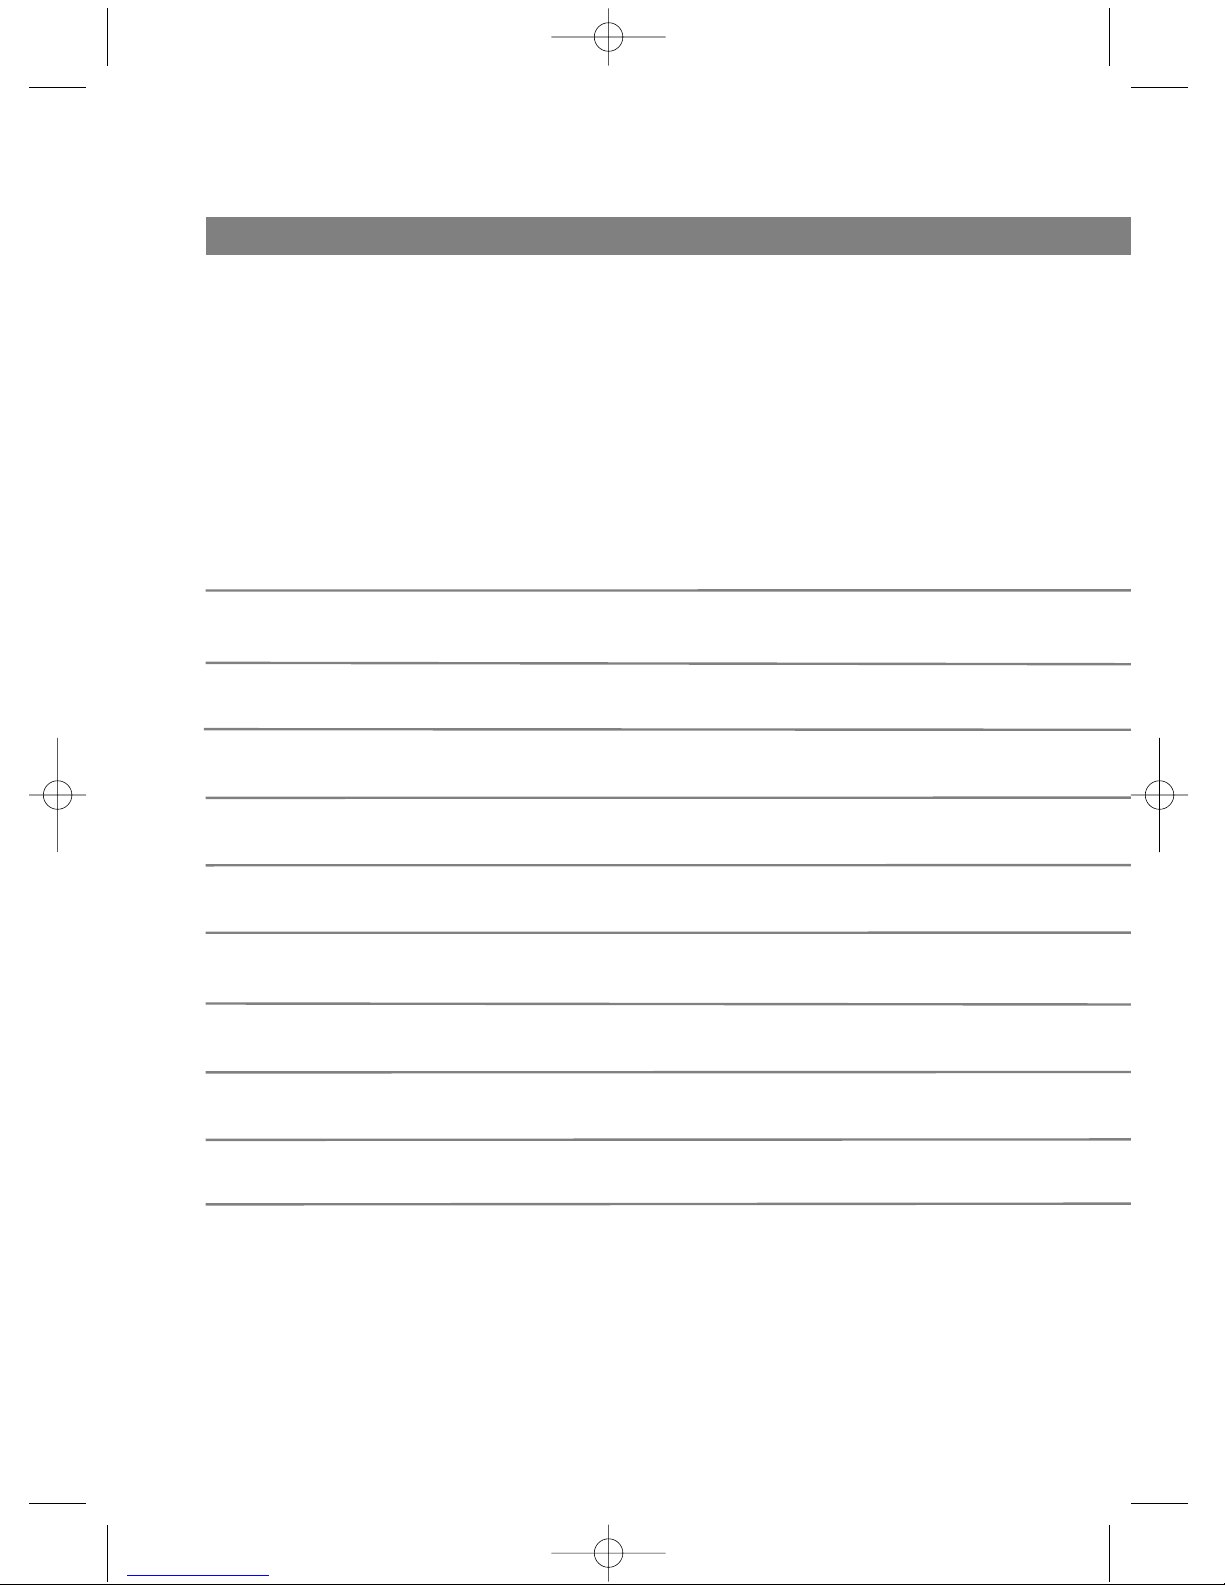
Operating information for the ASTINtrew AT 3000
up-sampling CD player with valve output amplifier
1. Introduction
2. Unpacking
3. AC mains supply
4. Safe use
5. Set up
6. Operation and remote control
7. Valve and fuse replacement
8. Troubleshooting
9. Specifications
10. Guarantee
11. CE, RoHS and WEEE
1
PAGE
SECTION
2
2
2
2
3
3
9
10
11
11
12
1. Introduction
Congratulations on your purchase of
the ASTINtrew upsampling valve
buffered CD Player. This CD Player
has been designed and manufactured
to a very high specification making it a
true audiophile product. It will give you
many years of listening pleasure. The
following notes explain all aspects of
its functions and will help you get the
very best from it.
The ASTINtrew AT3000 CD Player
uses both valve and solid-state devices
within the design to offer an involving
musical experience. As with all audio-
phile products, the other components
you use within the chain will also affect
the quality of sound you experience.
The AT3000 CD Player requires high
quality ancillary components to give its
best and works particularly well with
other AT range products.
2. Unpacking
Included with your ASTINtrew CD
Player you will find:
One mains lead with plug fitted
One remote control
One Alan key
One instruction manual
One spare fuse, located within fuse
holder, see section 7
Please retain all packing materials.
Re-packing may be necessary to trans-
port your CD Player in the future with-
out risk of damage to the equipment.
3. AC mains supply
This amplifier is designed to work on a
220-240VAC supply only.
4. Safe use
This CD Player generates some heat
when switched on. Do not place on a
carpet or any material where the
amplifiers feet may sink into the sur-
face, obstructing the ventilation slots
on the underside of the unit. Entry of
liquids into the CD Player is dangerous
and may cause electric shock or fire
hazard.
The AT3000 should be located in a
well ventilated area and kept away
from sources of heat, dust, humidity
and direct sunlight.
Do not open the equipment at any
time with the mains cable
attached.
Do not attempt to change or alter any
component or part of this CD Player
except for those which are user
replaceable (see sections 6 and 7).
Unauthorised adaptations will void
the warranty and may damage the CD
Player.
This unit is listed as a class 1 laser
2
product and is so labelled. Do not
attempt to repair any part
of the CD draw.
Clean the outside surfaces with a dry
lint free cloth. Some cleaning and pol-
ishing agents may cause marking to
the surface finishes.
All electronics is susceptible to local
lightening strikes affecting the mains
cabling in your home. When not in
use, the safest option is to remove
the mains plug from the wall socket.
5. Set up
The mains lead supplied with this prod-
uct has an IEC mains socket which
plugs into the IEC connector on the
rear panel. The other end is fitted
with an appropriate mains plug of your
country. In the UK this is the stan-
dard UK13A plug.
The high-quality performance of this
CD Player will be impaired if the elec-
trical supply to it is in poor condition.
We recommend that you use a high
quality wall socket directly, or a multi-
way socket unit designed for audio
use. If you live in an area with very
‘dirty’ or variable mains supply, you
may also wish to try a power supply
conditioner to optimize fidelity.
We recommend that you place the CD
Player on a suitable rack, table or plat-
form support, offering maximum isola-
tion from
mechanical vibration.
The RCA phono output connections
should be connected to an amplifier or
audio equipment with an output vol-
ume control. We recommend that you
use high-quality signal cables for opti-
mum performance. The digital signal
output can be used into a DAC using a
50 ohm digital signal cable.
See illustration on page 4.
6. Operation
Control from facia.
The CD Player power on-off switch is
located on the left side of the front
fascia. The blue LED light above the
switch is illuminated when the Player
is on. Some operating controls are
switched from the front facia.
See illustration on page 5.
We recommend that the CD Player is
turned on half an hour or more before
use. This is not essential but we think
it sounds better once the valve has
‘warmed up’. We do not recommend
that you leave it on all the time but it
will come to no harm if you do. From
new, you will find that the AT3000 will
need up to 100 initial hours use to
achieve its optimum audiophile sound.
Remote control.
The remote control offers all the oper-
ating functions except the power
on/off switch.
3
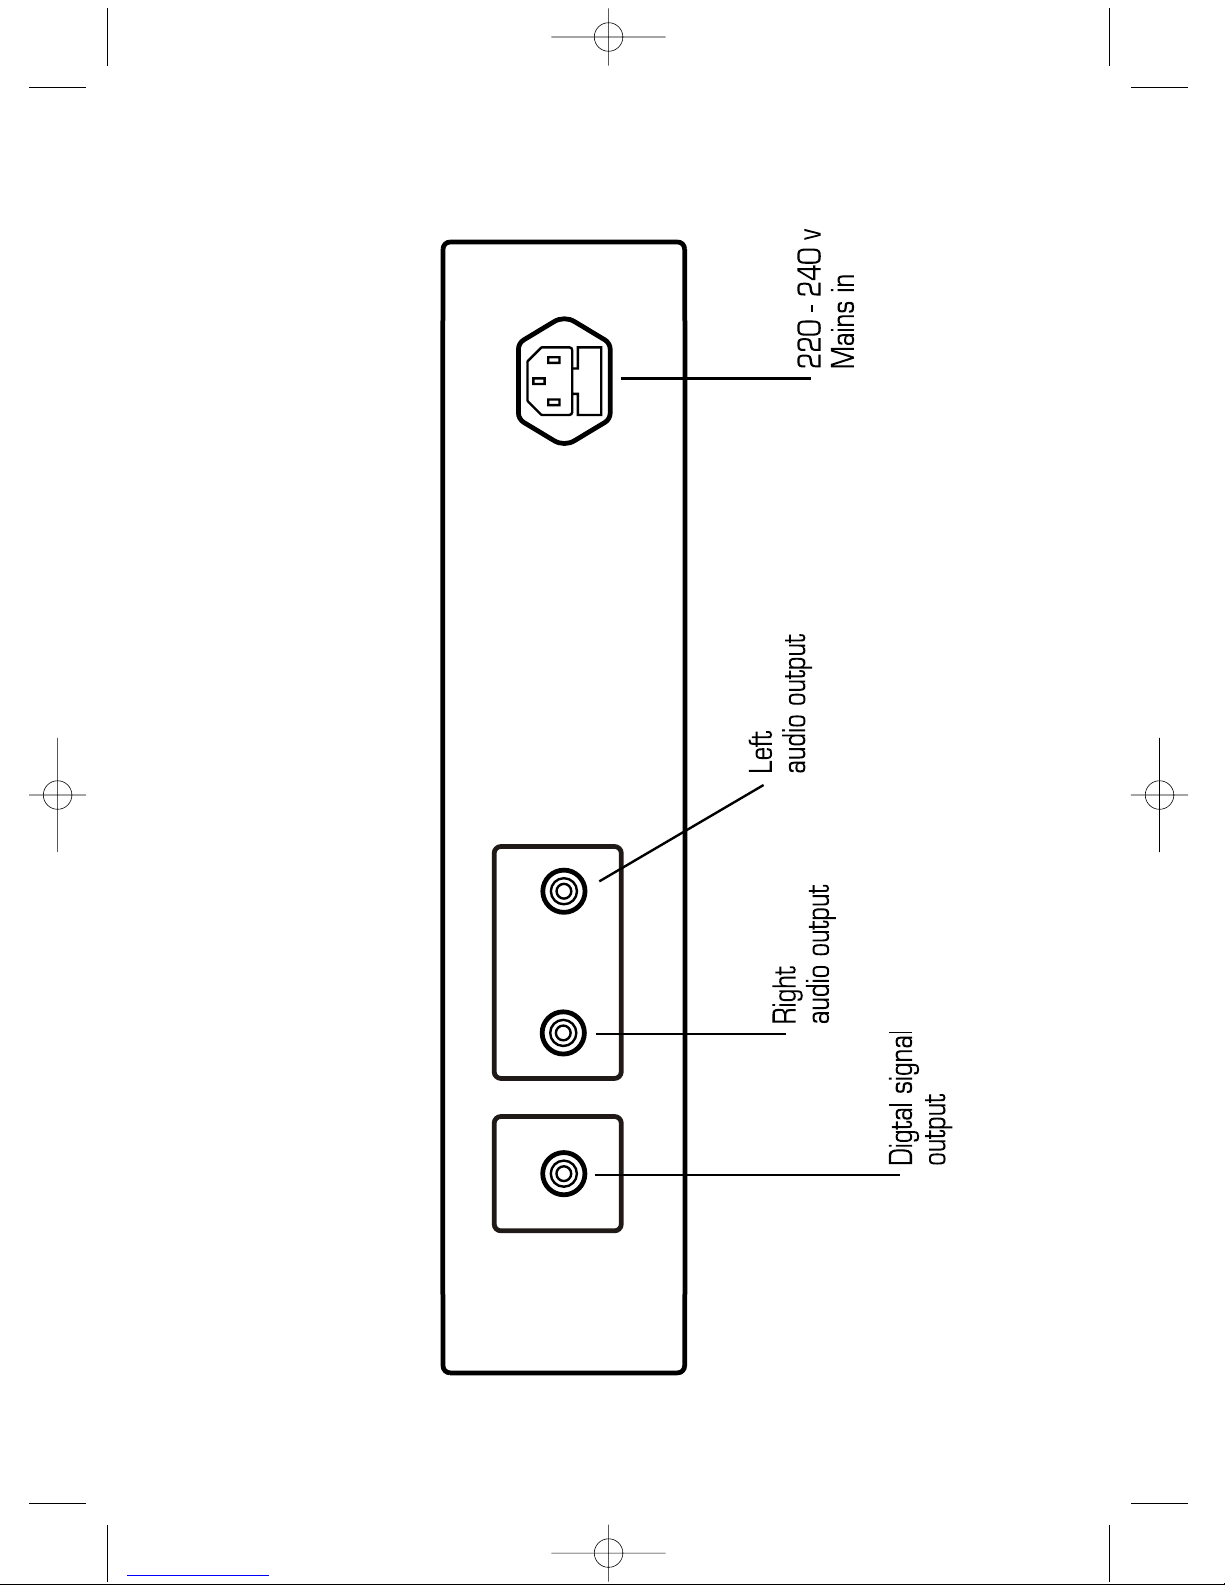
4
AT 3000 rear view
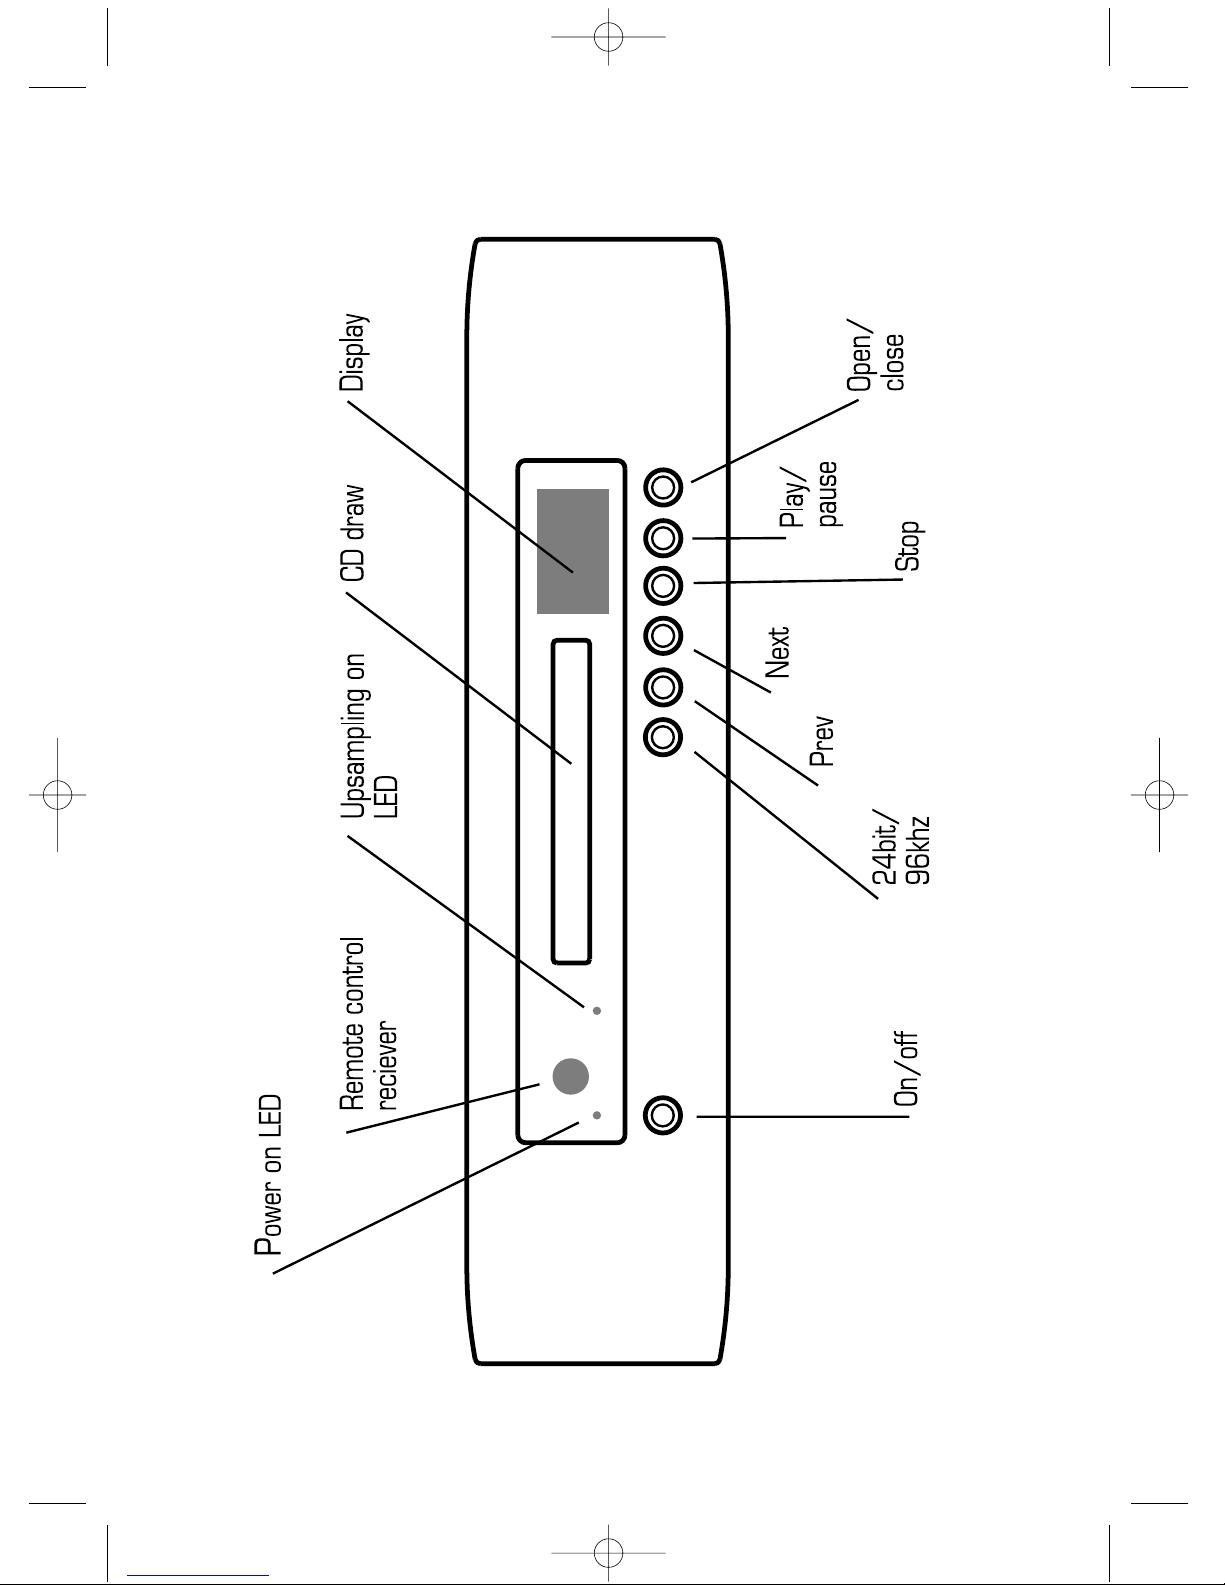
5
AT 3000 front view
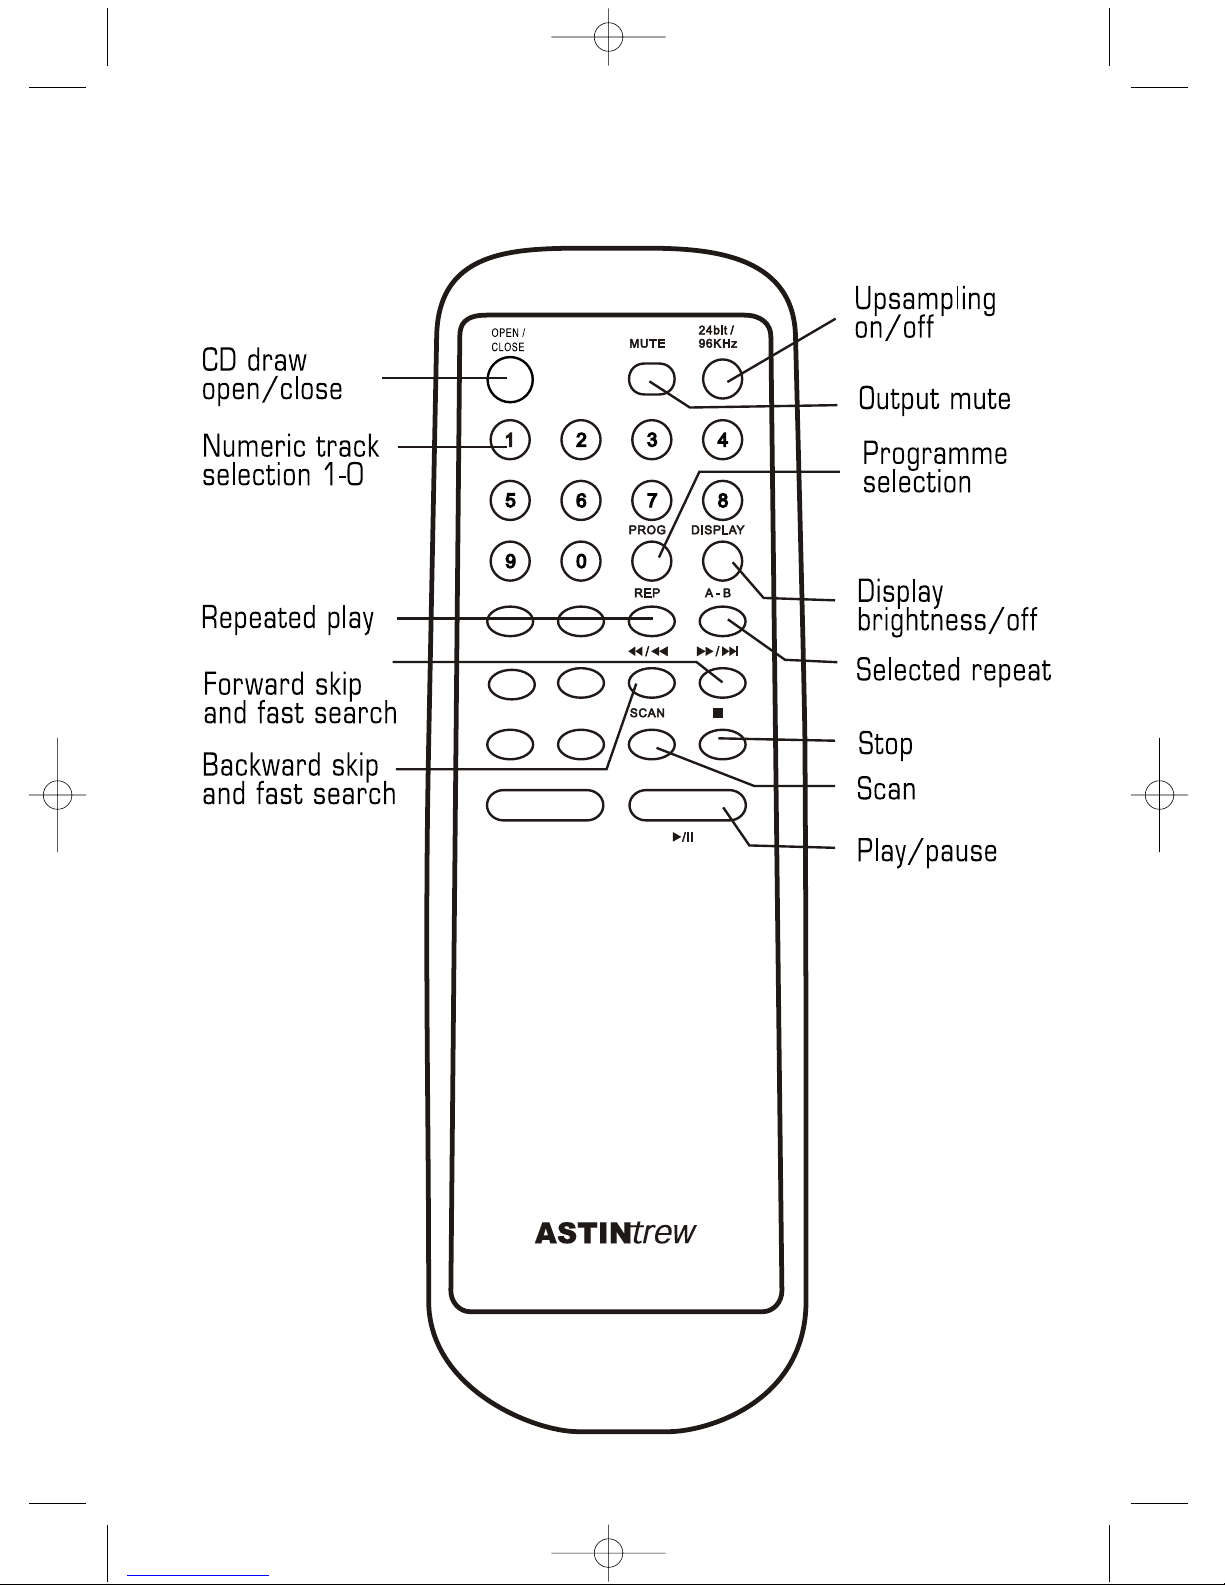
6
AT 3000 remote control function
Point the remote at the facia panel
when using. It will work up to 10Mtrs.
from the CD Player and up to a 30
degrees either side of front panel.
The remote will also operate the
AT1000 pre-amplifier. The buttons
will not work with any other equip-
ment.
See illustration on page 6.
CD Player operation and
display features.
TURN ON:
When the power switch is pressed on,
the display screen will show ‘READ’
then after a few seconds ‘NO DISK’
or if a CD is in the draw, it will show
the number of tracks and total playing
time – example: ‘16-16 57:37’
UPSAMPLING:
Press 24bit/98khz button on facia or
remote to turn upsampling option on.
Orange LED will illuminate on facia
when in operation. With the upsam-
pling on, you should hear an improved
level of fidelity. Occasionally an upsam-
pled CD may sound harsh, have too
much high frequency energy or just
sound ‘wrong’. Switch upsampling off
in this case to compare.
DISC PLAY:
Press open/close button on facia or
remote, screen display will show
‘OPEN’ and CD tray will open. Place
CD onto tray with printed side face up.
Press open/close button again, tray
will close and screen display will show
‘READ’ then number of tracks and
total playing time – example: ‘16-16
57:37’
When the number of tracks and total
time is shown, for example: ‘16-16
57:37’ press play/pause button on
facia or ➤/II on remote and track
one will play, continuing on through all
tracks sequentially.
If the display then shows ‘NO DISK’
the CD may have been put in upside
down, it may be too scratched or dirty
to read, or it may not be a compatible
CD ie. non compatible HDCD disk or
DVD. Most HDCD’s are compatible
with CD players, check HDCD instruc-
tions on its disk cover.
It is rare but possible for condensation
to build on the laser lens to prevent its
operation if the unit has been moved
from a cold to a warm environment.
You may note condensation on the CD
Player casing as well. In this case,
wait for the CD player to warm up and
try again.
PAUSE:
Press play/pause button on facia or
➤/II on remote, display will show ‘II’
graphic and stop. Press again and
the CD will continue.
7
FORWARD SKIP:
To skip ahead to next track during nor-
mal play, press next button once on
facia or ➤➤/➤➤II button on remote.
To skip several tracks, press button
several times, track selection will be
shown on display.
BACKWARD SKIP:
To skip back to previous track during
normal play, press prev button once
on facia or II / button on
remote. To skip several tracks, press
button several times, track selection
will be shown on display.
FAST SEARCH:
To fast forward search, hold down the
➤➤/➤➤II button on the remote. To
fast backward search, hold down the
II / button. Release the key
and normal play resumes.
When the player is in stop mode,
press the ➤➤/➤➤II button on the
remote to go forward one track and
press the II / button to go
back one.
SCAN:
Scan function allows you to preview
first 10 seconds of each track on the
CD in numeric order for selection pur-
poses. Press scan button on remote,
‘scan’ will show on the display and
scan will start with track 1.
TRACK SELECTION:
Press the numeric button 1-9 to
select a track 1-9. To choose track
10 or higher, first press the button
representing the tens place, then
press button representing the ones
place. Example: To choose track 14,
press button 1then press button 4.
REPEATED PLAY:
To continuously play the current track,
press rep button on the remote once.
The letter ‘T’ will show on the dis-
play.
To continuously play all tracks on the
disk, press rep button on the remote
twice. The letter ‘A’ will show on the
display.
To cancel repeat instruction, press
rep button three times.
SELECTED REPEAT:
To repeat any part of the CD, at any
time during play, press button A-B on
the remote when you wish to start
selection, display will show ‘A’.
Press again when you wish to finish
repeat selection, display will show ‘B’.
CD will then continue to repeat selec-
tion made, until A-B button is pressed
again, retuning back to normal play.
PROGRAMMED SELECTION:
To programme up to 20 tracks in your
preferred order. In stop mode press
8
➤➤
➤➤ ➤➤
➤➤
➤➤
➤➤
event of failure during the warrantee
period can be carried out by your deal-
er or distributor.
The high quality dual triode valve fitted
in the AT3000 has been selected to
offer an audiophile sound.
If you wish to experiment with alterna-
tive manufacturers’ valves after the
warrantee period has expired, ensure
that the factory fitted valve is replaced
with a 6922 type only. Other valve
types may damage the CD Player. If
you attempt to replace the valve, the
following instructions must be adhered
to.
Note: Dangerously high voltages
are present inside the unit, when
powered from the mains supply,
that can KILL.
NEVER open the CD Player when
attached to the mains supply.
A.Disconnect the AT3000 from all
equipment and the mains supply.
Place on a table or work bench
with plenty of space around the
CD Player.
Note: Wait at least 1 hour before
opening the top cover to allow the
valve time to cool down.
B.Undo the 10 x M3 Alan screws
holding the top plate in position.
Put the screws somewhere safe.
C.Remove the top plate, place on a
the prog button on the remote.
Enter the first track required as per
TRACK SELECTION instructions above.
If you enter the wrong track, press
the ■button on the remote and re-
enter.
Then enter up to 19 more track selec-
tions when the display will show ‘FULL’
and flash.
Press the play/pause button on facia
or ➤/II on remote to play selection.
To cancel the programmed selection,
press the prog button on the remote
again.
MUTE:
Press the mute button on the remote
and the display will show ‘MUTE’. The
CD will continue to play silently. Press
‘MUTE’ again and the CD will again
play. If you are using the ASTINtrew
pre-amplifier, this will also mute as
well.
STOP:
Press the stop button on the facia or
■button on the remote to stop the
CD.
7. Valve and fuse replace-
ment.
Replacing the valve in the unlikely
9
Table des matières


