12/04/2016 - 5 - Concept
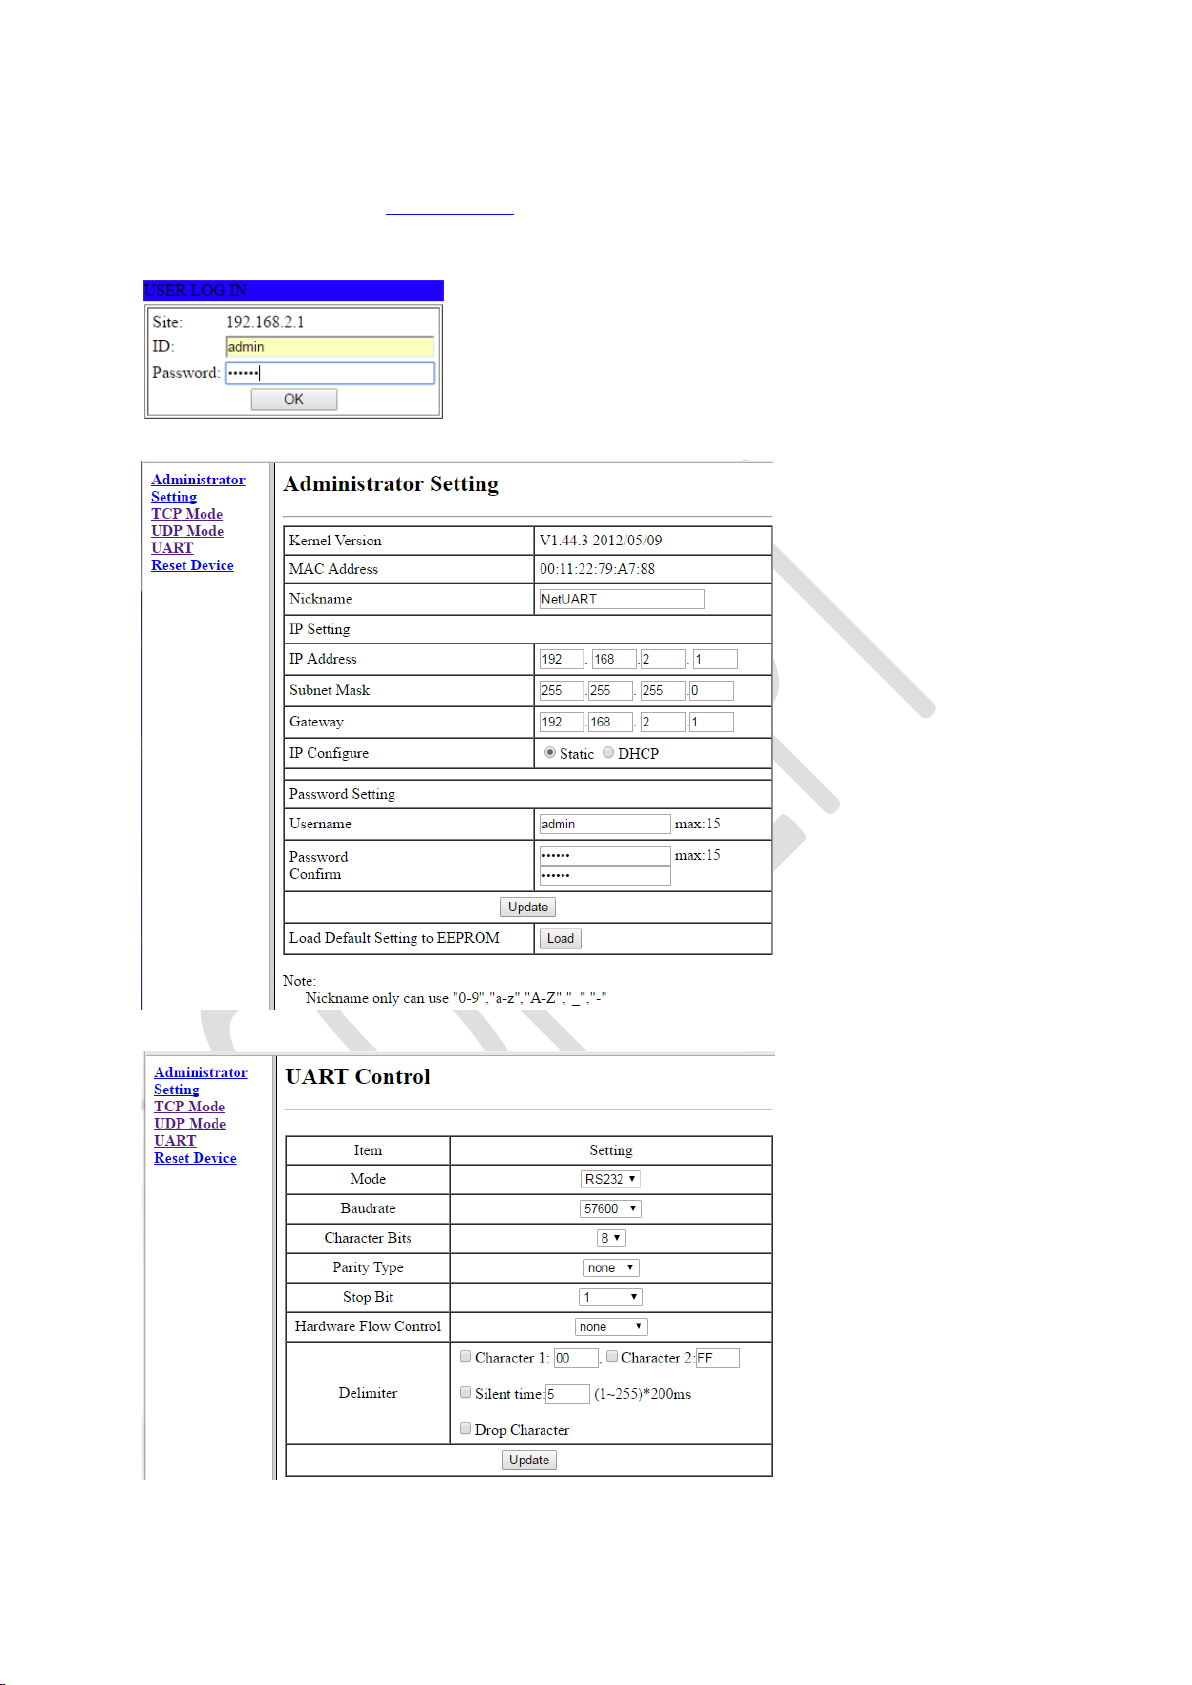
Now we will adapt the default IP address to the new IP address given to you by the IT service of the client.
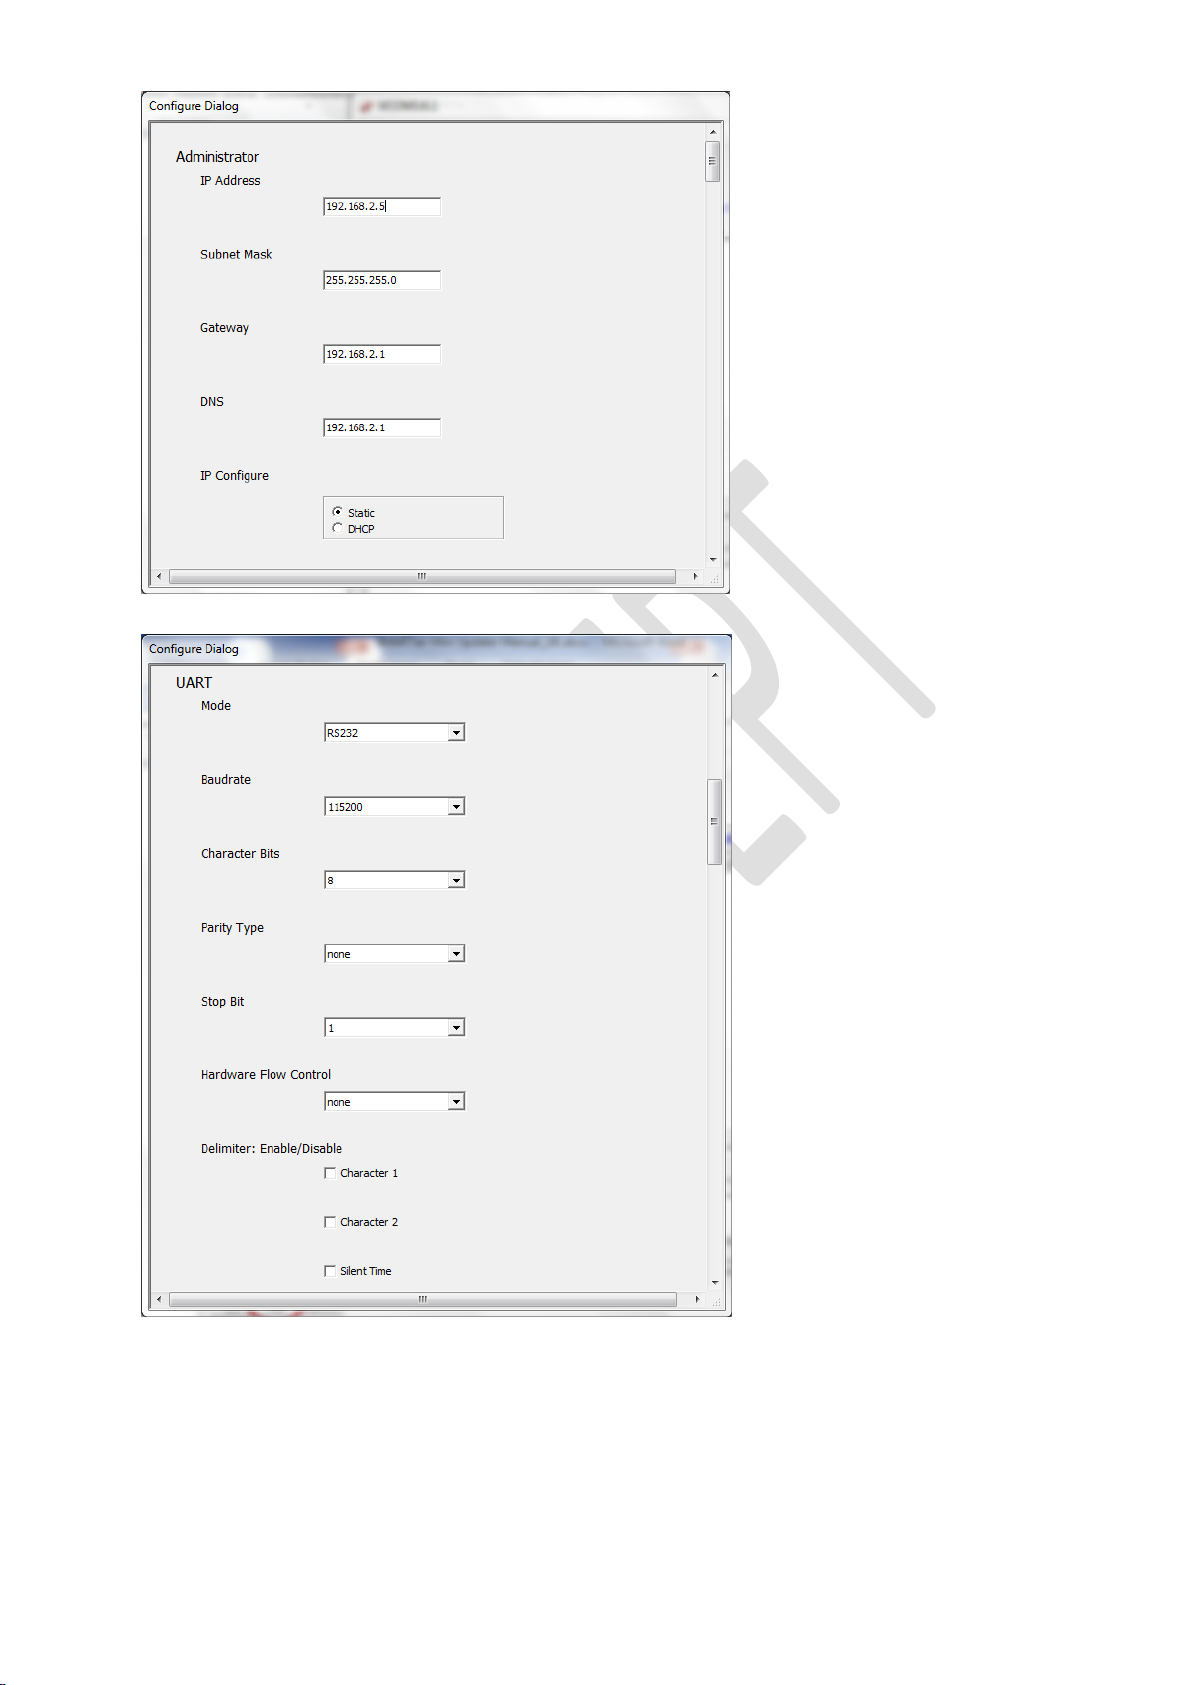
We will go back to the main screen, we must click on Administrator settings to do this.
In the main screen we will type in the new IP address, subnet Mask and gateway and click the Update button.
If the new IP address is not in the same range as the default IP address, you will lose communication to the TCP/IP –RS232!
You will need to change the IP address from your PC to be in the same range again as the IP address of the TCP/IP –RS232.
The TCP/IP –RS232 adaptor is now setup correctly in the network.
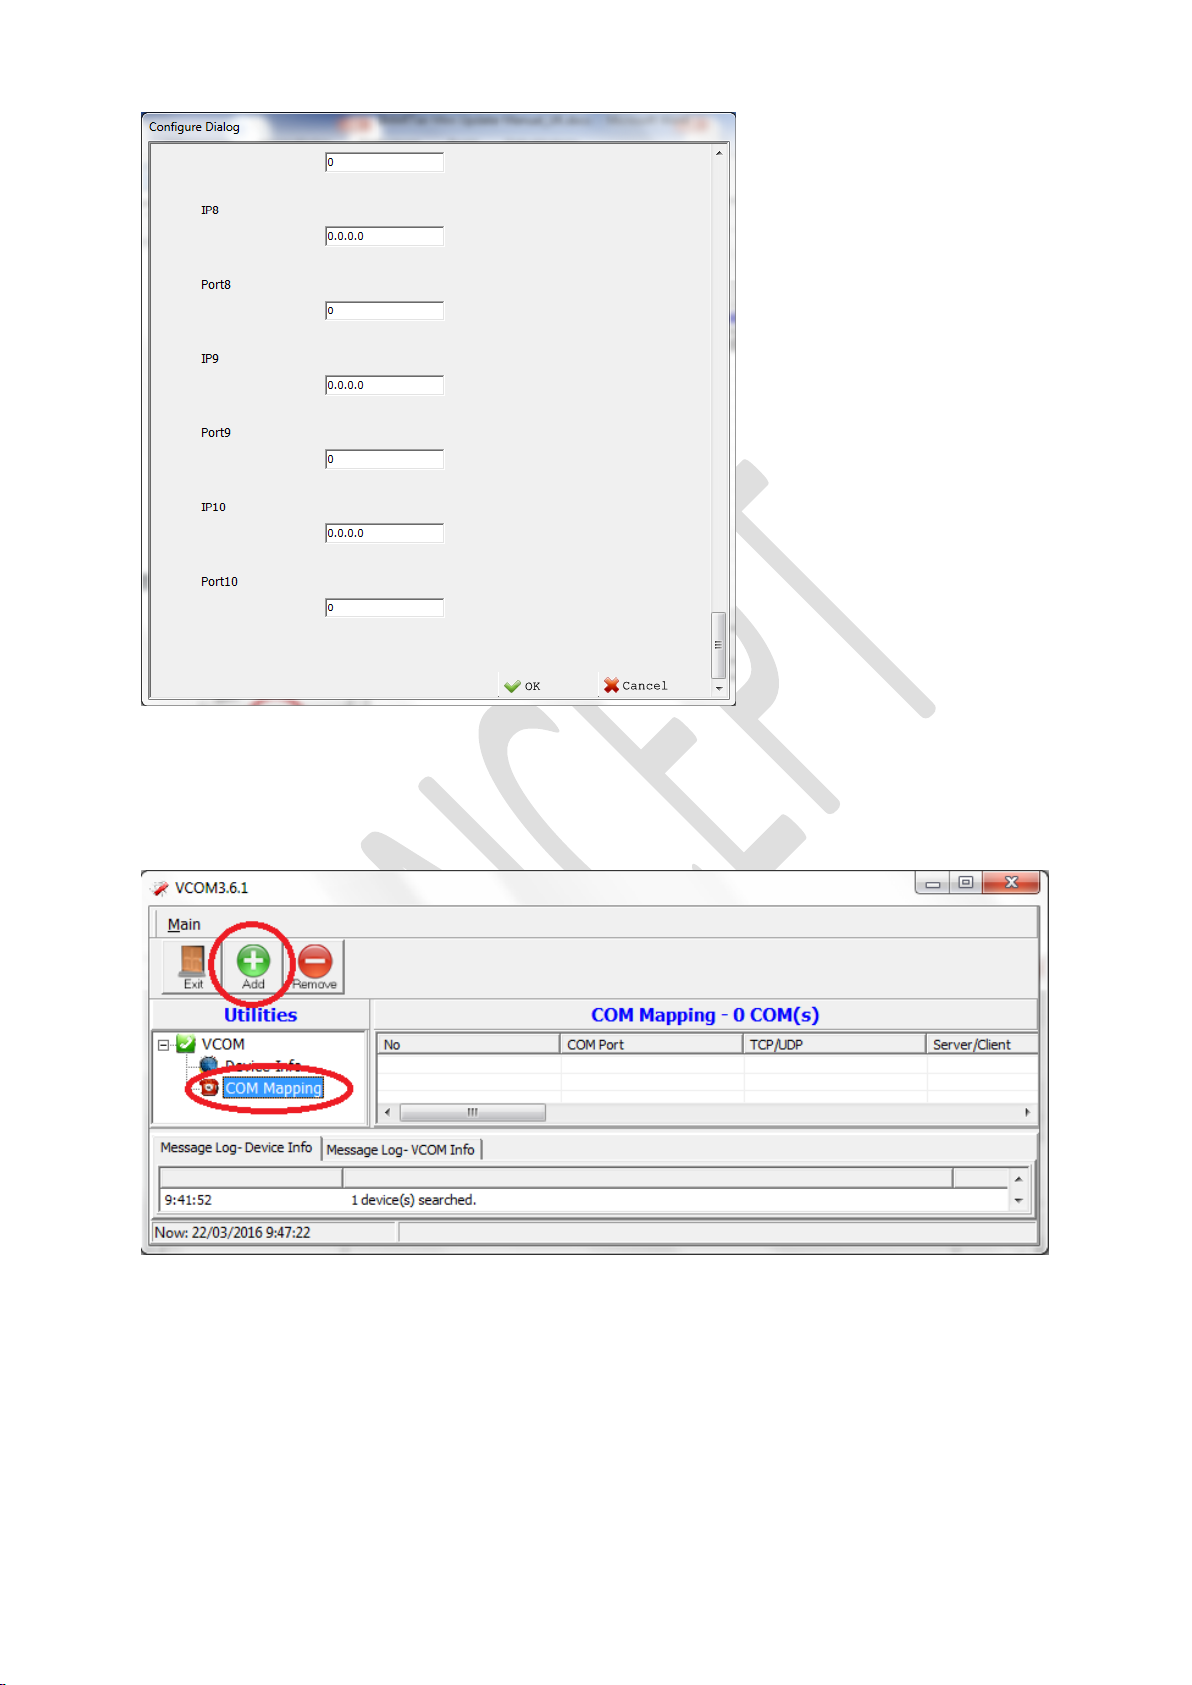
Now we must setup the virtual comport via the VCOM program.
See point 2.3.2
2.3 Configuring the TCP/IP –RS232 Adaptor via the VCOM program
Always use the latest version of the VCOM program with a new installation or in case of problems.
Run the VCOMsetup.exe program (can be downloaded from the Tesa support website or can be found on the CD delivered
together with the TCP/IP –RS232 adaptor, look in the folder: F:/Driver/ATC-1000 folder to run VCOMSETUP.)
Please select the correct Windows version driver!
You need to be administrator to install this software and make sure the firewall is configured correctly or is disabled!
The VCOM program will automatically start after installation and also every time Windows is started.
The VCOM program must always be running in order to make the Mini updater functional! If the VCOM program is not
running, the mini updater will not work!
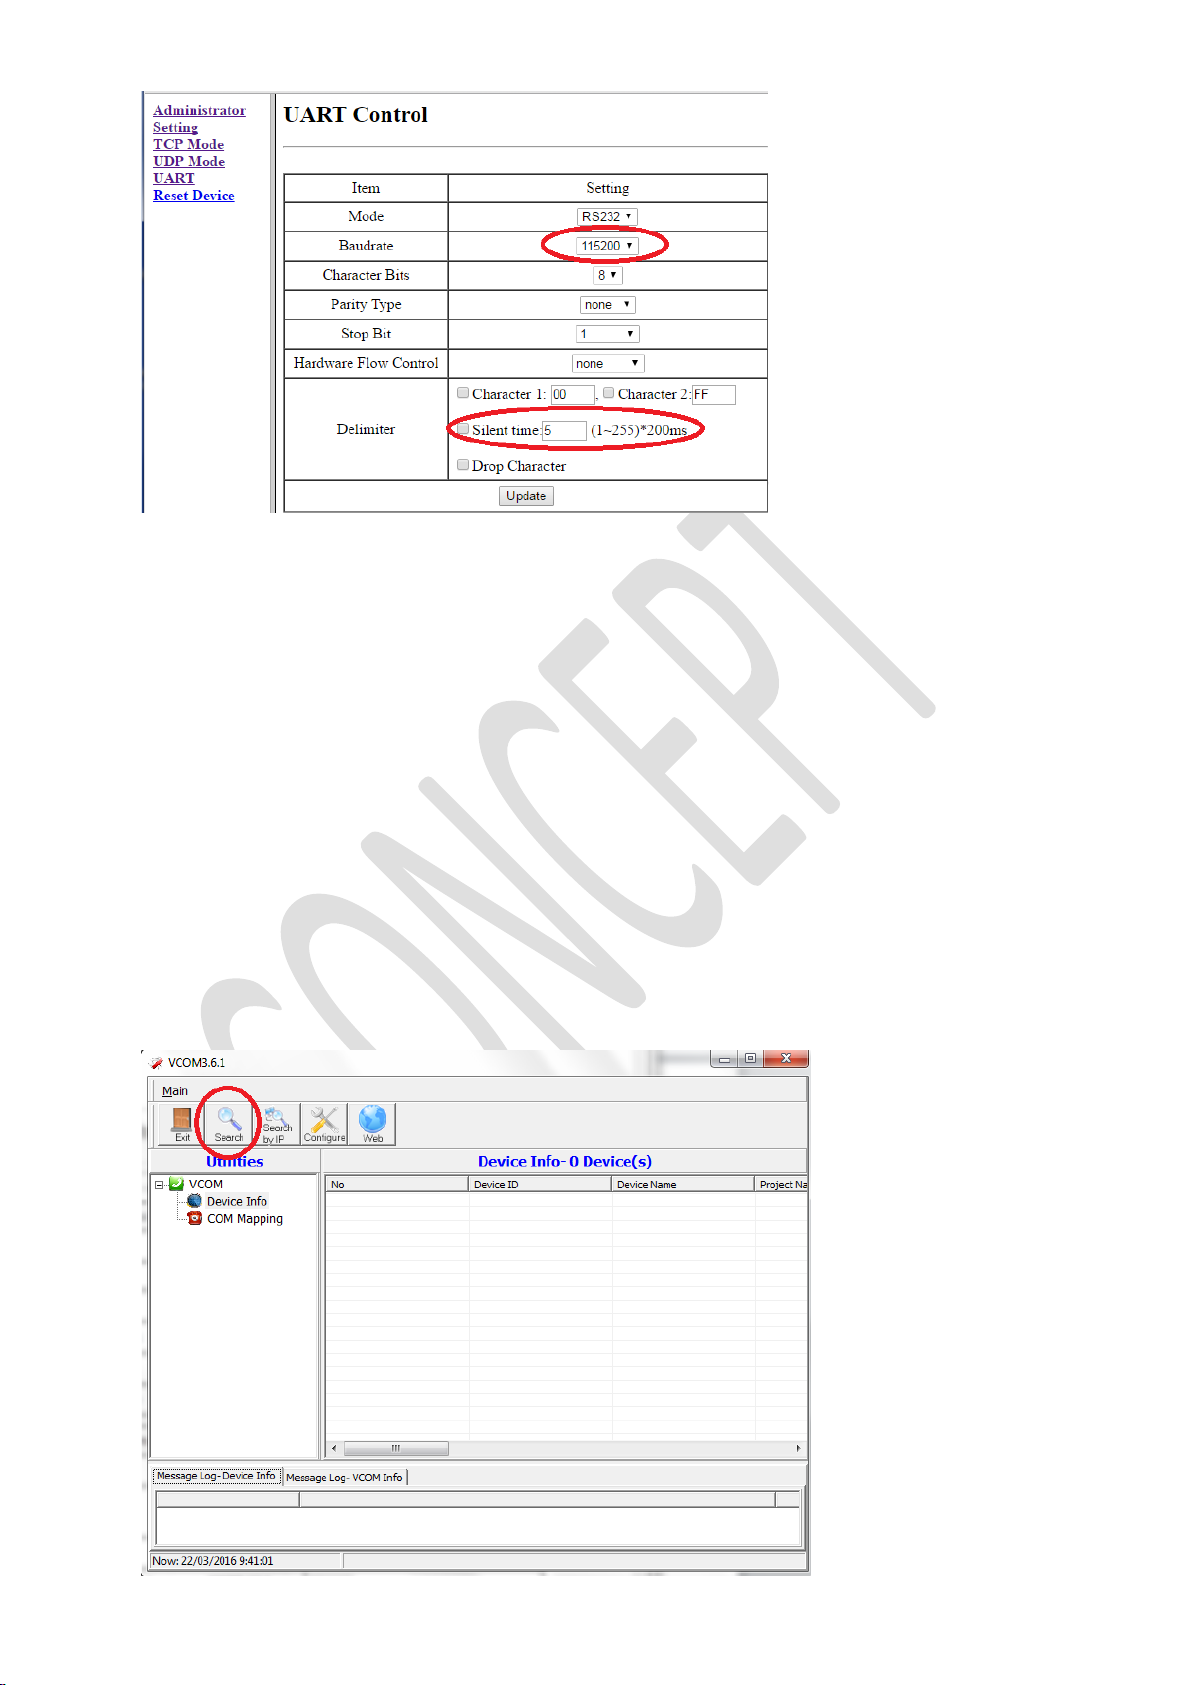
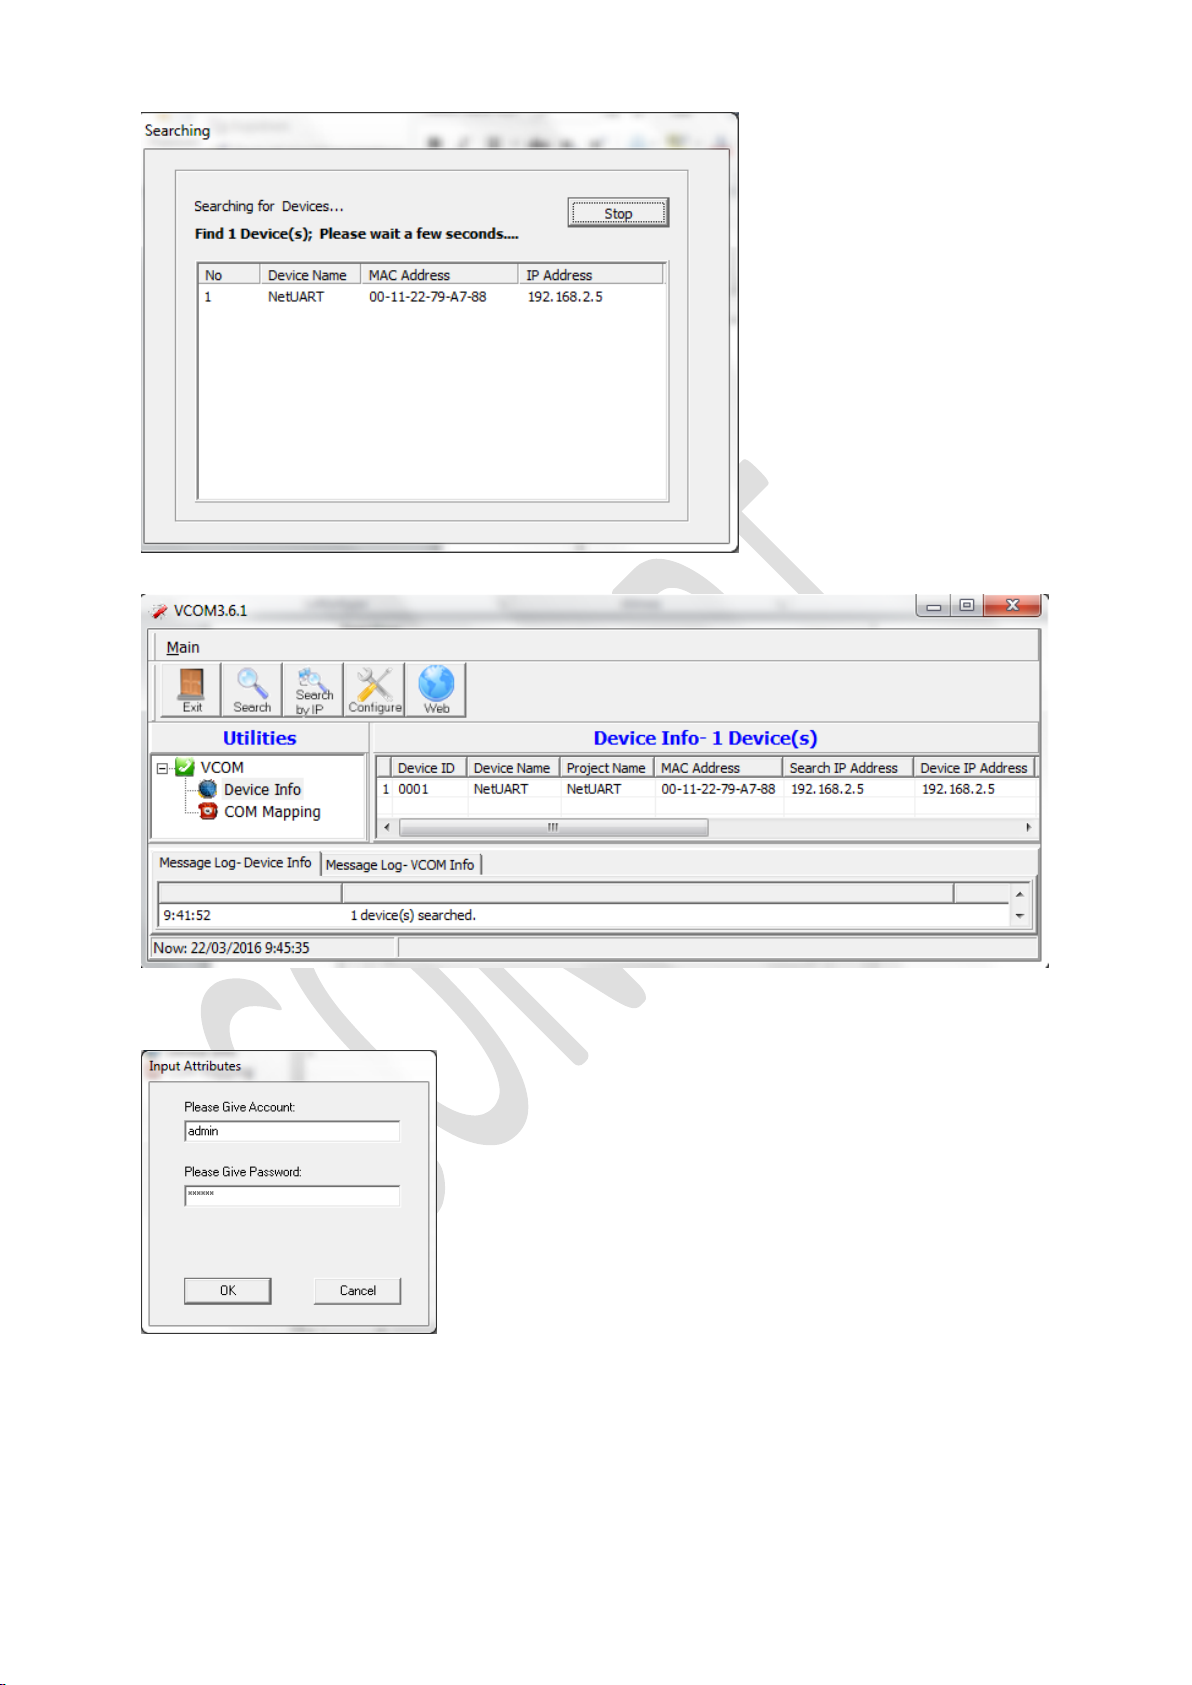
2.3.1 Adding the TCP/IP –RS232 adaptor in the VCOM software
In the VCOM program we must first search for the newly configured TCP/IP –RS232 adaptor. Therefore we click on the
Search button.