Asada Eco Series Manuel utilisateur
AIR CONDITIONING TOOL
VACUUM PUMP SERIES
Ver.3
【
Read through this manual carefully before using the pump.
】
INSTRUCTION MANUAL
VACUUM PUMP
1
Fire
Do not take
apart Burn injury Wear protective
equipments
220V Electric shock Explosion
Other
Rotation parts
Gas caution
220V
SAFETYPRECAUTIONS........................ 2
COMPONENTSOFTHEMACHINE
... 5
MainParts ................................................. 5
Specications ............................................. 6
StandardAccessories................................ 6
OptionalAccessories ................................ 6
HOWTOUSE ............................................. 7
Preparation ................................................. 7
PerformanceTest ...................................... 8
ForEectiveOperation ............................. 8
Vacuuming ................................................. 9
MAINTENANCE&INSPECTION.........11
OilCheck ....................................................11
OilChange .................................................11
VacuumLevelCheck ................................12
OilApplication............................................12
AmbientTemperature ................................12
BEFOREASKINGFORREPAIRS ......13
WARNING
Indicatesapotentiallyhazardoussituationwhich,ifnotavoided,could
resultindeathorseriousinjury.
Precautionarysignsareclassiedintothefollowing2levels.
SAFETY PRECAUTIONS
CLASSIFICATION OF CAUTIONS
CONTENTS
Indicatesapotentiallyhazardoussituationwhich,ifnotavoided,mayresultin
minorormoderateinjury.Itmayalsobeusedtoalertagainstunsafepractices.
CAUTION
ThankyouforchoosingourVacuumPump series.
●Thisinstructionmanualmustberetainedbytheuserofthispump.
●Readthisinstructionmanualcarefullyandcompletelybeforeuseandthoroughly
understandtheusage,capacity,cautionsandmaintenanceforcorrectoperation.
●Handlethepumpproperlytomakefulluseofitsfunctionsforsafework.
●Afterreadingtheinstructions,savethismanualsothatyoucanreaditwhennecessary.
●Usethepumpfortheintendedapplicationonly.Itwilldoabetterjobandbesaferat
therateforwhichitwasdesigned.
●Uponreceivingthepump,checkthefollowing.
・ Checkthatthepumpisbuiltconformingtothespecicationsstatedinyourorder.
・ Checktheoverallpumpforanydamageordeformationcausedintransitdueto
accidentsorotherreasons.
・ Checkthatallitemsandaccessoriesdelivered.
Incaseanydiscrepancyisfound,immediatelyreportthefacttotheshopyoupurchasedor
oursaleoce.(Thecontentsofthismanualaresubjecttochangewithoutpriornotice.)
VACUUM PUMP
2
●Basiccautionstousethepumpsafelyarelistedinthissection.
●Thedetailedcautionsinoperationaredescribedineachchapter.
CAUTIONS IN USE
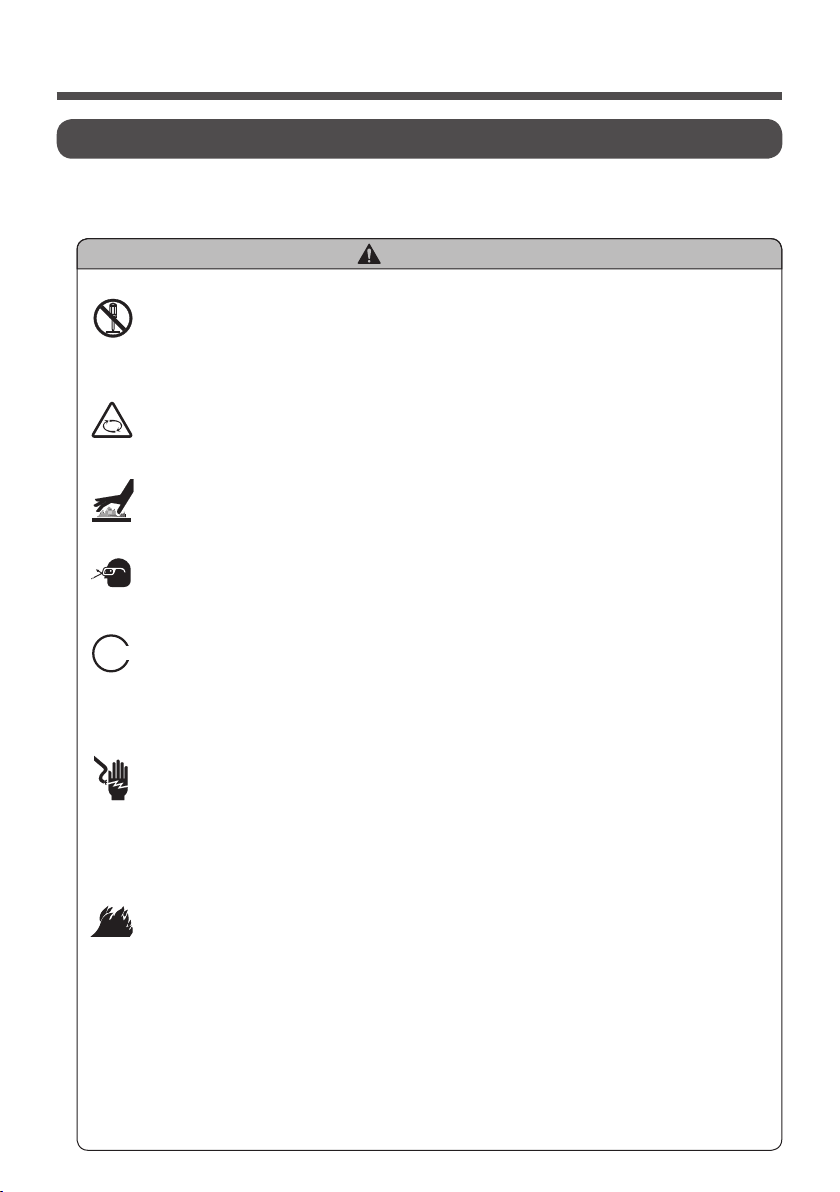
WARNING
◆ Only qualied persons are allowed to disassemble the pump.
◆ Do not modify the pump.
Itmayleadtomechanicalfailureoraccident.
◆ Do not put a nger or a stock to the turning part of motor.
Itmayleadtoaccidentorinjury.
◆ Do not touch the pump part during or soon after operation.
Thepumppartbecomeshotanditmayleadtoburninjury.
◆ Wear protective glasses and gloves during operation.
◆ The power source should be AC220-240V.
Ifthepowersourceisnotcorrect,itmayleadtoheating,smokingorre.
Seethespecicationinthisinstructionmanual.
◆ Do not operate the pump in rain or with wet hands.
Operationinrainorwithwethandsmayleadtoelectricshock.
◆ Always ground the pump.
Ifthepumpisnotgrounded,itmayleadtoelectricshockormechanical
failure.
◆ Always inspect the power plug and plug in securely.
Adirtyplugandincompleteconnectionmayleadtoelectricshockorre.
220V
VACUUM PUMP
3
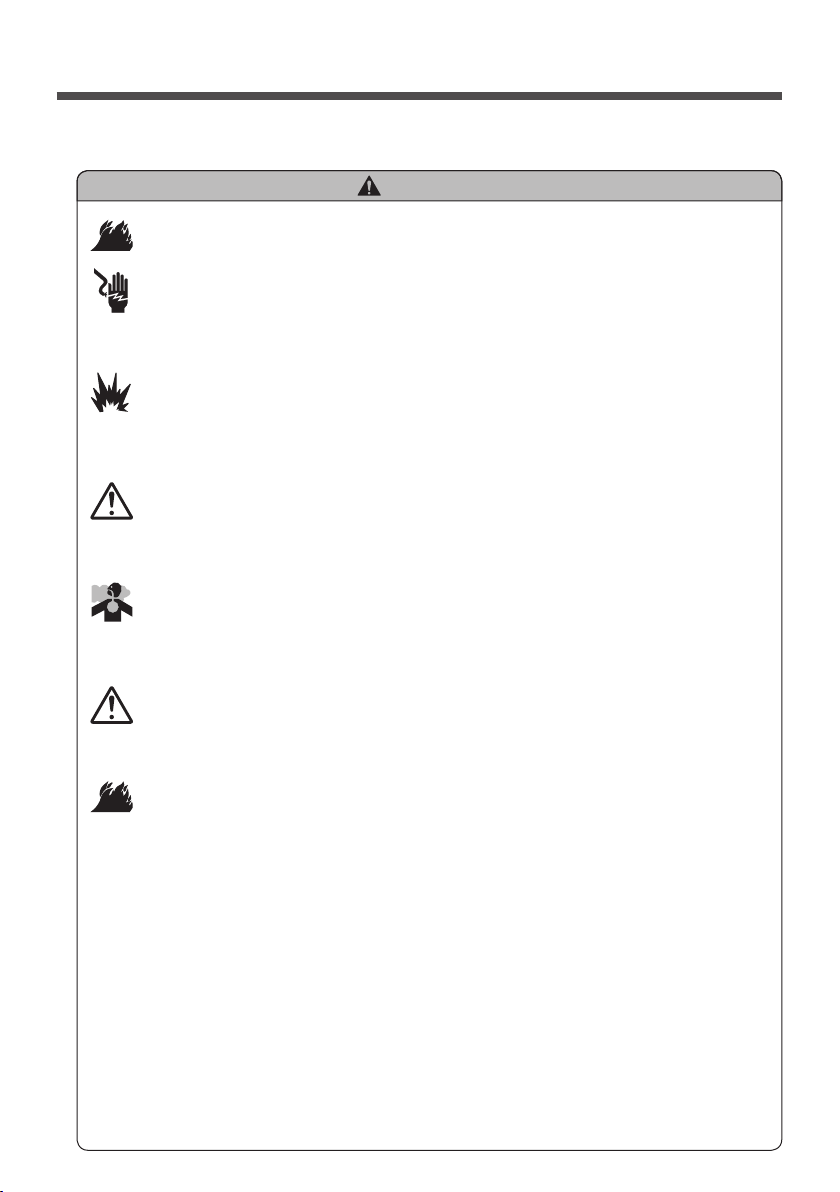
WARNING
◆ Do not use the power cord concurrently with other electrical
equipments and avoid overload connection.
◆ Do not pull the power cord to disconnect from the outlet.
Itmayleadtoelectricshock,reorinjury.
◆ Do not use the pump in an area where gasoline, thinner or any
other combustible gas may exist.
Itmayleadtoexplosionorreasthepumphassparksinstartingorduring
operation.
◆ When unattended, blackout or servicing, switch o and unplug
the pump.
Thepumpwillstartsuddenlyanditmayleadtoaccident.
◆ The pump should be used in a well-ventilated area especially in
a small space.
Otherwiseanaccidentallackofoxygenorpoisoningmayhappen.
◆ Use or store the pump on a level place.
Theoilmayleakanditmayleadtoaccident.
◆ Be careful about oil leakage. Make sure no vacuum pump oil
leaks.
Itmayleadtore.
VACUUM PUMP
4
CAUTION
◆ An extension cord used should be a three-core cabtyre cable
with a length of 10m or less when its diameter is 2.0㎡ .
Anunsuitableextensioncord(toothinortoolong)mayleadtostarting
failureorre.
◆ Do not let visitors touch the pump.
Thepumpshouldbeusedbyapersonwhoreadthroughtheinstruction
manualandunderstandsitcompletely.
◆ Do not use the pump for purposes other than the original
intent.
Thispumpisdesignedtoevacuateairfromsystemsorrecoverycylinders.
◆ Do not use the pump when the result is unpredictable.
◆ Do not overload the pump.
Itwillleadtomechanicalfailureoraccident.
◆ Keep your work bench and area tidy and well lit.
Badworkingconditionsinviteaccidents.
◆ Do not operate the pump when you cannot concentrate on your
work due to fatigue, drinking, medication and so on.
◆ When not in use, the pump should be stored in dry and high or
locked-up place – out of reach of children.
◆ Use only the accessories or attachments given in this manual
and our catalogs.
Otherwiseitwillleadtoaccidentormechanicalfailure.
◆ If you have dropped or hit the pump accidentally, carefully
check for damage, crack or deformation.
◆ Always check for deformation, corrosion and so on in each
part of the pump.
◆ Immediately stop the pump if something is wrong with the
pump (unusual smell, vibration, sound) and refer to “BEFORE
ASKING FOR REPAIRS”. Do not disassemble the pump without
reason and ask for repairs.
Contactourauthorizeddistributorsforrepairs.
VACUUM PUMP
5
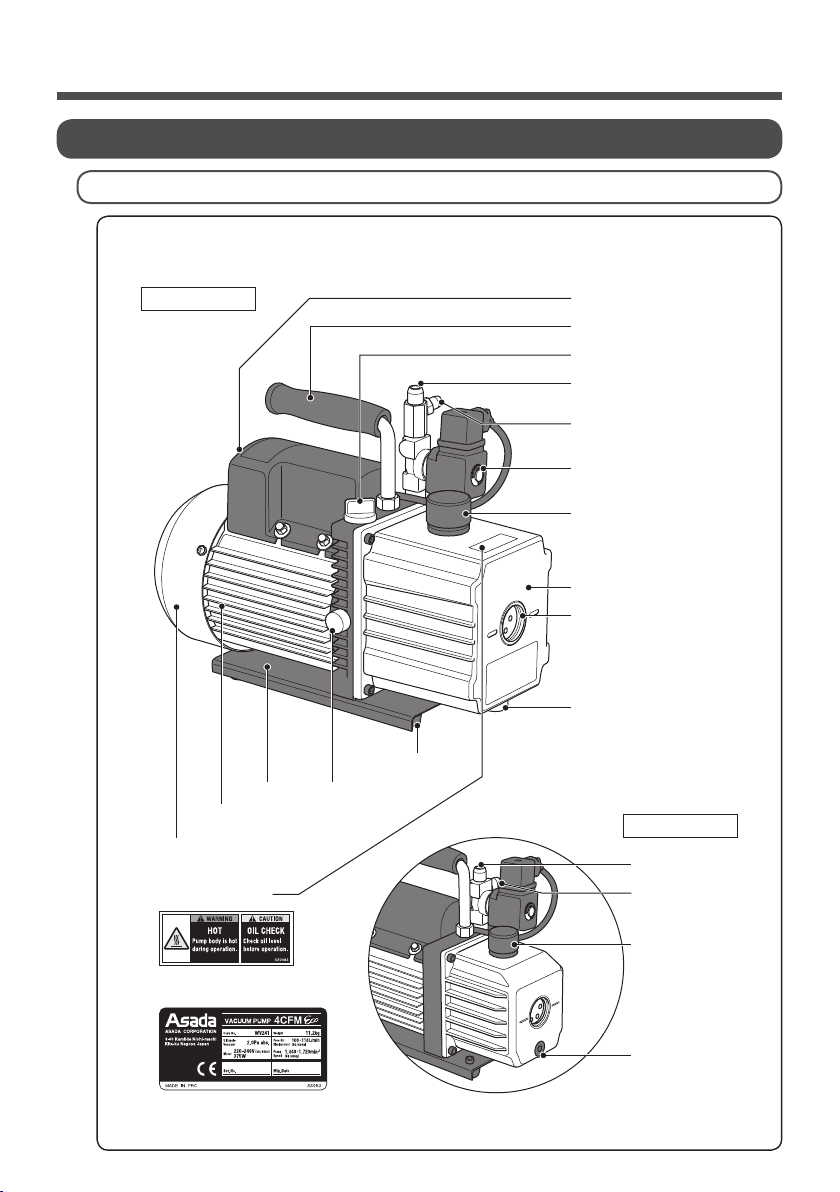
COMPONENTS OF THE MACHINE
Main Parts
Fan cover
Nameplate
Caution label
Motor
Base
Power switch
2・4・6・8 C F M
Rubber legs
Intake 1/4” (2CFM)
3/8” ( 4・6・8 C F M )
Intake 5/16” (2CFM)
1/4” ( 4・6・8 C F M )
Solenoid valve
Oil filler port
Intake 1/4”
Intake 5/16”
Handle
Exhaust port
Sight glass
Oil filler/
exhaust port
Oil reservoir cover
Gas
ballast
plug
Oil drain plug
Oil drain plug
1.8CFM
VACUUM PUMP
6
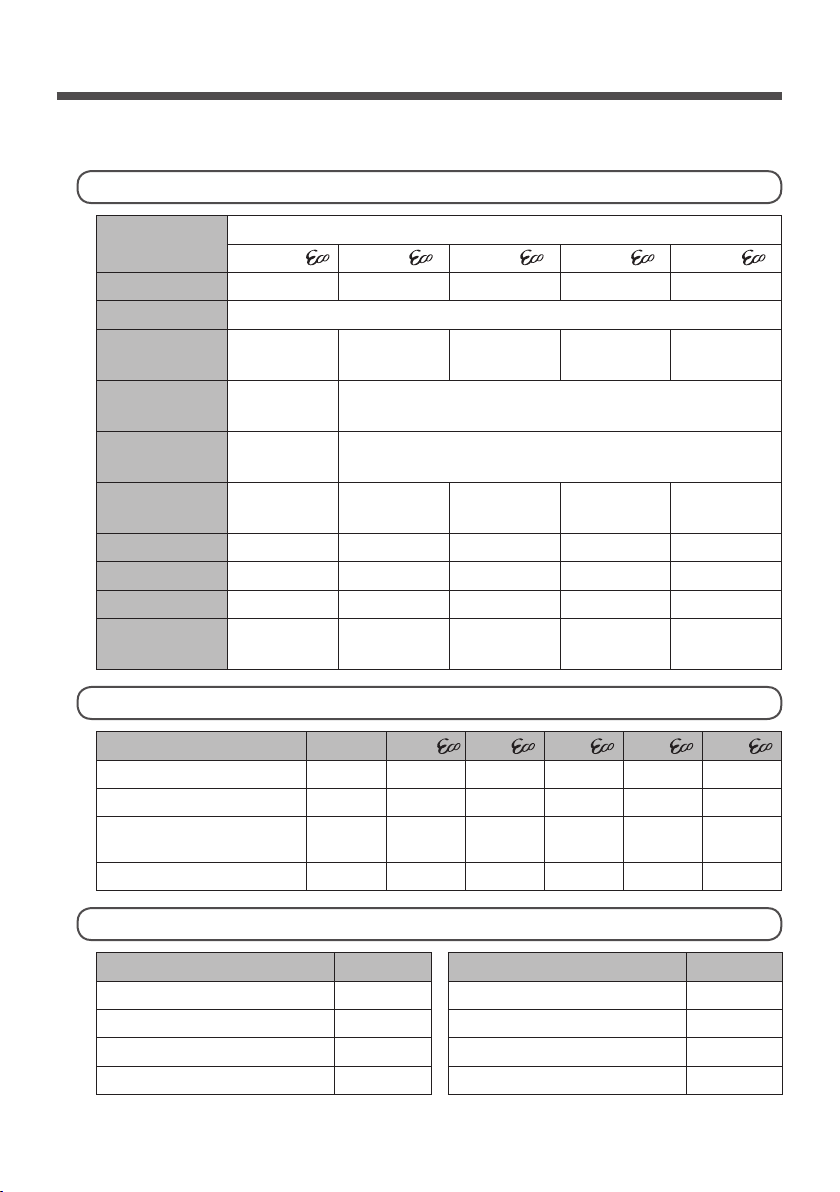
Item Vacuumpump
1.8CFM 2CFM 4CFM 6CFM 8CFM
CodeNo. WV211 WV221 WV241 WV261 WV281
Pump 2-stage
Exhaustrate
(50/60Hz)
42/50L/min 51/57L/min
100/113L/min 142/170L/min 198/226L/min
Ultimate
vacuum
3Paabs.
(25micron)
2Paabs.
(15micron)
Pumpspeed
(50/60Hz)
2,880/3,440min
-1
1,440/1,720min-1
Motor
220-240V 200W 250W 375W 550W 550W
Oilcapacity 150ml 260ml 390ml 580ml 460ml
Intake 1/4、5/16 1/4、5/16 1/4、3/8 1/4、3/8 1/4、3/8
Weight 5.0kg 9.4kg 11.2kg 16.5kg 17.0g
Dimensions
(L×W×H)
260 × 105
× 200mm
308 × 124
× 230mm
335 × 138
× 265mm
390 × 145
× 290mm
395 × 153
× 300mm
Specications
Item CodeNo.
1.8CFM 2CFM 4CFM 6CFM 8CFM
Vacuumpumpoil230ml WV014 ○ - - - -
Vacuumpumpoil350ml WV002 - ○ ○× 2 ○× 2 ○× 2
Adapterfordierentdiameter
1/4 "femalex5/16" male
Y06114K
--○○○
Instructionmanual IM0037 ○ ○ ○ ○ ○
Item CodeNo.
Vacuumpumpoil470ml Y93091
Vacuumpumpoil950ml Y93092
Vacuumpumpoil3.8L Y93094
1/4"QuickchargingvalveA
Y18975
Item CodeNo.
5/16"QuickchargingvalveA
Y18985
Electronicvacuumgauge Y69075
Digitalvacuumgauge Y69086
Standard Accessories
Optional Accessories
VACUUM PUMP
7
HOW TO USE
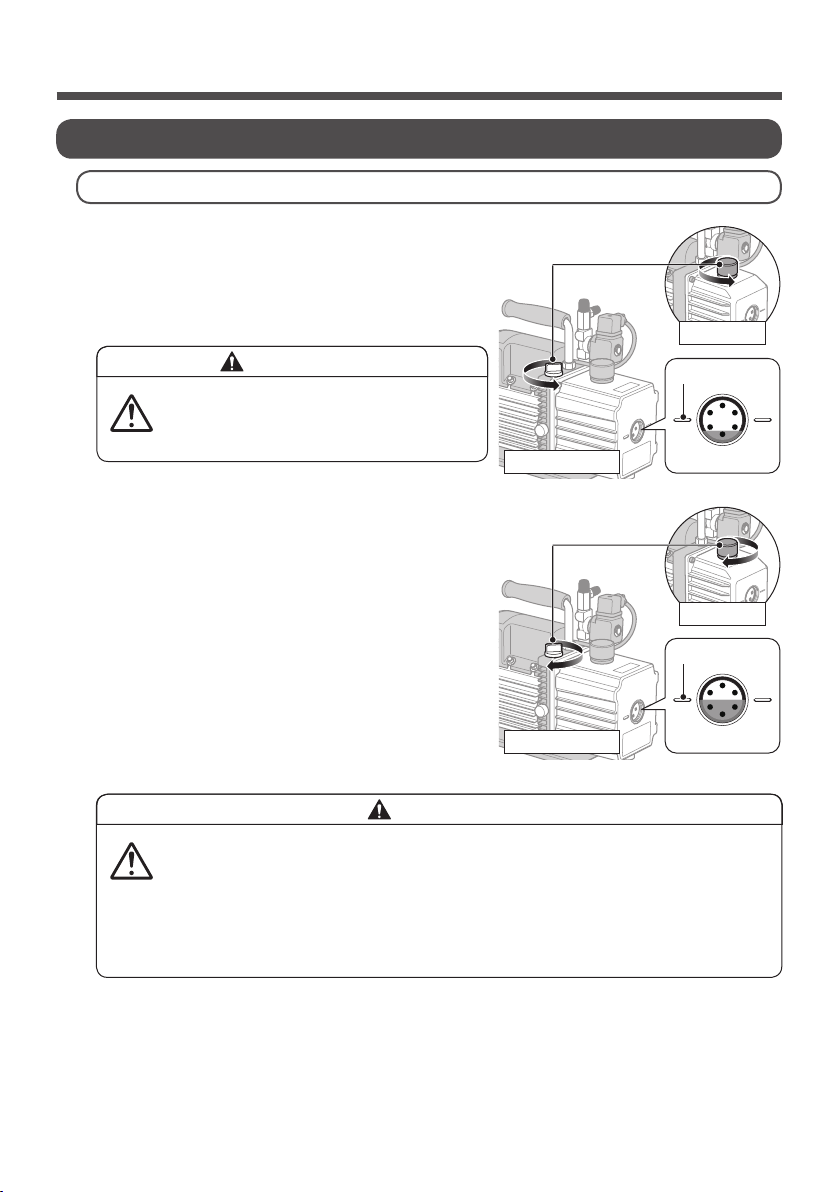
Preparation
①Removethecapofoilllerport(exhaust
port).
②Fillwithvacuumpumpoiluntiloillevelisa
littlehigherthanthebottomofsightglass.
※Useafunnelforoillling.
③Putthecapofoilllerport(exhaustport)
back.
④Removethecapofintake.
⑤Pluginasocket.
⑥Switchonthepumpandrunforabout30
secondsuntilthepumpreachesrunning
speed.
⑦Putthecapofintakeback.
⑧Afterrunningforabout1minute,checkif
oillevelreachesthelevellineonthesight
glass.Relloilifnecessary.
⑨Switchothepump.
CAUTION
◆ Insucient oil will result in poor vacuum performance.
◆ The pump may not start when the temperature of the pump
and oil is 5℃ or less.
Warmingupisnecessaryintheareawherethetemperatureis5℃orhigher.
◆ The pump may not restart soon after shut-o. Wait for a
while and switch on the pump again.
Level line
Sight glass
Exhaust port
1.8CFM
2・4・6・8 CFM
Sight glass
Level line
Exhaust port
1.8CFM
2・4・6・8 CFM
CAUTION
◆ Excessive oil can result
in overowing of oil from
exhaust/oil ller port.
VACUUM PUMP
8
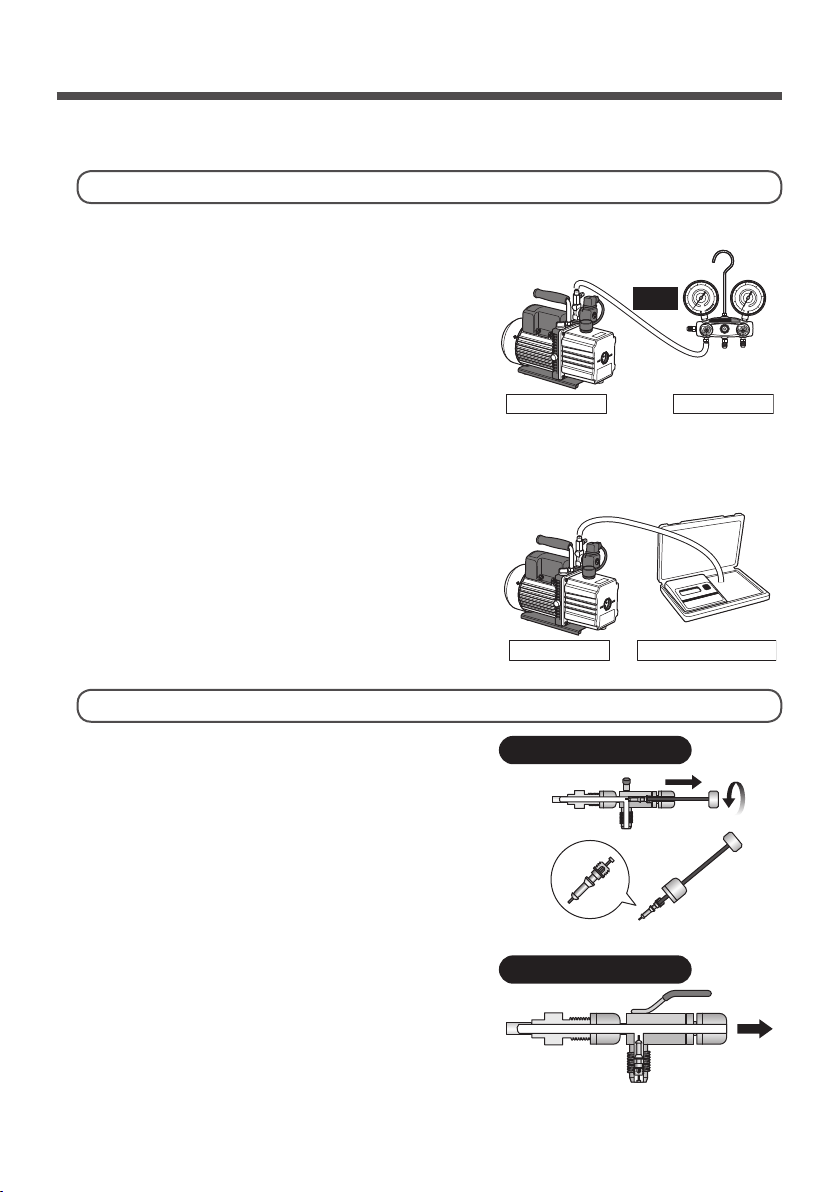
Performance Test
①Connectthelowpressuresideofmanifold
tointakeofvacuumpumpwithacharging
hose.
②Closethelowpressuresidevalveof
manifold.
③Switchonthepumpandcheckifthelow
pressuregaugeofmanifoldindicates
" - 0.09 ~- 0.1MPa"within30seconds.
④Switchothepump.
1)Simplied test method
2)Accurate test method
①Connectelectronicvacuumgaugetointake
ofvacuumpump.
②Switchonthepumpandcheckifthe
readingis13.33Pa(100micron)after20 ~
30minutes.
Intake
Vacuum pump
Electronic vacuum gauge
Intake
Manifold
Vacuum pump
Low pressure
side valve
Close
For Eective Operation
①Thecharginghosebetweenthepumpand
thesystemshouldbeasshortaspossible
anditsdiametershouldbeaslargeas
possible.(1/4" < 3/8" < 1/2")
②Vacuumspeedcanbeimprovedby
removingthevalvecoreofsystemandthe
coredepressorofcharginghose.
※Optionalaccessories
Y189751/4"QuickchargingvalveA
Y189855/16"QuickchargingvalveA
Remove valve core
Improve vacuum speed
VACUUM PUMP
9
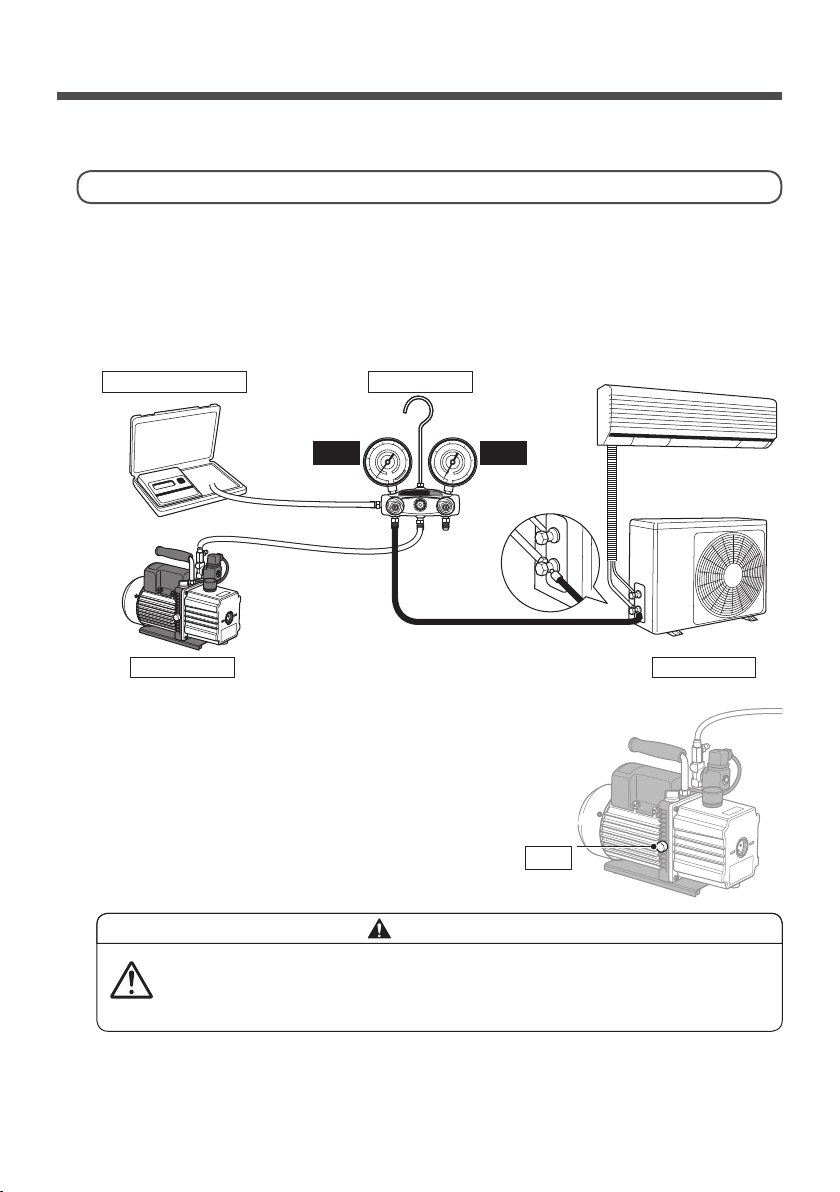
③Opengasballastplug.(except1.8CFM)
④Pluginasocketandswitchonthepump.
CAUTION
◆ Always ground the pump.
Ifthepumpisnotgrounded,itmayleadtoelectricshockincaseof
mechanicalfailureorelectricalleakage.
Vacuuming
①Closethelowandhighpressuresidevalvesofmanifold.
②Connectthecharginghosesasbelow.
※IncaseofvacuumingfrompipingforR410A,attachtheprovidedY06114A
Adapterfordierentdiameter1/4"femalex5/16"maletointake.
1)Vacuuming
Low pressure
(vapor) side
Intake
Charging hose
yellow
Charging hose
blue System
Manifold
Electronic vacuum gauge
Vacuum pump
High pressure
side valve
Close
Low pressure
side valve
Close
Gas ballast
plug
Open
Table des matières


