
ArrowSpan MeshAP 2100 Manuel utilisateur

User Guide
MeshAP 2100/1100
Dual-Radio Wi-Fi Mesh Network
Access Points
ArrowSpan Inc.
4800 Great America Parkway
Suite 238
Santa Clara, CA 95054
USA
v1.9.3
June. 2007

Installation Guide - MeshAP 2100/1100 Dual-Radio Wi-Fi Mesh Network Access Point Table of Contents
Table of Contents
Safety Guide and Installation Tips…………………………………………………………………………… 1
Chapter 1 - Accessing the MeshAP Access Point (Login) ……………………………………………….. 2
Chapter 2 - General MeshAP Infrastructure Information ………………………...………………………. 5
Chapter 3 - Mesh Manager Configuration ………………..………………….…….………………………. 6
Chapter 4 - Station Configuration
Setup Station (Auto Mode) ………………………………………..………………………. 9
Connect a MeshAP station to other Stations/Mesh managers under Auto Mode …… 12
Setup Station (Manual Mode) ……………………………………….……………............... 13
Connect a MeshAP station to other Stations/Mesh managers under Manual Mode …… 16
Chapter 5 - Managing the Topology
Accessing Topology Page …………………………………………………………………. 18
Manage MeshAP on Topology Tree ………………………………...……………………. 19
Chapter 6 - Wireless
Wireless Network Mode ……………………………………………………………………. 21
Wireless Channel …………………………………………………………………………… 23
Wireless Security
Configure WEP ……………………………………………………………………. 23
Chapter 7 - Firmware Upgrade
Direct Unit Update ………………………………………………………………………….. 26
Station Update via Topology (Remote Update) …………...……………………………. 29

Installation Guide - MeshAP 2100/1100 Dual-Radio Wi-Fi Mesh Network Access Point
DOC-6200-0152 - 1 -
SAFETY GUIDE & INSTALLATION TIPS
Safety Guide for the Indoor MeshAP 1100
•Make sure to read the installation instructions thoroughly before you install your unit(s).
•To avoid the risk of being electrocuted, do not work on the unit(s) during a lightning storm.
•Do not touch the antenna while the unit is transmitting or receiving.
•Do not hold the antenna very close to any exposed body parts while it is transmitting.
•Antennas should be placed at least 20cm from the bodies of all persons.
•If you are mounting the unit on the wall, make sure it can hold the MeshAP’s weight of about 1lb.,
plus the additional weight of any attached cables.
•Place access points in a location where it is hard for people to turn them off.
Installation Tips for the Indoor MeshAP 1100
•Make sure there is a power outlet at each access point location.
•Configure the mesh manager first, and then the rest of the nodes.
•In order to insure the best signal possible, make sure the nodes are not being blocked by a
microwave or any metal or concrete objects.
Safety Guide for the Outdoor MeshAP 2100
•Make sure to read the installation instructions thoroughly before you install your unit(s).
•To avoid the risk of being electrocuted, do not work on the unit(s) during a lightning storm.
•Do not install any unit(s) near heat sources such as radiators or any other equipment that produce
heat.
•Do not place antennas near power circuits or power lines. Choose your location carefully and keep
in mind that power lines look similar to phone lines so always use caution.
Installation Tips for the Outdoor MeshAP 2100
•Before you install your outdoor unit(s), choose a location where buildings and trees will not block
the signal.
•Make sure to install your outdoor unit at a moderate height (approximately 40 feet), so it can
provide a clear signal to neighboring nodes.
•When installing the unit(s), allow at least 10 feet of separation between each unit.
•Do not mount units on metal objects, doing so will drastically reduce the signal strength.
Installation Guide - MeshAP 2100/1100 Dual-Radio Wi-Fi Mesh Network Access Point
DOC-6200-0152 - 2 -
Chapter 1
Accessing the MeshAP Access Point (Login)
Important Default Settings of the MeshAP
User Name: admin
Password: admin
Wireless Network Name (SSID): mymesh
IP Address: 192.168.1.1
Subnet Mask: 255.255.255.0
Mesh Link Connection: station
Direct Ethernet Connection
Step 1. Make sure the MeshAP unit is Powered On and Ready. Once it is powered on, it
takes about 35 seconds for the MeshAP unit to completely get booted and be ready
for service and configuration.
Indoor Unit:
Make sure both the WLAN light (Green) and the Power light (Yellow) are
on.
Outdoor Unit:
Use the wireless WLAN utility application on the PC to scan for the SSID:
mymesh. Make sure the SSID: mymesh MeshAP unit has the correct Mac
address.
Step 2. Change the PC IP address to 192.168.1.XXX Subnet mask: 255.255.255.0
Step 3. Access the MeshAP via WAN Ethernet Port
•Make sure the Ethernet cable is properly connected to the MeshAP - WAN
Ethernet Port and the PC - Ethernet Port. (Connect via PoE Injector)
Note: Please review the Hardware installation Guide for more information.
Step 4. Open up a Web Browser and type 192.168.1.1 to access the MeshAP Access Point.
Installation Guide - MeshAP 2100/1100 Dual-Radio Wi-Fi Mesh Network Access Point
DOC-6200-0152 - 3 -
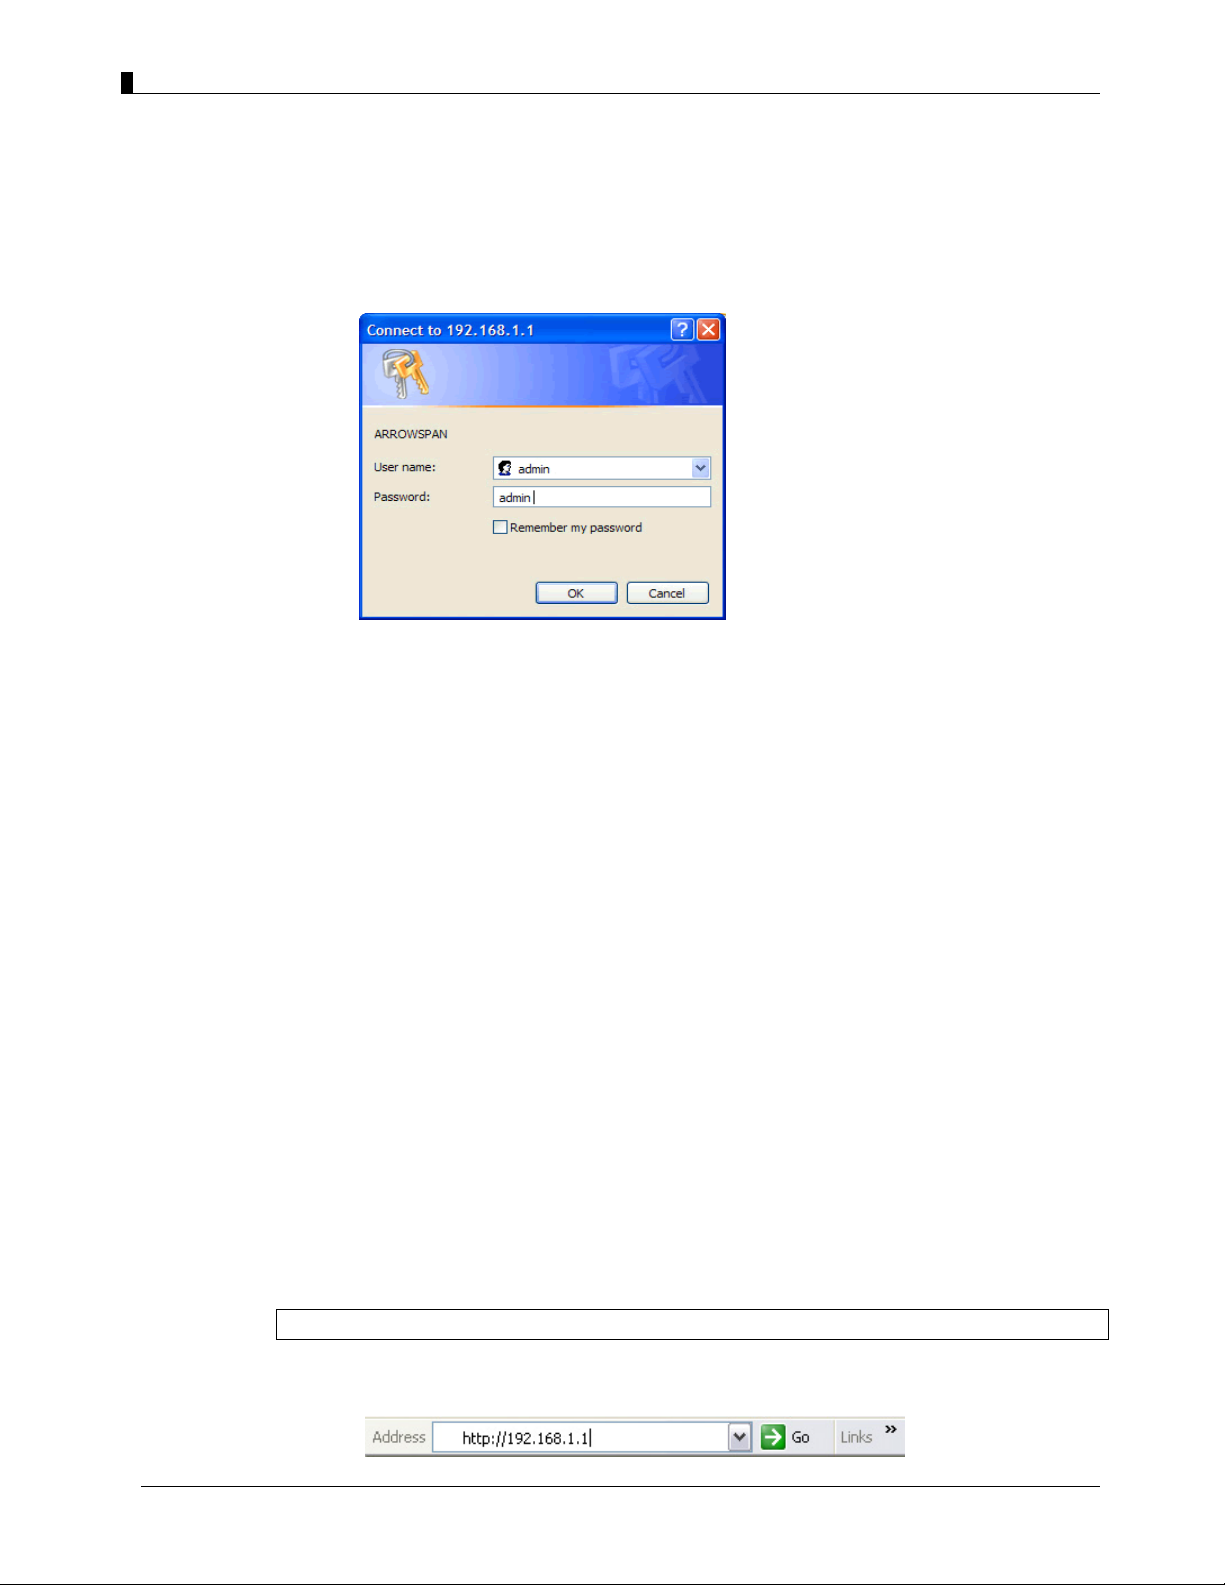
Step 5. User Name: admin
Password: admin
Click "OK
Wireless LAN Access
Step 1. Make sure the MeshAP unit is Powered On and Ready. Once it is powered on, it
takes about 35 seconds for the MeshAP unit to completely get booted and be ready
for service and configuration.
Indoor Unit:
Make sure both the WLAN light (Green) and the Power light (Yellow) are
on.
Outdoor Unit:
Use wireless the WLAN utility application on the PC to scan for the SSID:
mymesh. Make sure the SSID: mymesh MeshAP unit has the correct Mac
address.
Step 2. Change the PC IP address to 192.168.1.XXX Subnet mask: 255.255.255.0
Step 3. Access the MeshAP via Wireless LAN
•Make sure the PC is connected to the SSID: mymesh (The default SSID
for MeshAP)
Note: Please review the Hardware installation Guide for more information.
Step 4. Open up a Web Browser and type 192.168.1.1 to access the MeshAP Access Point.
Installation Guide - MeshAP 2100/1100 Dual-Radio Wi-Fi Mesh Network Access Point
DOC-6200-0152 - 4 -
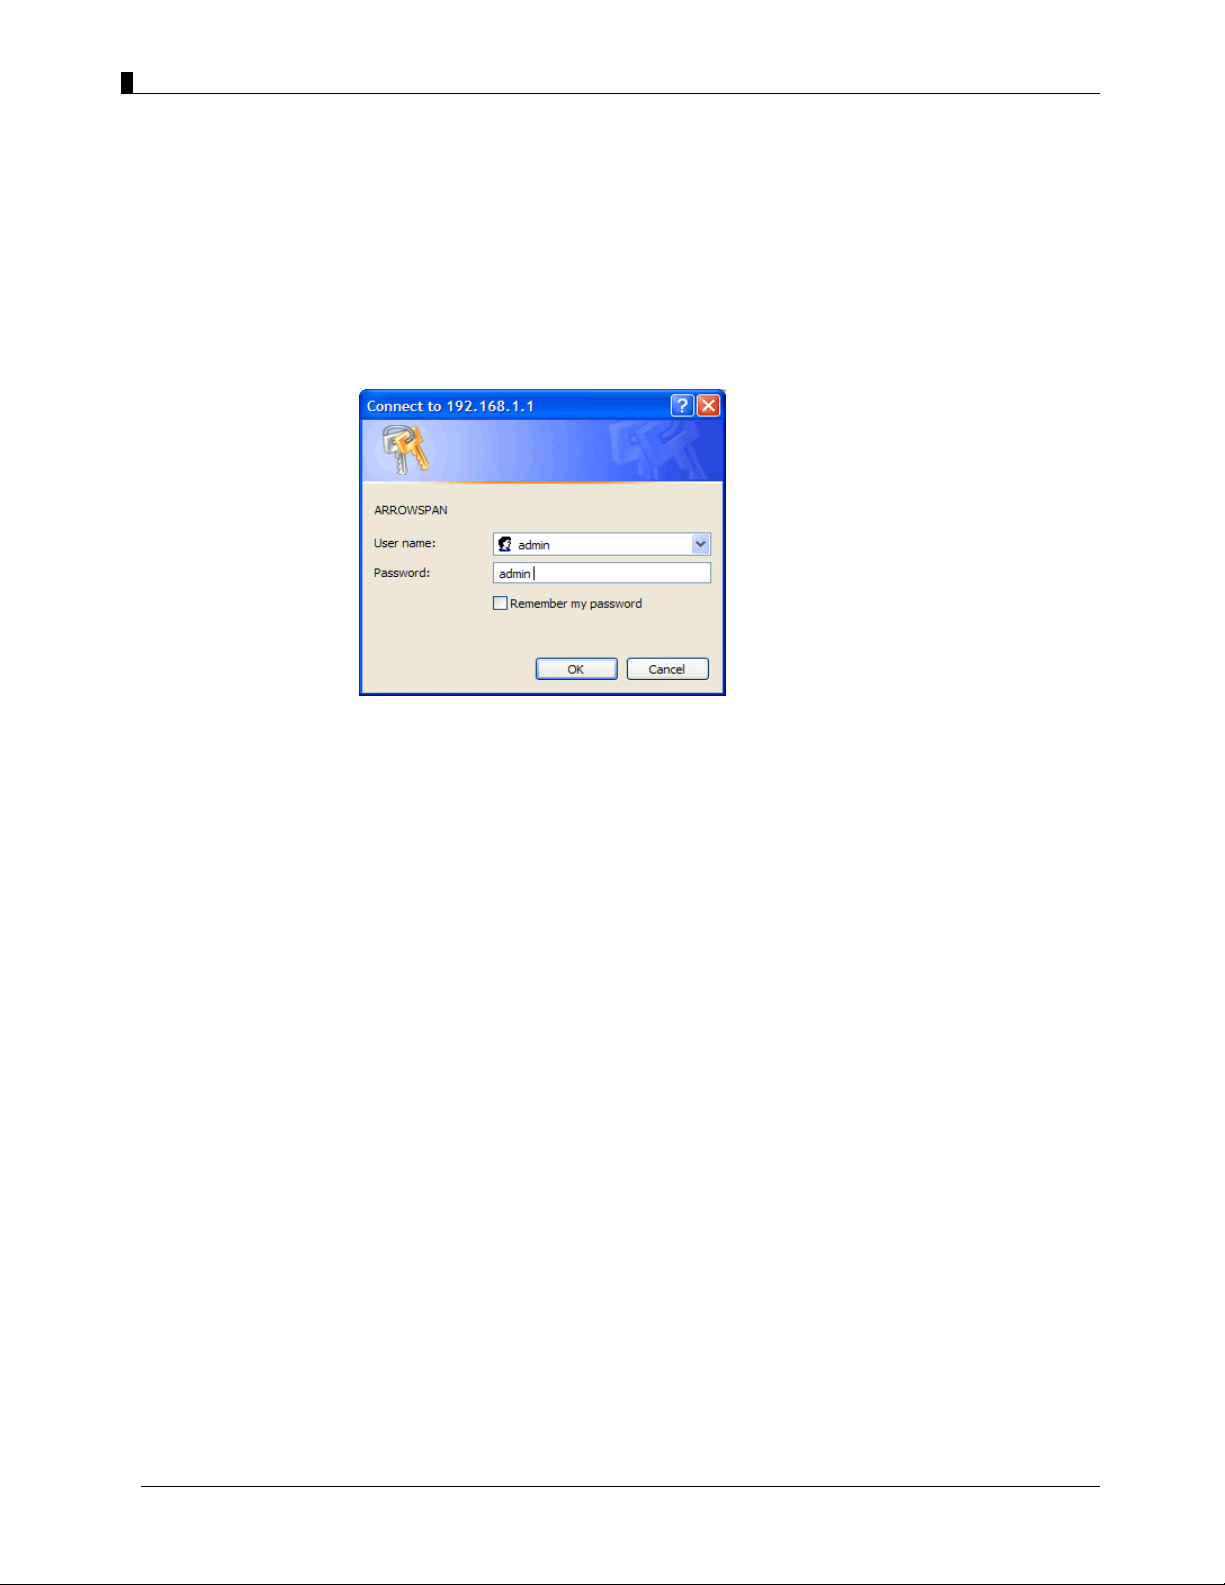
Step 5. User Name: admin
Password: admin
Click "OK
Access a MeshAP unit via the Mesh Manager’s Topology Page
(See Chapter 5 - Managing the Topology on the Mesh Manager unit)
Installation Guide - MeshAP 2100/1100 Dual-Radio Wi-Fi Mesh Network Access Point
DOC-6200-0152 - 5 -
Chapter 2
General MeshAP Infrastructure Information
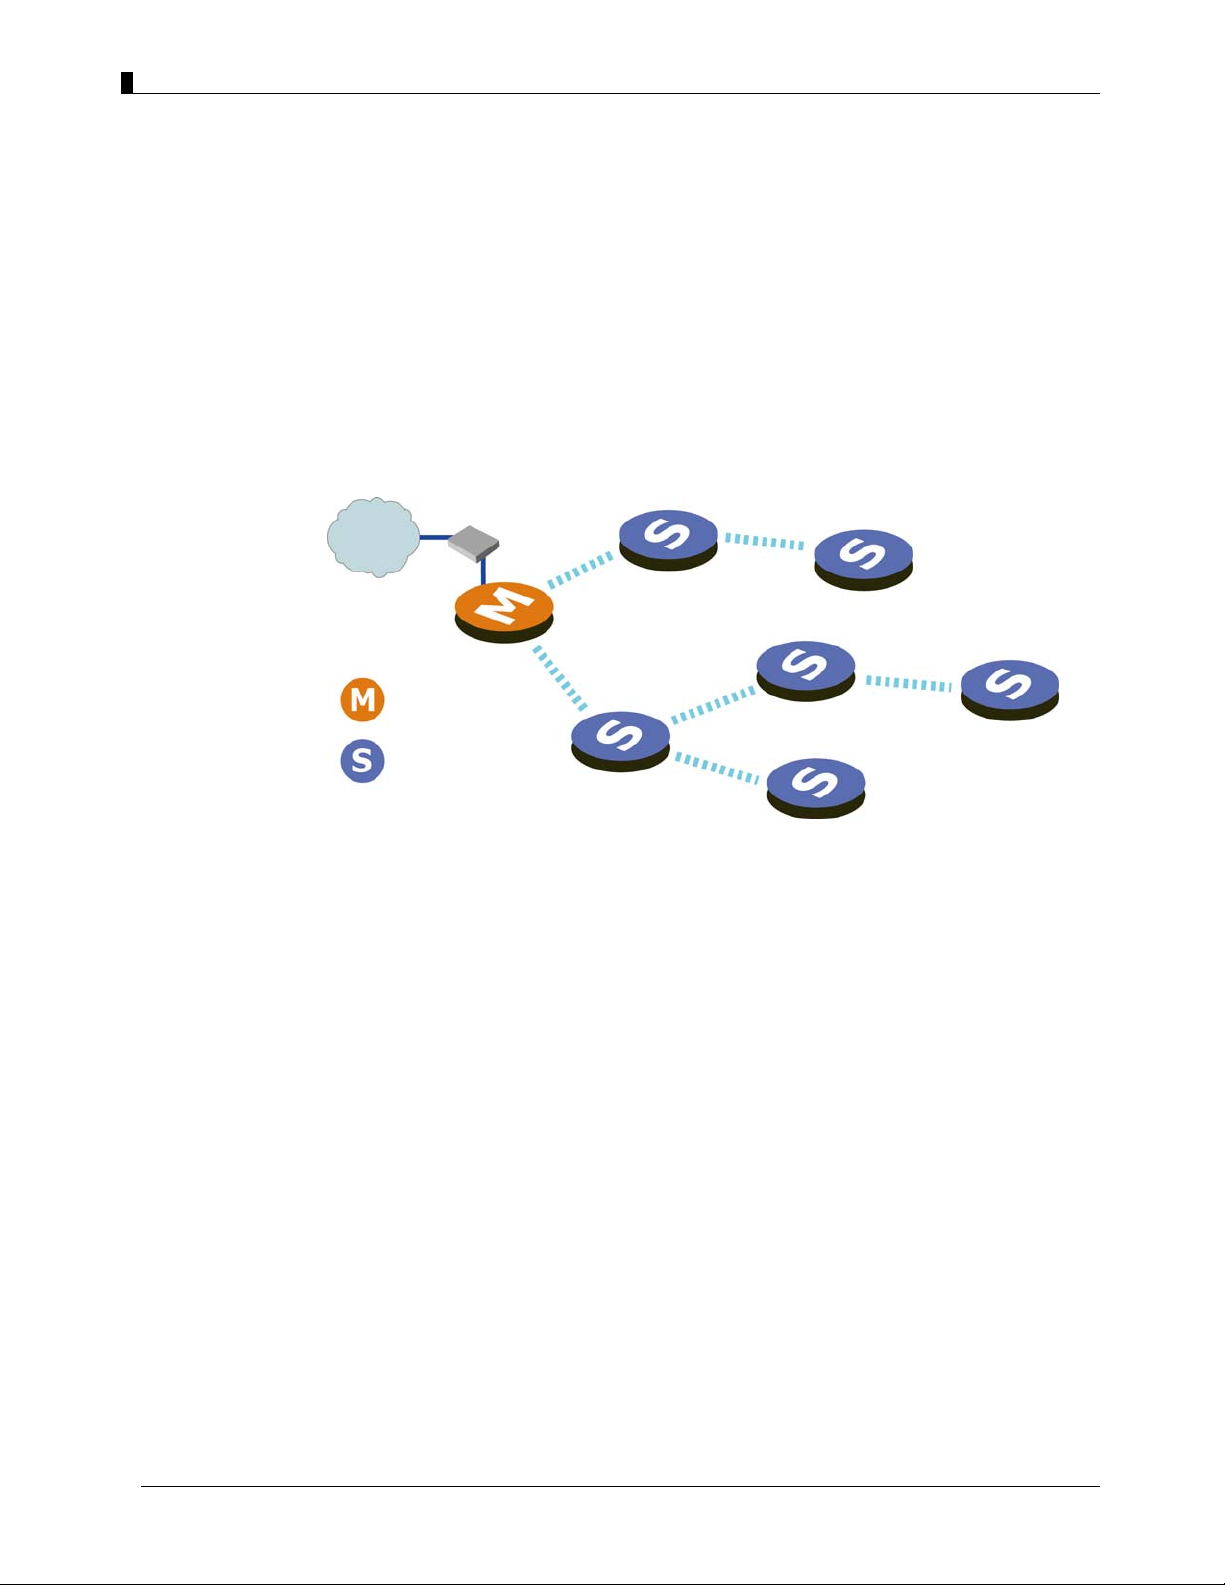
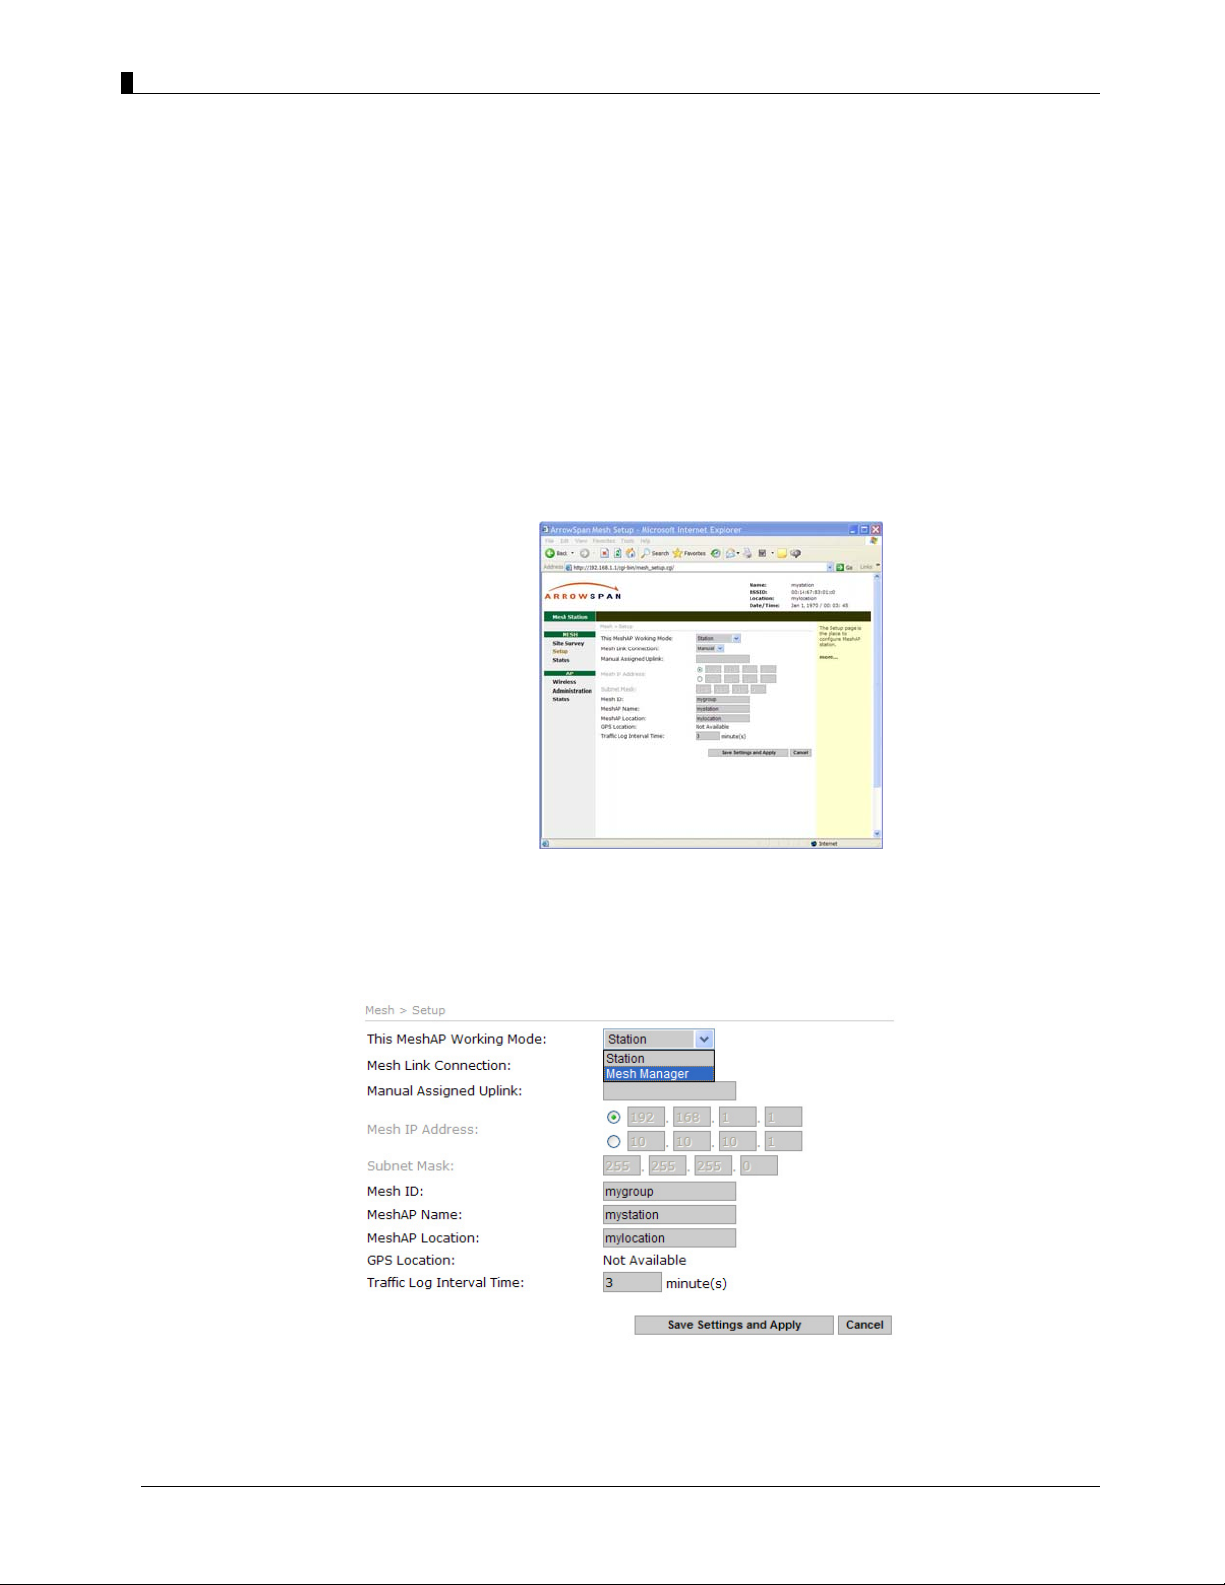
Mesh Manager – The MeshAP unit configures as the Mesh Manager and has a direct-
wired link to the Internet Gateway/Router/Access Server. It is used as the
management unit and Internet Gateway for the MeshAP unit (Station) on
the mesh network. (Any MeshAP access point could be configured as a
Mesh Manger unit.)
Station – The MeshAP unit configures as the Station (Hop), and is the child unit of the
Mesh Manager unit. Station units expand the wireless signal coverage for the
mesh network. Stations could be added to the mesh network based on the
network signal quality needs.
Mesh Manager
Station
Internet Gateway
Installation Guide - MeshAP 2100/1100 Dual-Radio Wi-Fi Mesh Network Access Point
DOC-6200-0152 - 6 -
Chapter 3
Mesh Manager Configuration
Setup Mesh Manager Unit
The Mesh Manager has a direct wired link to the existing network and Internet. The Mesh
Manager unit also manages all the Station units associated with the MeshAP.
ANY MeshAP unit could be setup as a Mesh Manager unit.
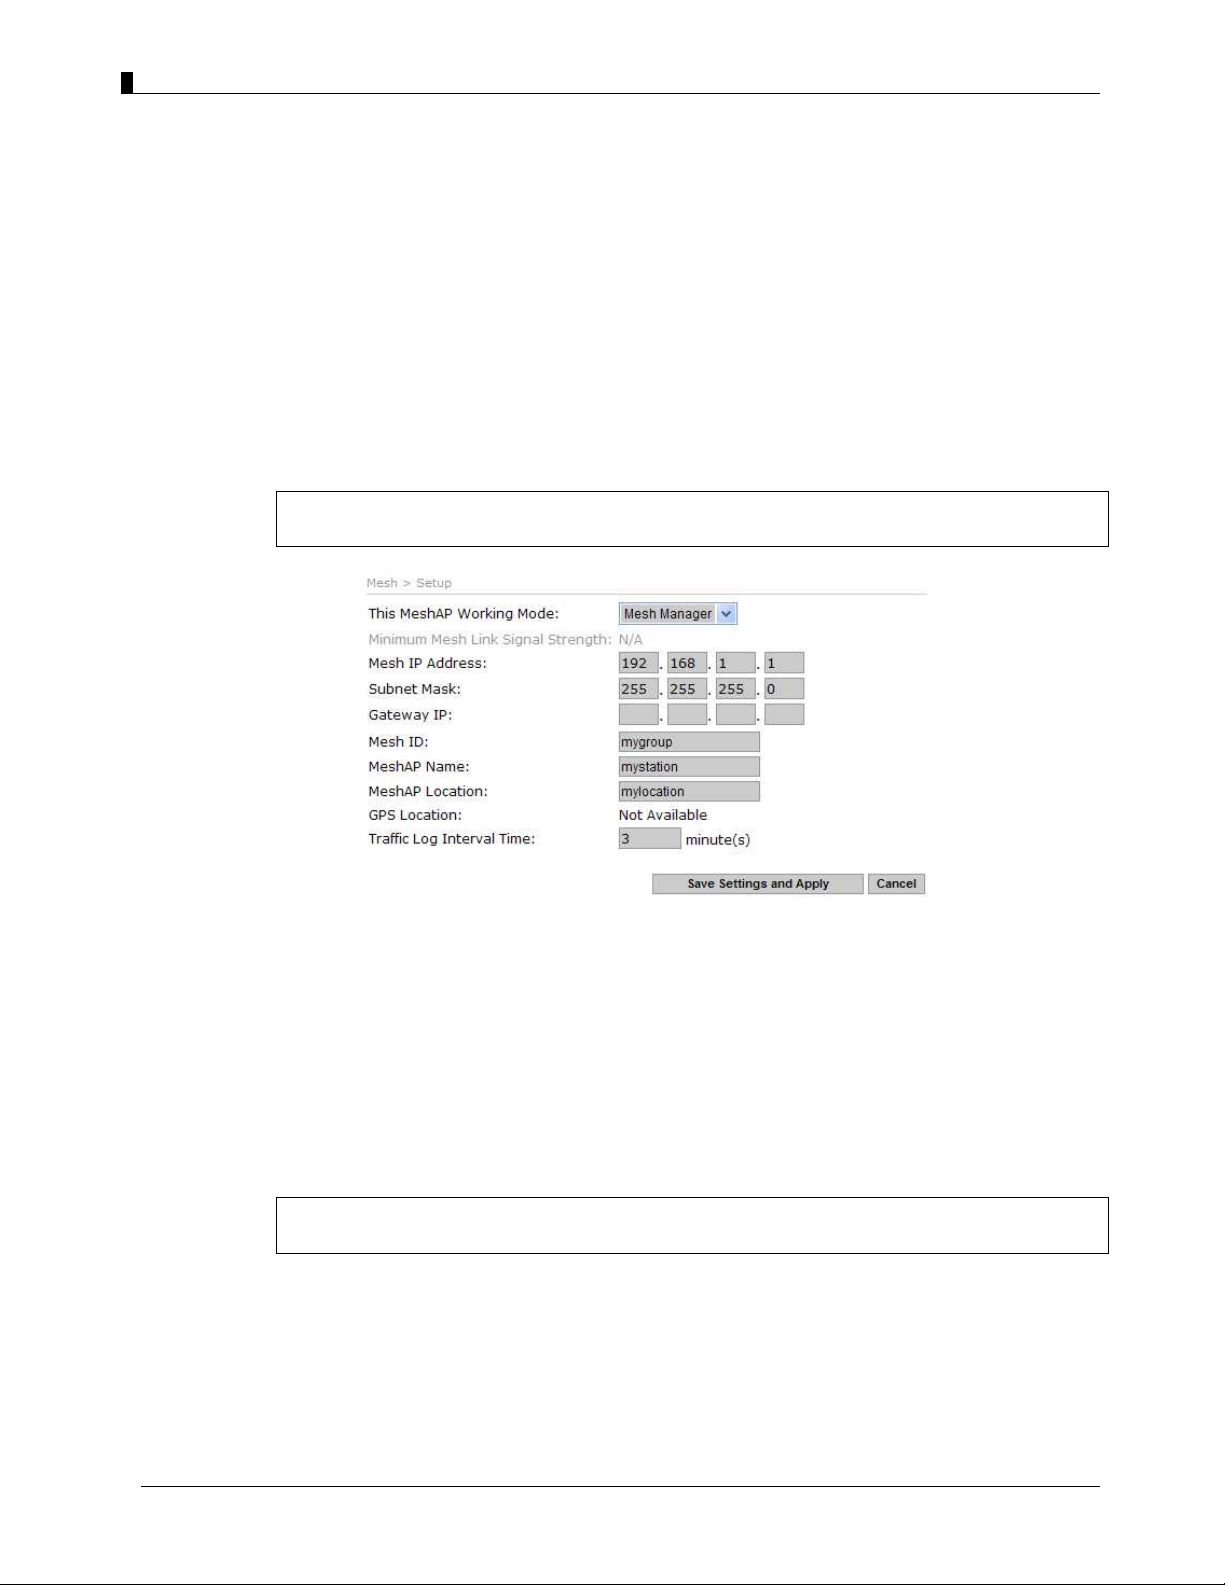
Step 1. Login to the MeshAP Access Point.
Step 2. Go to Setup page.
Step 3. Select “Mesh Manager” to assign a MeshAP unit to be a Mesh Manager unit on
the mesh network.
Ste
p
3
Installation Guide - MeshAP 2100/1100 Dual-Radio Wi-Fi Mesh Network Access Point
DOC-6200-0152 - 7 -
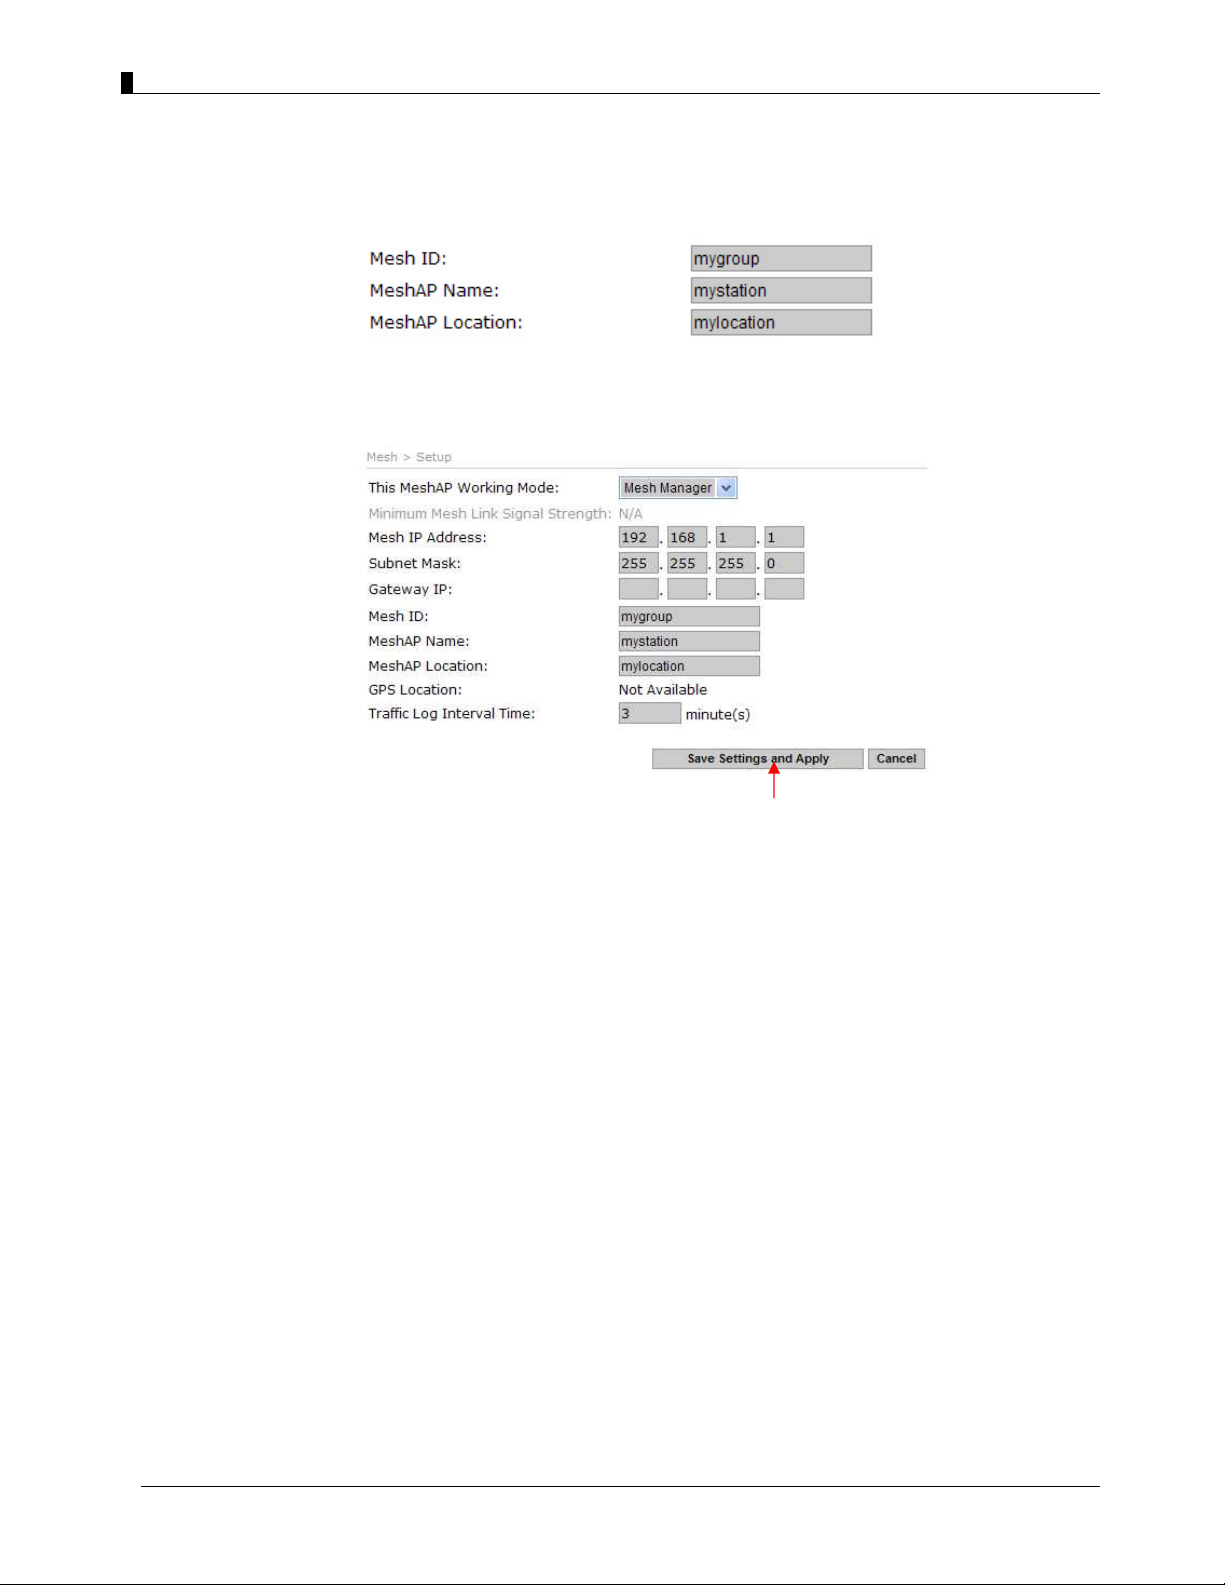
Step 4. Replace the default IP address with an IP address of your choice that could be
reached from the existing network. You can also select an IP address provided by
your ISP as your MeshAP IP Address
Replace the default Subnet Mask with the one belonging to the above IP address.
Enter the Gateway IP of the above IP address or the IP address provided by your
ISP as Gateway IP address. (For Offsite Remote Management)
IMPORTANT: Make sure that the gateway address and the IP address of the unit are
under the same network. If not, the unit may not be able to log-on because the network is
not logically connected.
EXAMPLE: (The IP address and Gateway are under the same domain.)
Mesh IP Address: 192.168.0.120, and Gateway IP: 192.168.0.1
Mesh ID
The Mesh ID is designed for the Service Provider/Carrier/Operator to create a unique
identification for its mesh network. Only the MeshAP Access Points under the same Mesh
ID will be able to associate with each other on the mesh network.
Step 6. Replace the default Mesh ID with a preferred name. It is important to have all the
MeshAP stations set under the same Mesh ID.
Note: MeshAP Stations MUST have the same Mesh ID to be able to associate with each
other and to be managed by the Mesh Manager unit.
Step 7. Update Station Name. (Station Name is NOT required, it is recommended for easy
identification of each Station.)
Ste
p
4
Installation Guide - MeshAP 2100/1100 Dual-Radio Wi-Fi Mesh Network Access Point
DOC-6200-0152 - 8 -
Step 8. Update Station Location. (Station Location is NOT required, it is recommended
for easy identification of each Station.)
Step 9. Click "Save Settings and Apply" to confirm changes.
Ste
p
6
Ste
p
7
Ste
p
8
Ste
p
9
Ce manuel convient aux modèles suivants
1
Table des matières
Autres manuels ArrowSpan Point d'accès sans fil

Manuels Point d'accès sans fil populaires d'autres marques

D-Link
D-Link DWL-2100AP - AirPlus Xtreme G Manuel utilisateur

Ubiquiti
Ubiquiti NanoStation NSM2 Manuel utilisateur

Cisco
Cisco Aironet 1550 Series Manuel utilisateur

Aruba
Aruba IAP-335 Manuel utilisateur

Advantek Networks
Advantek Networks AWN-AP-54MR Manuel utilisateur

IP-COM
IP-COM AP355 Manuel utilisateur


