ARCTIC WIND 2AD22A Manuel utilisateur

DEHUMIDIFER
MODEL 2AD22A / 2AD35A / 2AD50A / 2ADP50A
OWNER’S MANUAL

IMPORTANT:
Thank you for your purchase. Please read this manual carefully before operating.
Make sure to save this manual for future reference.

TABLE OF CONTENTS
FOR DEHUMIDIFIER MODELS
2AD22A
2AD35A
2AD50A
2ADP50A
SAFETY INFORMATION ...........................................................3
IDENTIFICATION OF PARTS ........................................................6
POSITIONING THE UNIT...........................................................7
OPERATING INSTRUCTIONS .......................................................8
OTHER FEATURES ..............................................................11
REMOVING THE COLLECTED WATER...............................................12
CARE AND MAINTENANCE .......................................................15
PREPARING FOR STORAGE ......................................................15
TROUBLESHOOTING TIPS........................................................16
3
SAFETY INFORMATION
Read these safety precautions before installation and operation.
For your safety, it is important that you read and follow the instructions in this manual to minimize the risk of personal
injury, re or electrical shock.
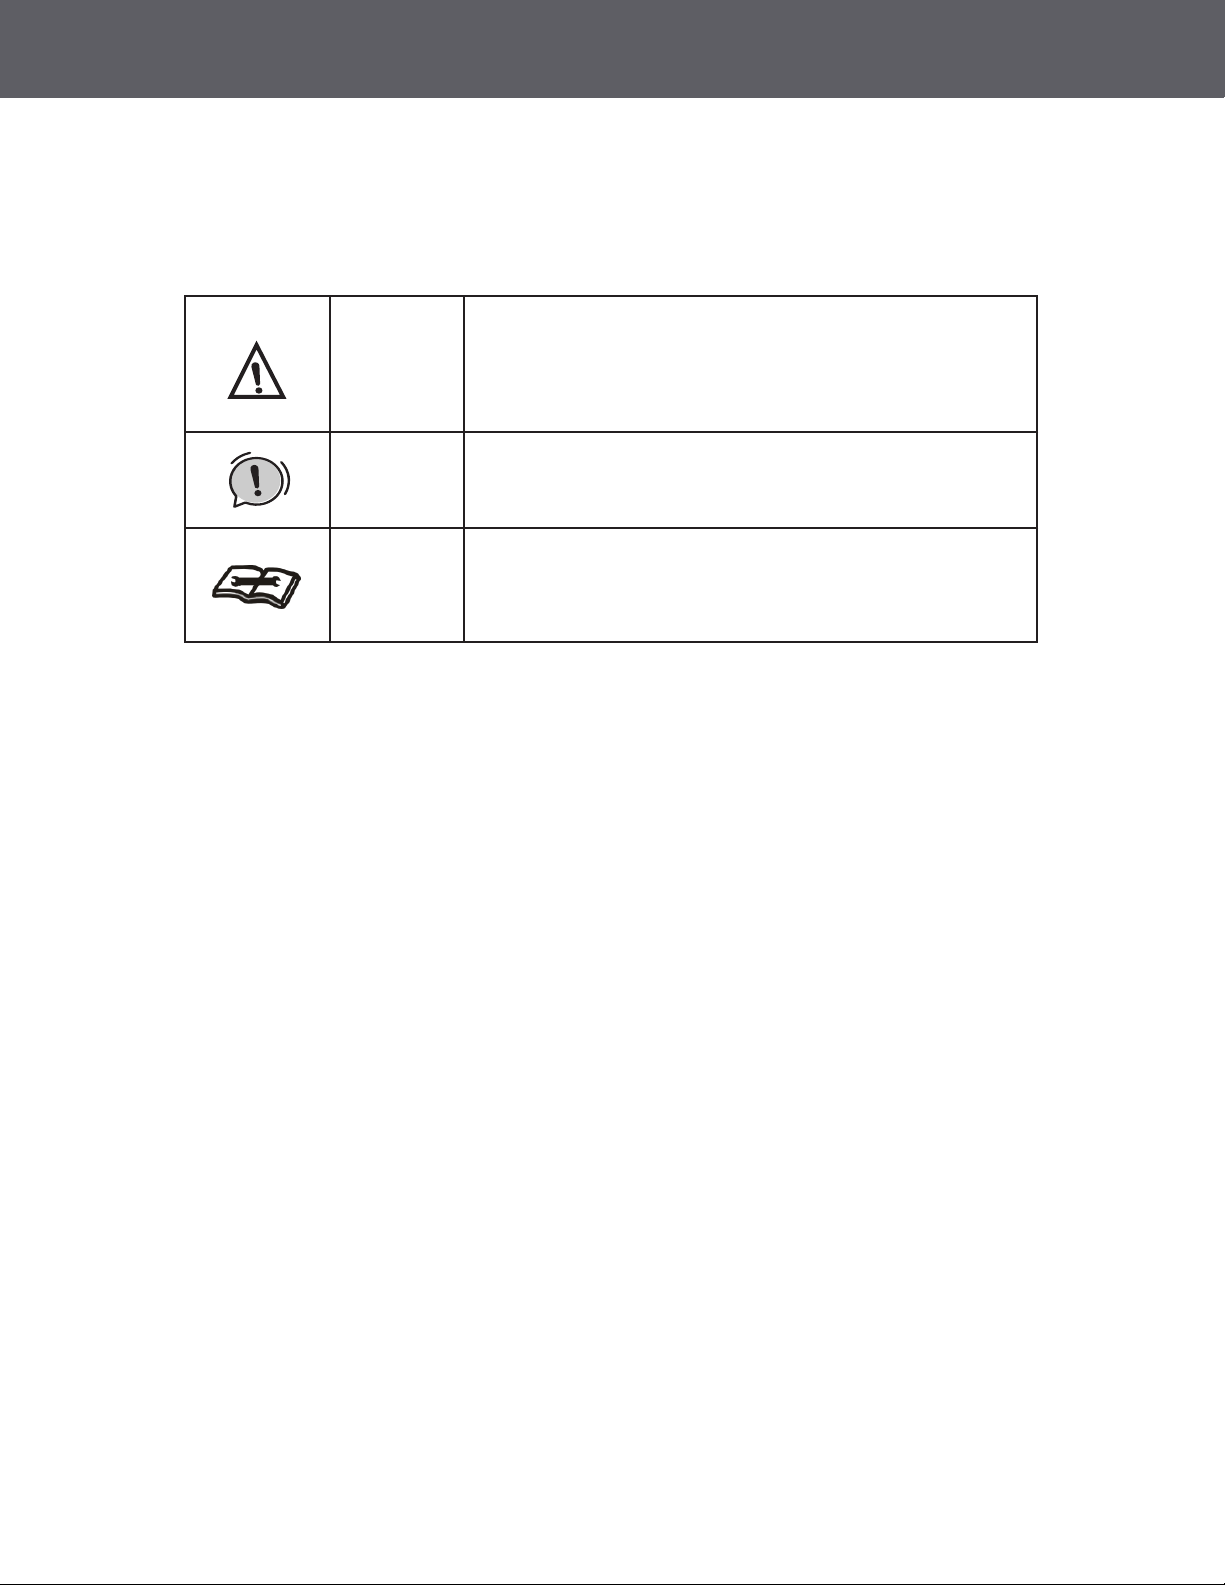
Warning
This symbol shows that this appliance uses a ammable
refrigerant. If a refrigerant leak occurs and is exposed to
an external ignition source, there is a risk of re.
This symbol shows that a service personnel should be
handling this equipment with reference to the installation
manual.
This symbol shows that the operation manual should be
read carefully.
Warning
Caution

4
SAFETY INFORMATION CONTINUED
CAUTION
• This dehumidier is intended for indoor residential us only and should not be used for
commercial or industrial applications. Do not use outdoors
• Do not place the unit near a heat source or other heat generating appliances such as
clothes dryer, heater or radiator
• Do not attempt to disassemble or repair the unit by yourself.
• Do not use or store the dehumidier near ammable gas or combustibles, such as gasoline,
benzene, thinner, or other chemicals, etc.
• Do not drink or use the water collected from the unit.
• Do not remove the water bucket during operation.
• Do not use the unit in small cramped spaces that are not well ventilated
• Do not store or use in areas where water may splash onto the unit.
• Place the unit on a level, sturdy section of the oor.
• Do not cover the intake or exhaust openings.
• Never insert your nger or other foreign objects into grills or openings. Take special care
towarn children of these dangers.
• Do not climb or sit on the unit.
• Always insert the lters securely. Clean lter once every two weeks. If water enters the unit,
turn the unit o and disconnect the power , contact a qualied service technician.
• Do not place foreign objects on the unit.
• The dehumidier must be operated in an enclosed area to be most eective.
• Close all doors, windows and other outside openings to the room.
• When rst using the dehumidier, operate the unit continuously 24 hours. Make sure the
plastic cover on the continuous drain hose outlet is tted properly so there are no leaks.
• This unit is designed to operate with a working environment between 5ºC/41ºF and
32ºC/90ºF, and between 30%(RH) and 80%(RH).

5
SAFETY INFORMATION CONTINUED
WARNING: FOR YOUR SAFETY
• The dehumidier should not be stored in a room with continuously operating ignition
sources (for example: open ames, an operating gas appliance or an operating electric
heater).
• Do not pierce or burn this dehumidier
• Be aware that the refrigerant contained within this dehumidier is odorless
• Appliance should be installed, operated and stored in a room with a oor area larger
than 50 ft2.
• Compliance with national gas regulations shall be observed.
• Keep ventilation openings clear of obstruction.
• Servicing shall only be performed an authorized service provider recommended by the
equipment manufacturer.
• Maintenance and repair requiring the assistance of other skilled personnel shall be carried
out under the supervision of the person competent in the use of ammable refrigerants.
• Fluorinated greenhouse gases are contained in hermetically sealed
equipment. For specic information on the type, the amount and the
CO2 equivalent in tons of the uorinated greenhouse gas (on some
models), please refer to the relevant label on the unit itself.
• Installation, service, maintenance and repair of this unit must be
performed by a certied technician.
• Recycling must be performed by a certied technician.
NOTE ABOUT FLUORINATED GASES (NOT APPLICABLE TO THE UNIT USING R290 REFRIGERANT)

6
IDENTIFICATION OF PARTS
BEFORE YOU BEGIN
NOTE: All the illustrations in the manual are for explanation purpose only. Your dehumidifier
may be slightly different. The design specifications are subject to change without prior
notice. Consult with the customer service for details. The most up-to-date versions of the
manual can be found on the service website. Please check for the latest version.
Accessories (shipped in the bucket of the unit)
Power Cord Holder Installation
Power Cord Holder (1PC) Female Threaded Connector (1PC)
(some models)
Pump Drain Hose
(1PC) (some models)
Fig 1
Fig 2
Fig 3
7
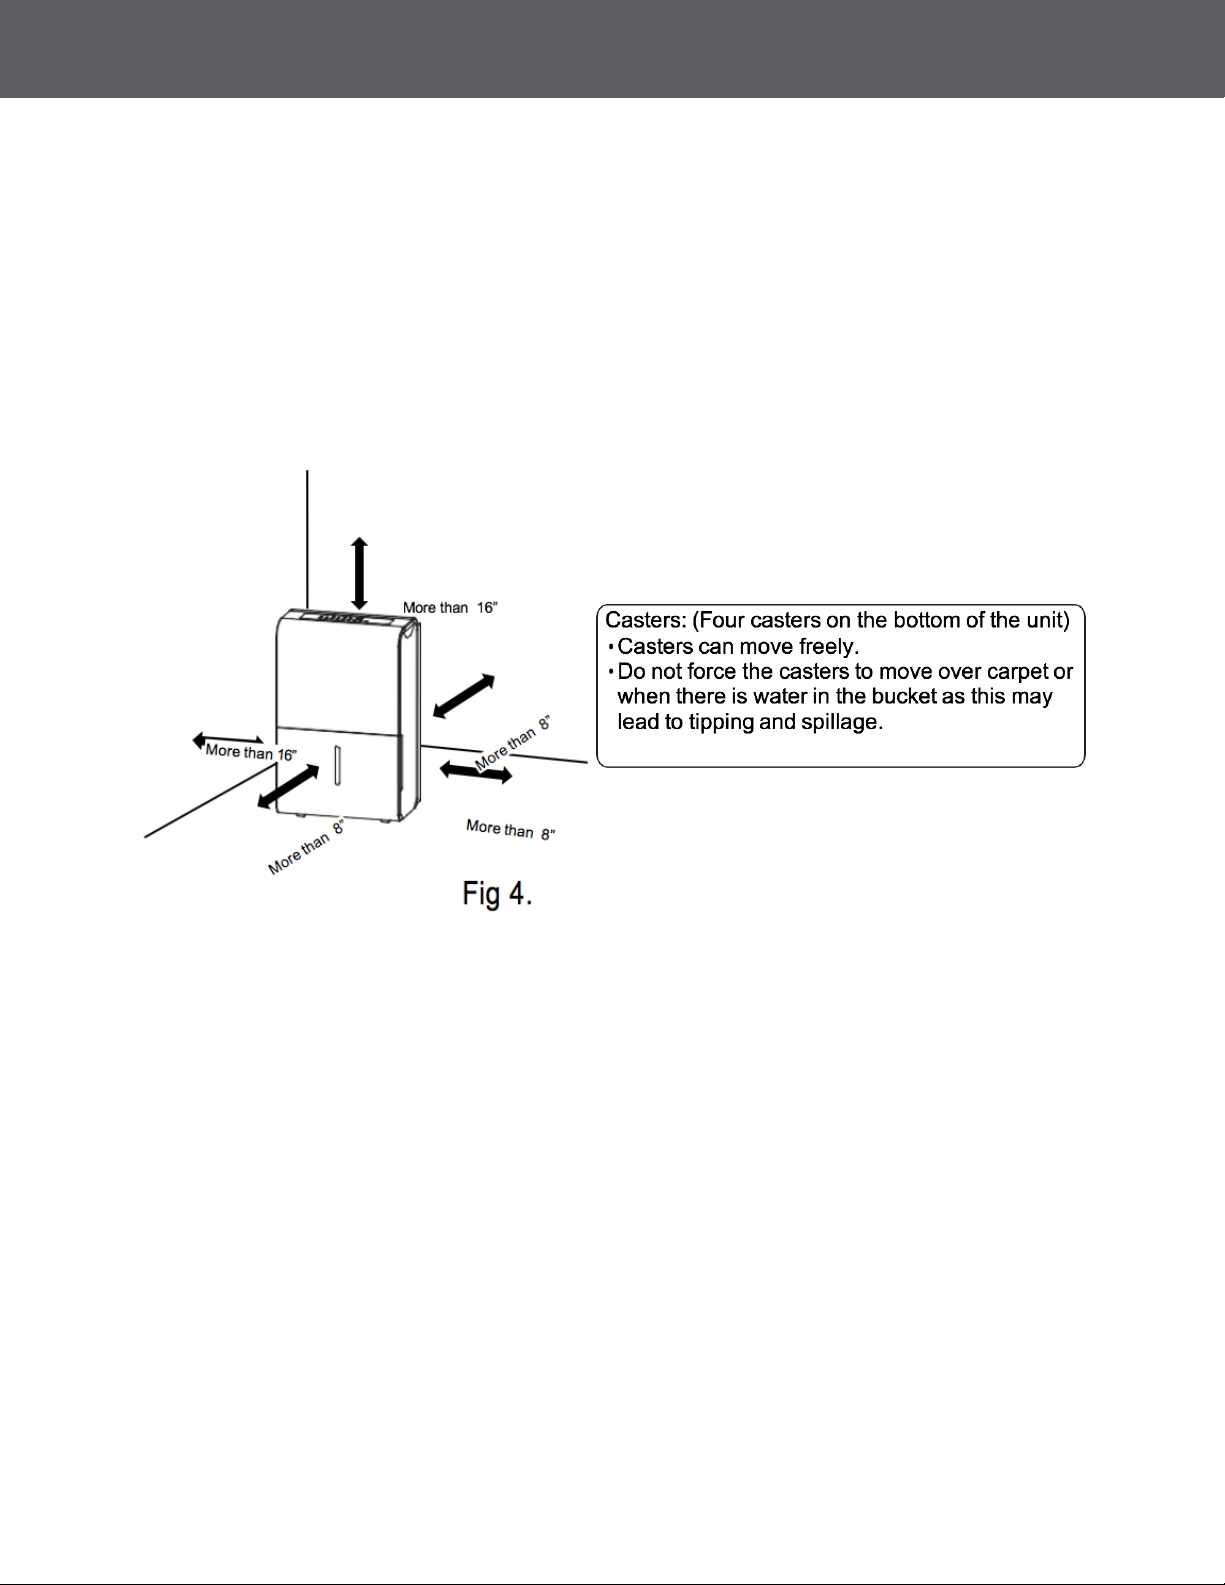
POSITIONING THE UNIT
This dehumidier should not be used for commercial or industrial applications.
Place the dehumidier on a smooth, level oor strong enough to support the unit with a full bucket of water.
For good air circulation, allow at least 8 inches of air space on all sides of the unit and a minimum of 16
inches of air space at the air outlet (Fig. 4)
Place the unit in an area where the temperature will not fall below 410 F (50 C) because low temperature
could cause the coil the freeze.
8
OPERATING INSTRUCTIONS
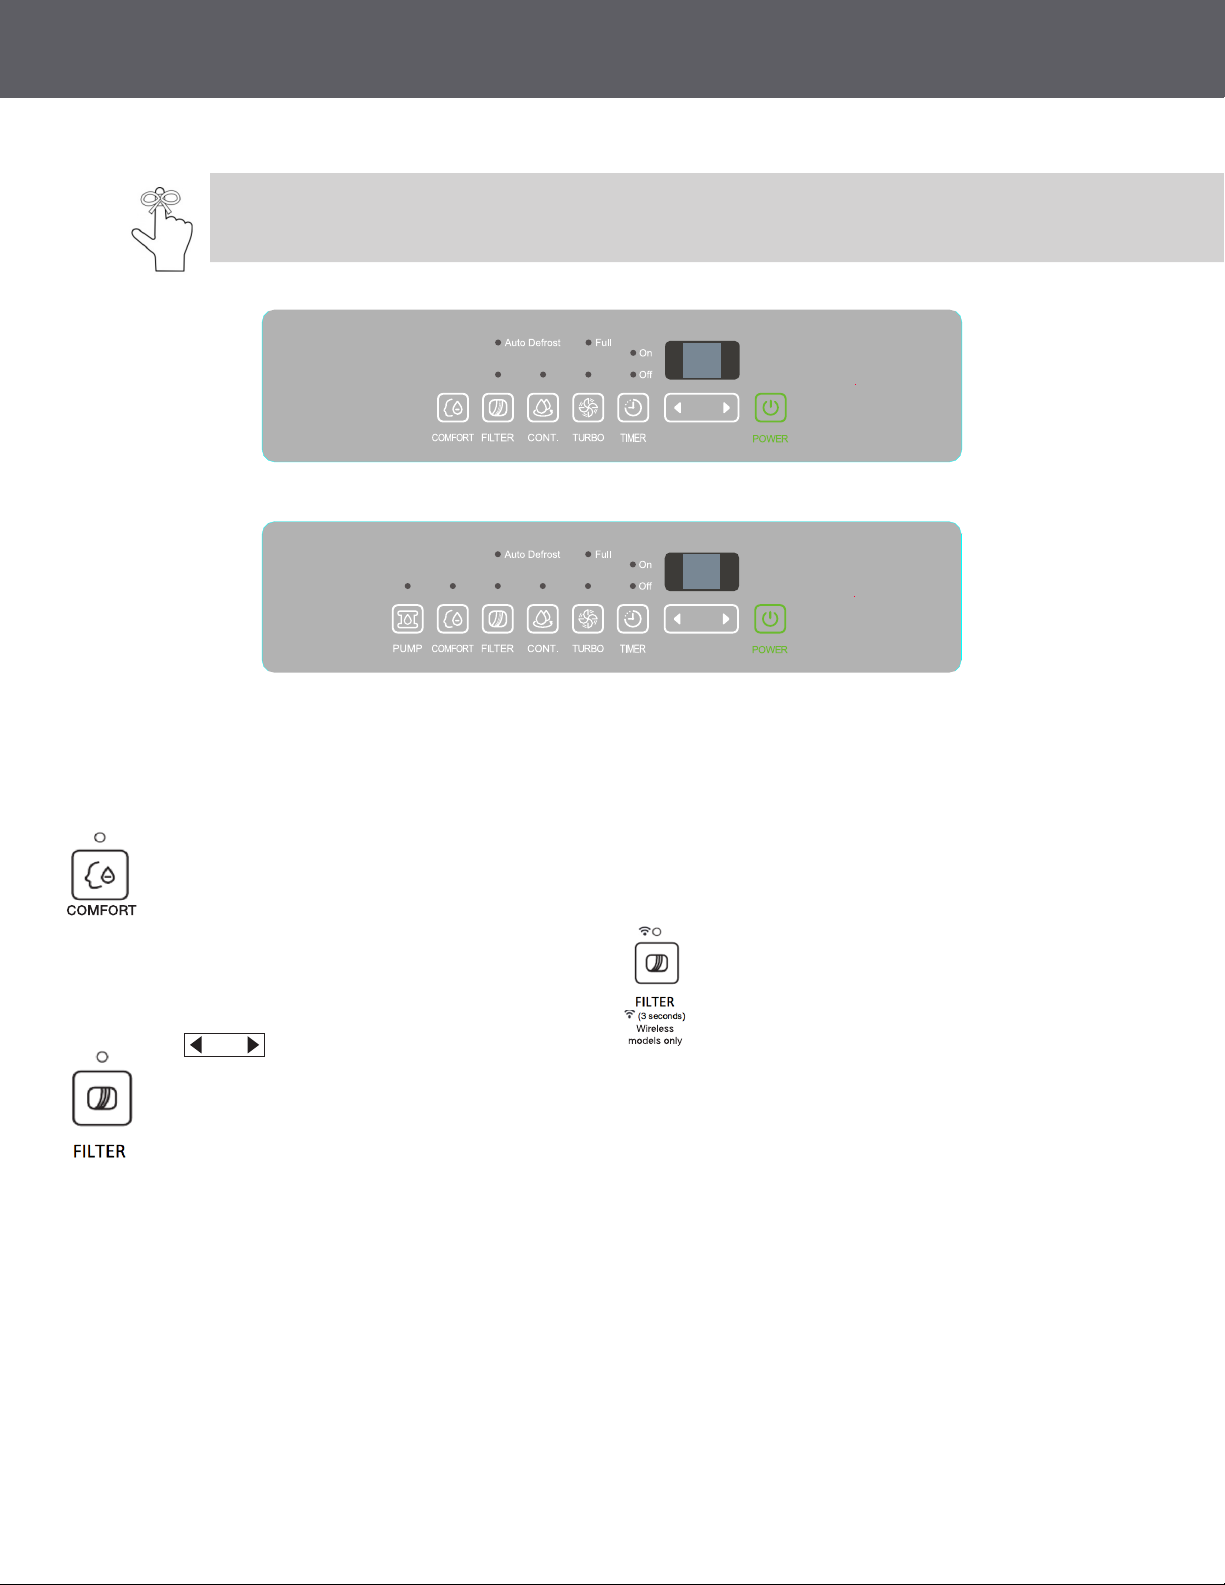
COMFORT Button ________________________
• This dehumidication setting automatically
keeps the humidity level in the room
between 45%-55% relative humidity
(based on room temperature).
• When operating in this mode the touch pad
• ( ) will be deactivated and you will
NOT be able to set a desired humidity level.
FILTER Button __________________________
• The FILTER light (clean lter indicator light)
will illuminate after 250 hours of fan motor
operation. This feature is a reminder
to clean the air lter for more ecient
operation of the dehumidier.
• Reset the timer after cleaning the lter by
pressing and holding the FILTER button
until the light goes o.
• To initiate the Wireless connection mode
(some models only), press the lter button
for 3 seconds when the unit is powered on
or powered o.
• The LED DISPLAY will display “AP” to
indicate you have entered the wireless
setup mode (if the unit running, the
compressor will shut o).
• If the connection to the (router) is successful
within 8 minutes, the unit will exit wireless
connection mode automatically and the
WIRELESS indicator light will illuminate and
the compressor will resume operation.
• If the connection is unsuccessful within
8 minutes, the unit will exit the Wireless
connection mode automatically.
Control Panel Features:
Note: The following control panels are for explanation purpose only. The control panel of the unit you
purchased may be slightly different according to the models. Your machine may not contain some indicators
or buttons. The actual shape shall prevail.
2AD22A, 2AD35A, 2AD50A
2ADP50A

9
OPERATING INSTRUCTIONS
CONTINUE button _______________________
• Press to activate the continuous
dehumidifying operation.
• If the CONT. mode is selected the unit will
continue to dehumidify and will not be
controlled to a specic humidity setting.
• The humidity setting cannot be adjusted.
• To adjust the humidity sitting, press the
CONT. button to cancel the continuous
mode.
TURBO button __________________________
• The Turbo button is to toggle between
normal fan speed and the highest fan speed
(Turbo).
• Press to select either High or Normal fan
speed.
• Set the unit to turbo by pressing the TURBO
button (green light illuminated) for maximum
moisture removal.
• When the desired humidity level has been
reached, press the TURBO button once
more (green line will extinguish) to return to
normal operation.
TIMER button __________________________
• Timer button is used in conjunction with
the (Humidity Control) buttons
to initiate the Auto start and Auto stop
feature.
Setting the Timer _______________________
• The TIMER button can be used to set a
desired ON or OFF time for the dehumidier.
The ON time or OFF time setting can only
be set in increments of 0.5 hr. up to 10 hrs.
and 1hr increments from 10 to 24 hrs.
• Press the TIMER button, the timer O or On
indicator light illuminates. This indicates the
auto stop/start program is initiated.
• Press or hold the or button to change
the desired stop/start time by 0.5 hour
increments, up to 10 hours, then at 1 hour
increments from 10 to 24 hours from the
time the feature is set. The control will
count down the time remaining until the
dehumidier stops/starts.
• Press the TIMER button again the timer On
indicator light illuminates. This indicates the
auto start program is initiated.
• Press or hold the or button to
change the desired start time by 0.5hour
increments, up to 10 hours, then at 1 hour
increments from 10 to 24 hours from the
time the feature is set. The control will count
down the time remaining until starts.
• When the Timer On & Timer O times are
set, within the same program sequence,
both On and O indicator lights will
illuminate indicating both On and O times
are programmed.
• Turning the unit On or O at any time or
adjusting the timer setting to 0.0 will cancel
the Auto Start / Stop function.
• If the water bucket is full and the LED
display window displays P2, the Auto
Start /Stop function will also be canceled.
Note:
• If the unit is off, the timer “On” indicator
be the first to illuminate.
• If the dehumidifier is on, the timer
“Off” indicator will first illuminate.
• Toggle between Timer On and Timer Off
by pressing the TIMER button.
Ce manuel convient aux modèles suivants
3
Table des matières


