2 www.allmand.com
Locate and identify the kit contents using the table below.
(Note: Contents may be contained in multiple packages.)
Ref Description Qty
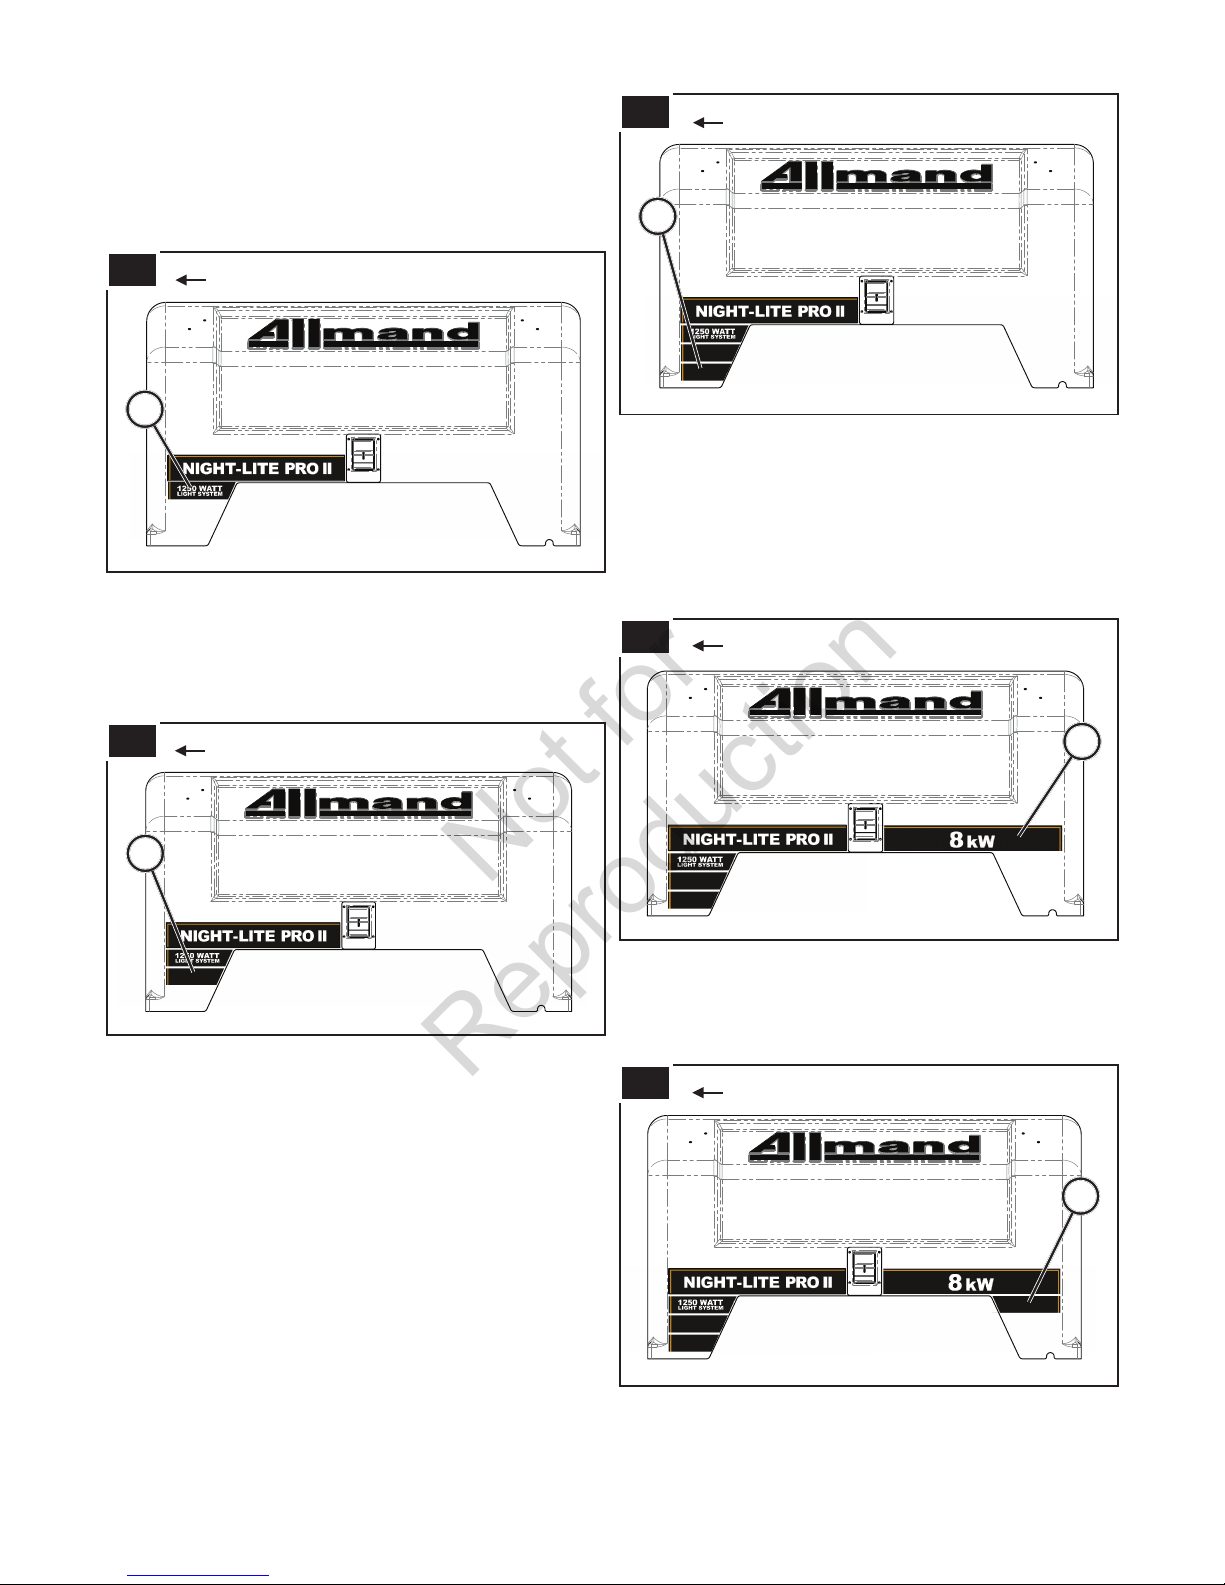
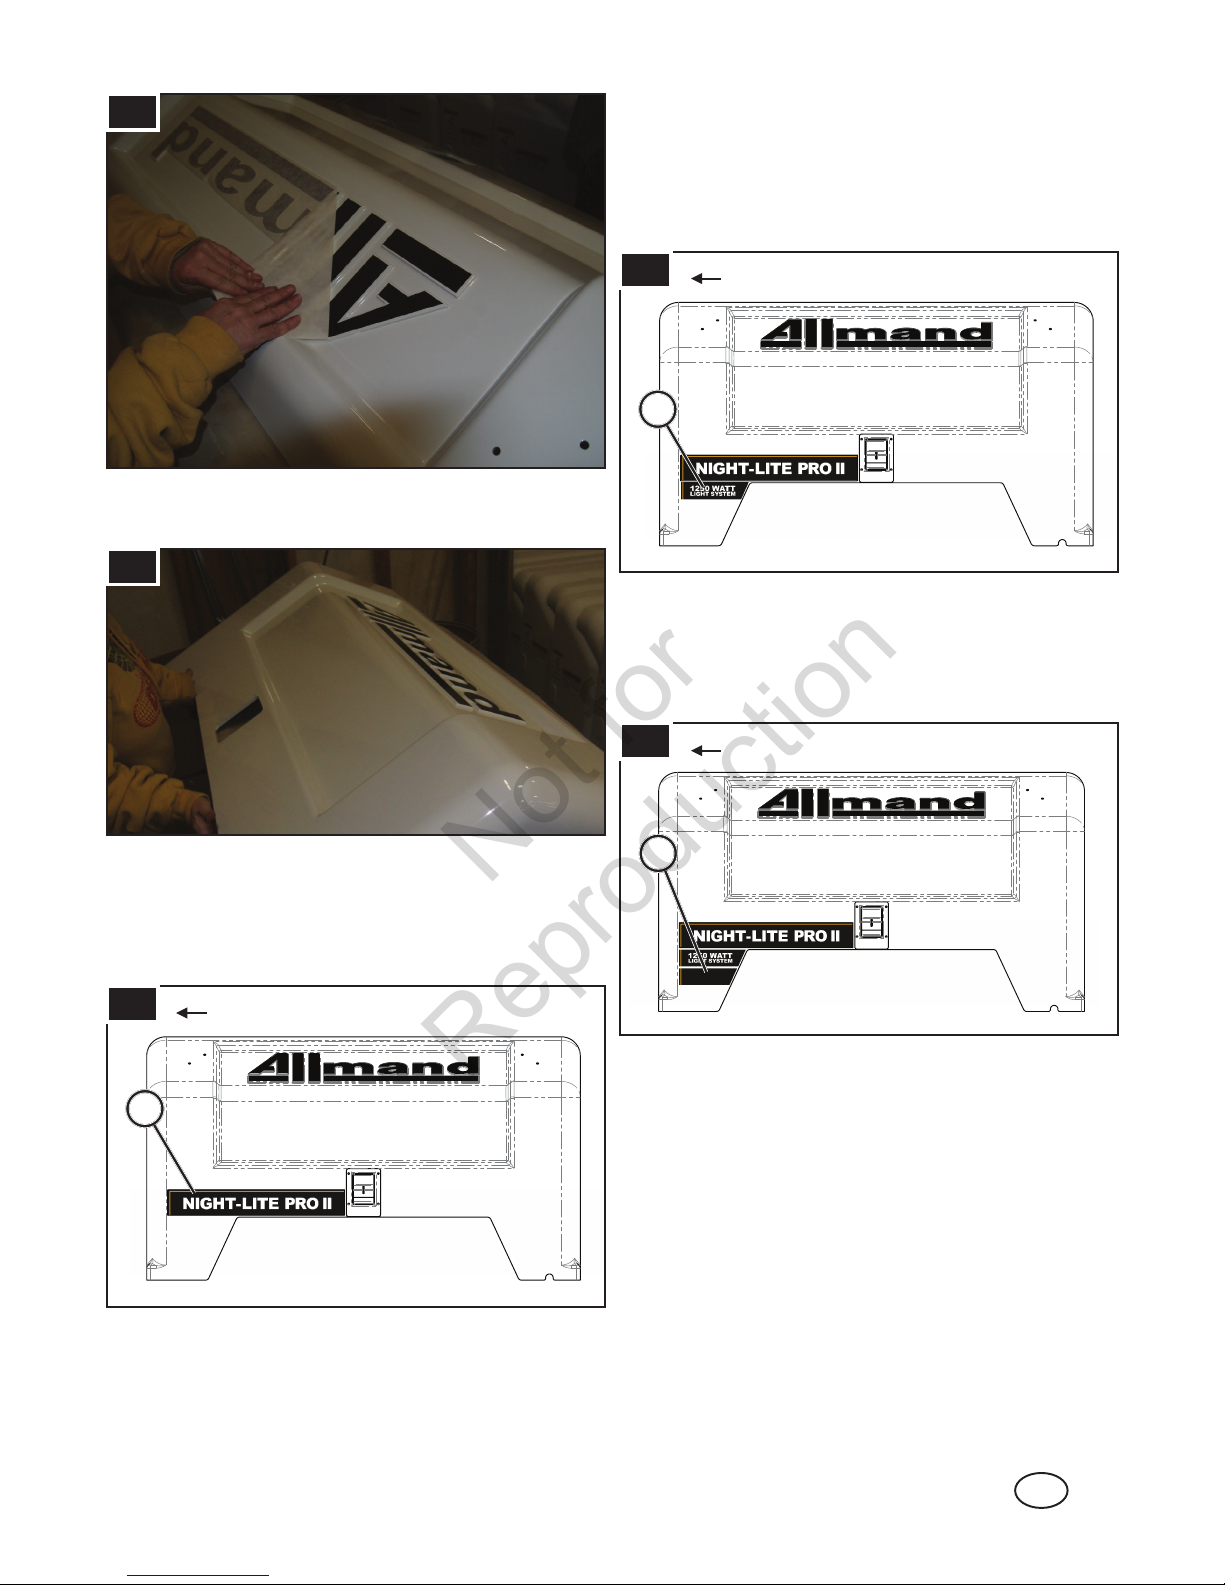
1. Allmand raised letter door decal 1
2. Night-Lite Pro II door stripe decal 1
3. 1250 Watt door stripe decal 1
4. 1000 Watt door stripe decal 1
5. LED door stripe decal 1
6. blank door stripe decal 1
7. blank door stripe decal 1
8. 8kW door stripe decal 1
9. 7.5kW door stripe decal 1
10. 6kW door stripe decal 1
11. blank door stripe decal 1
12. blank door stripe decal 1
13. blank door stripe decal 1
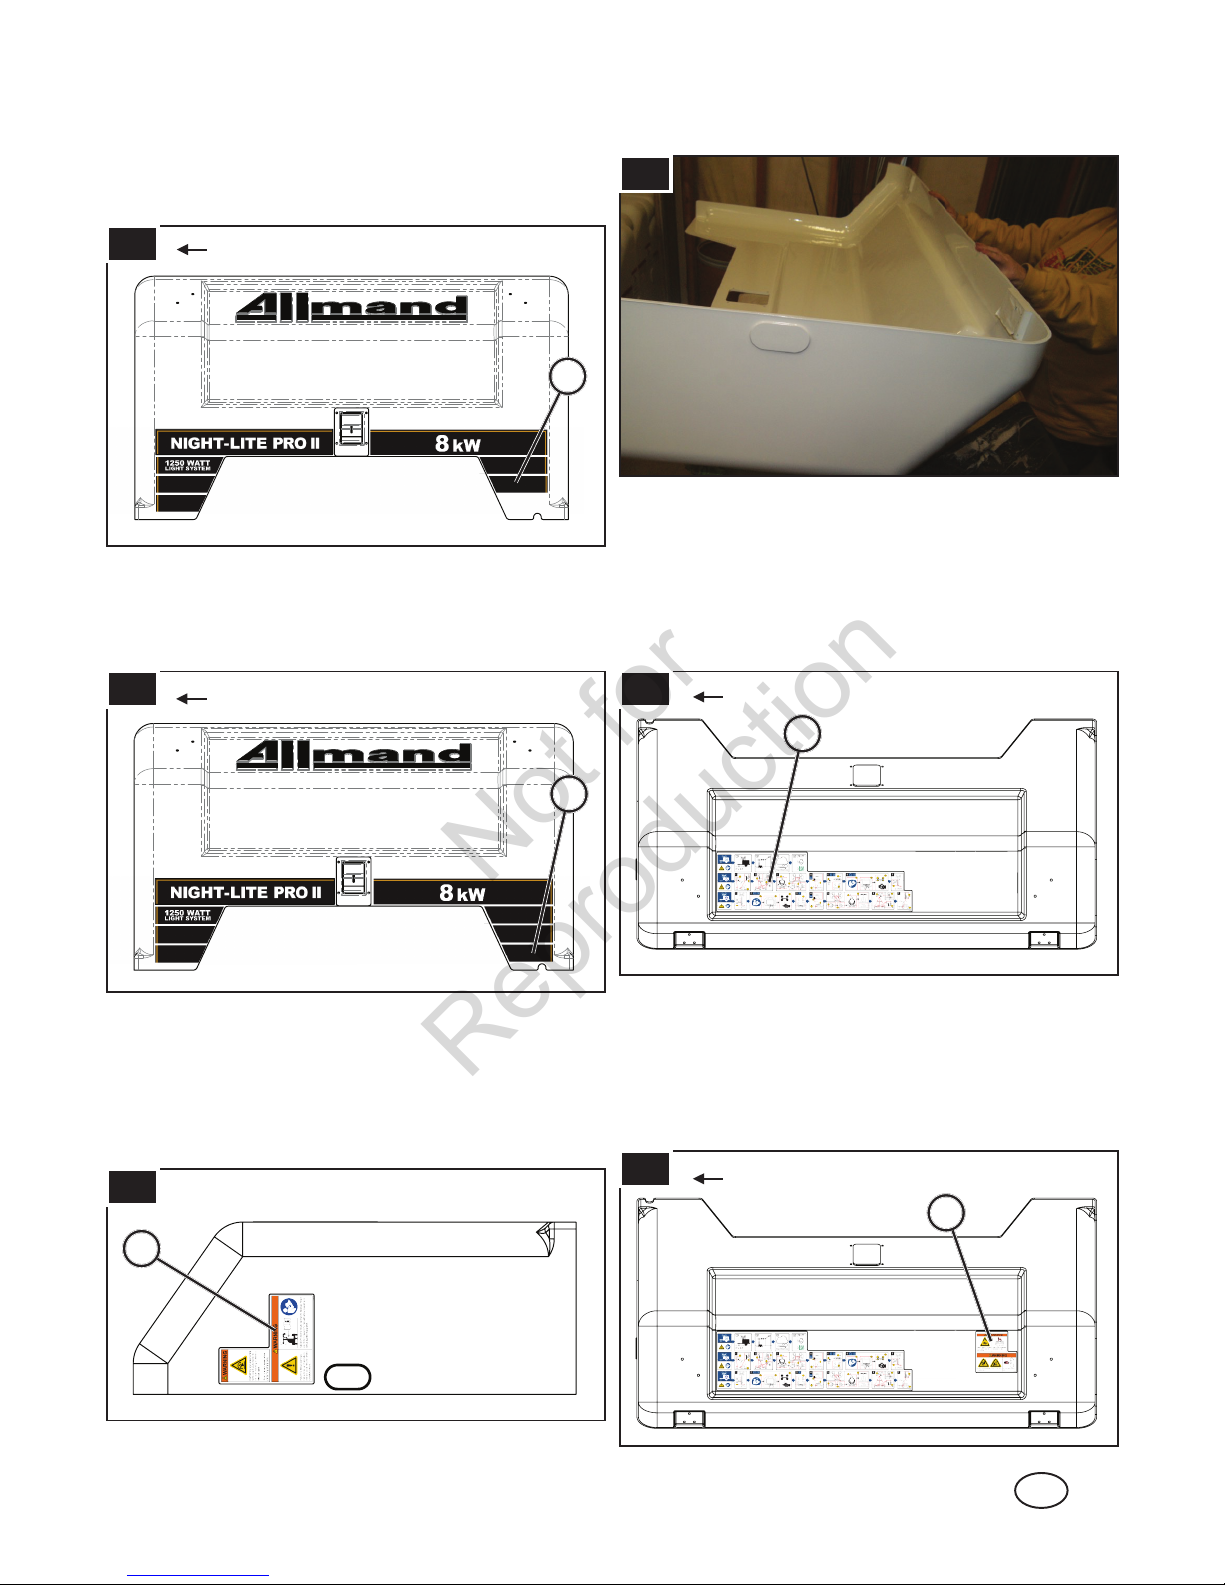
14. radiator/entanglement warning decal 1
15. wordless laydown tower 4 panel decal 1
16. vertical tower operator wordless decal 1
17. laydown tower operator wordless decal 1
18. LSC vertical tower operator wordless decal 1
19. LSC laydown tower operator wordless decal 1
20. wordless outriggers warning decal 1
21. wordless LSC auto start warning decal 1
22. wordless power line danger decal 1
23. wordless radiator/entanglement warning
decal
1
24. wordless operator/roll over warning decal 1
25. laydown tower 4 panel decal 1
26. LSC auto start warning decal 1
27. power line danger decal 1
28. outriggers warning decal 1
29. operator/roll over warning decal 1
30. 5kW door stripe decal 1
31. 7kW door stripe decal 1
Models This Instruction Covers
If uncertain about any of the information in this instruction,
or if questions or problems arise, contact the Allmand
service department at 1-800-562-1373, or contact through
the Allmand website, www.allmand.com
• Night-Lite Pro II™ V-Series
• Night-Lite Pro II™ LD-Series
Kit Contents
Allmand Parts & Service
1. Find suitable space or table to place the Night-Lite Pro
II door on for decal installation.
2. The surface of door should be cleaned thoroughly and
allowed to dry prior decal installation. This will help to
ensure a long-lasting adhesion to the surface.
3. If available, use a decal squeegee to smooth out decal
for better application.
4. Search through the instructions and choose the
correct Night-Lite Pro II decal door installation of either
the right door, left V-Series door, or left LD-Series door.
Before Kit Installation
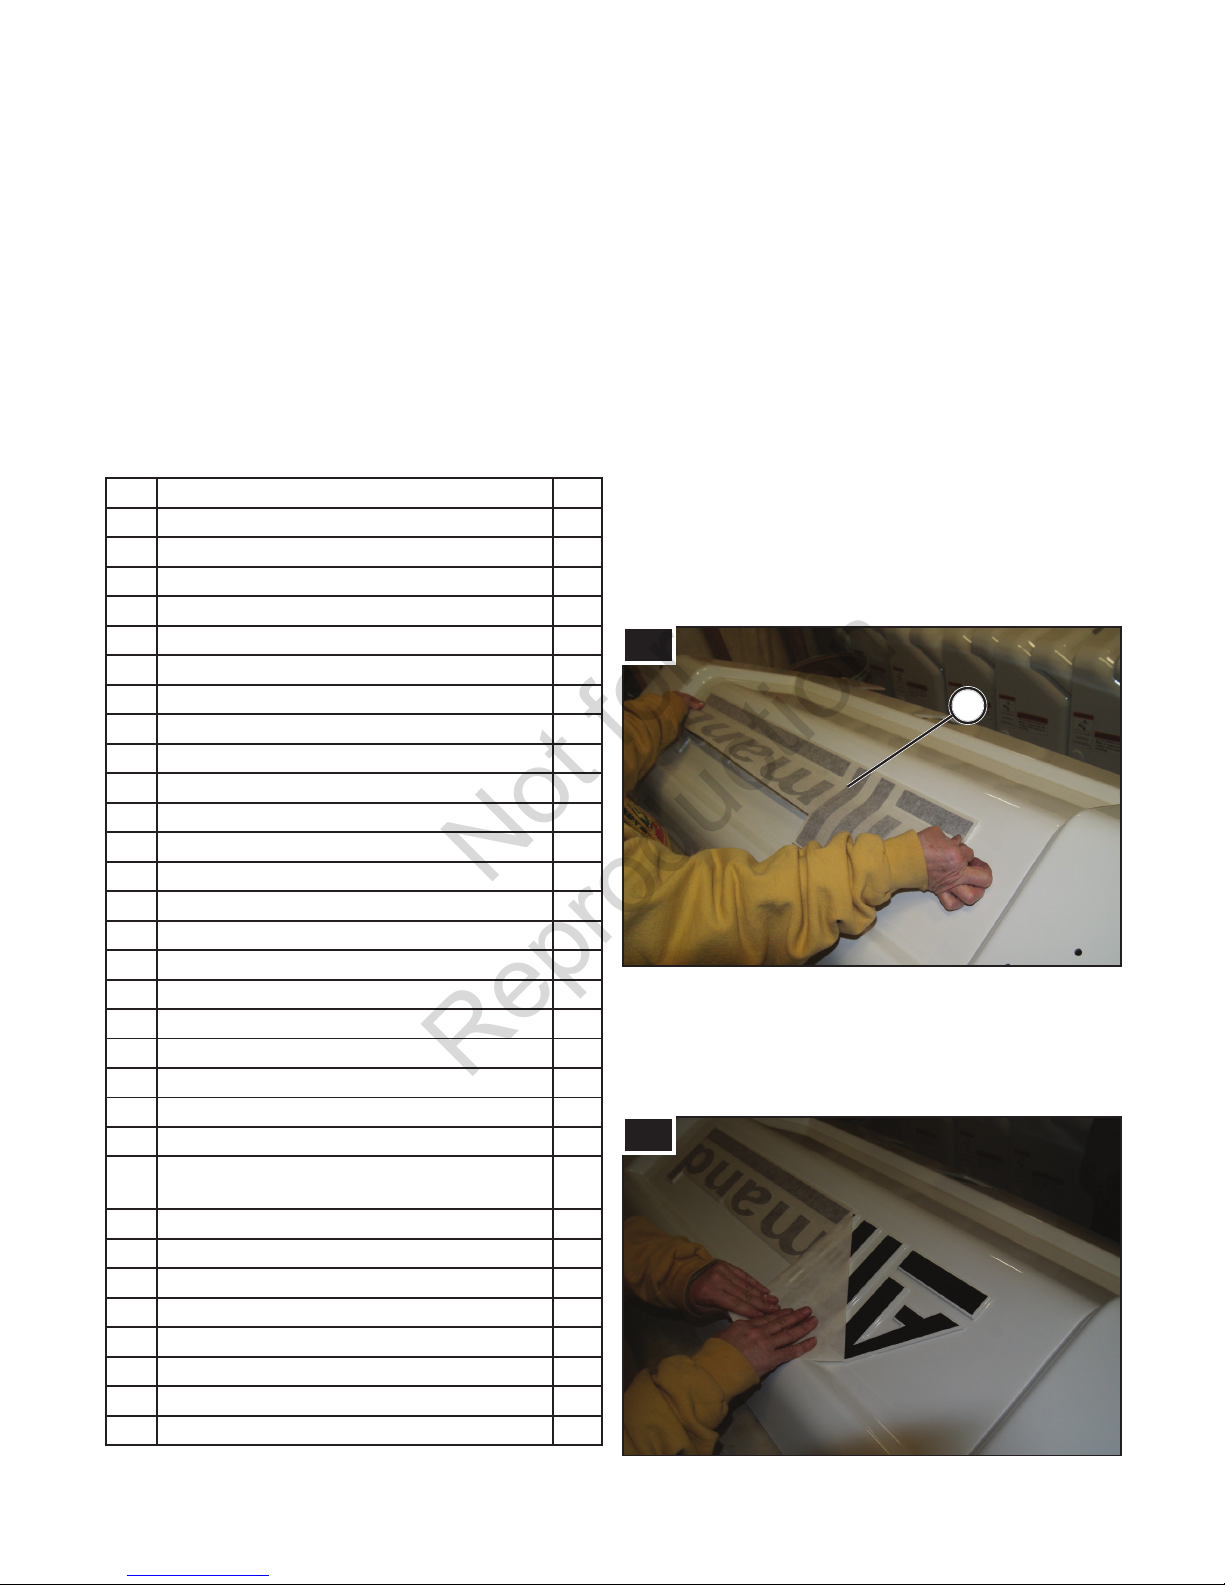
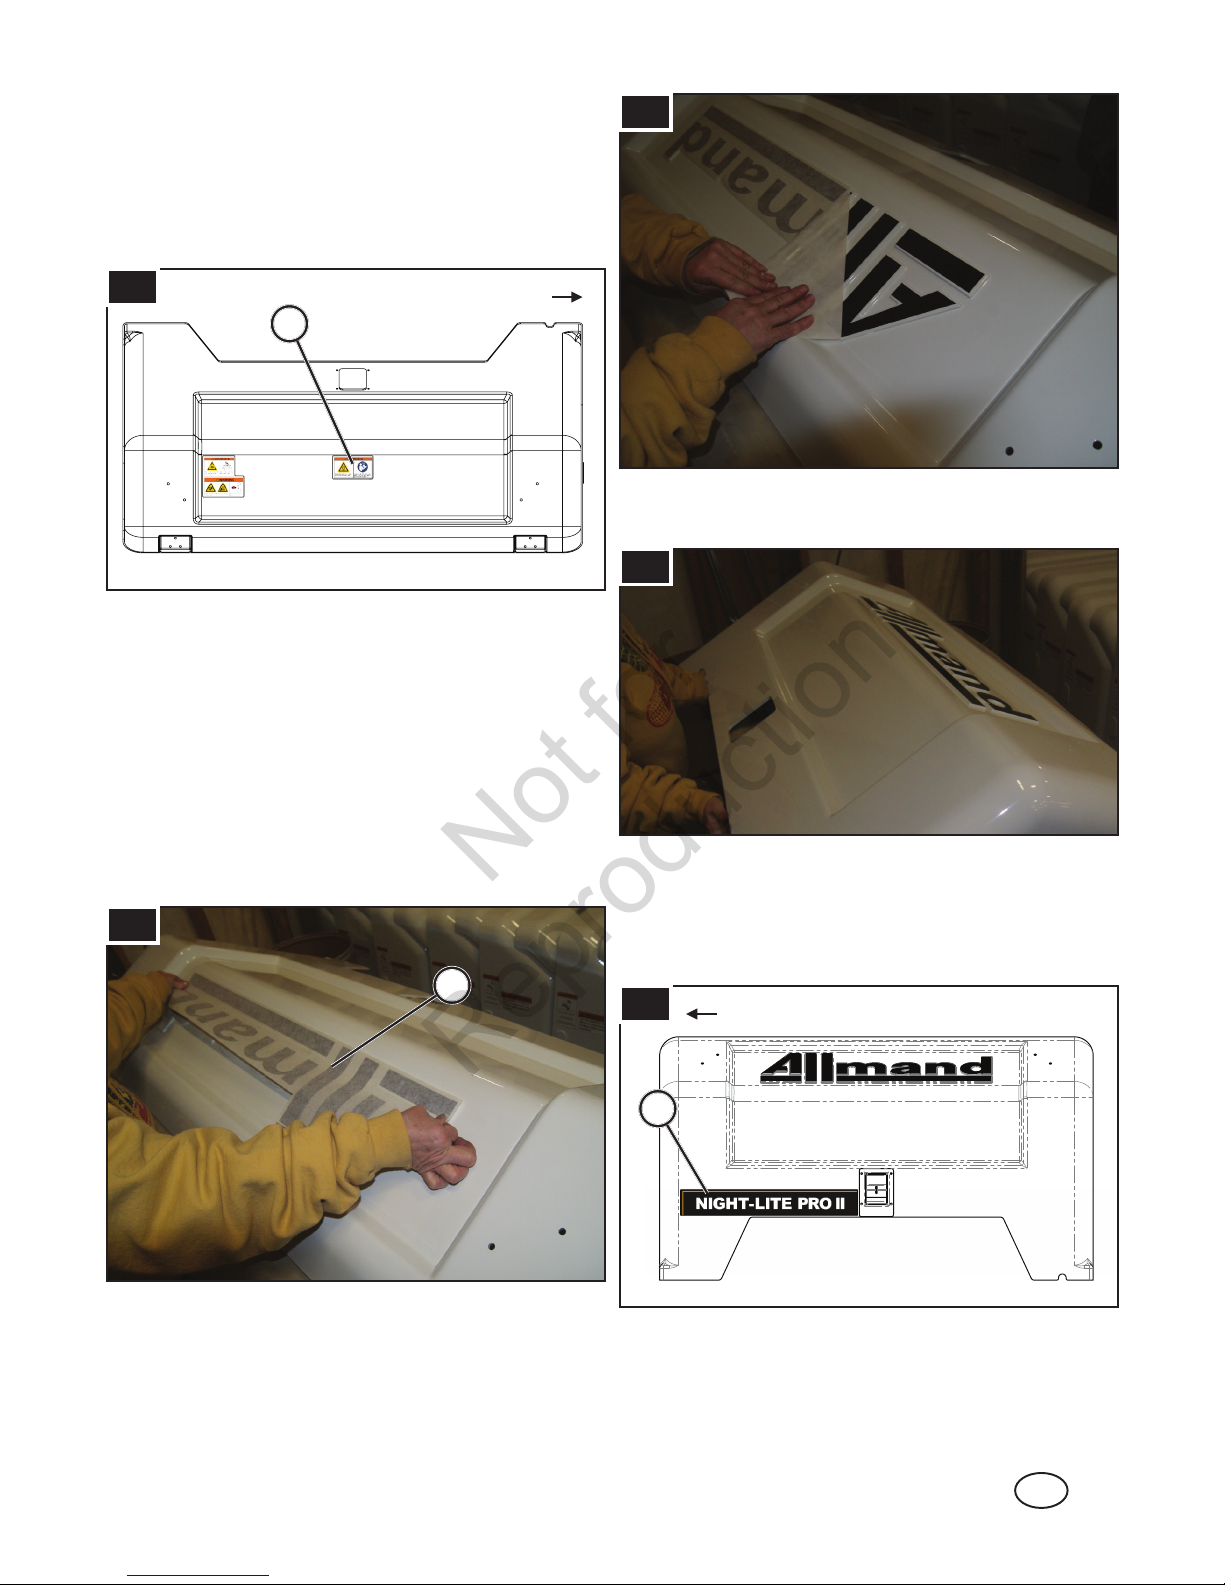
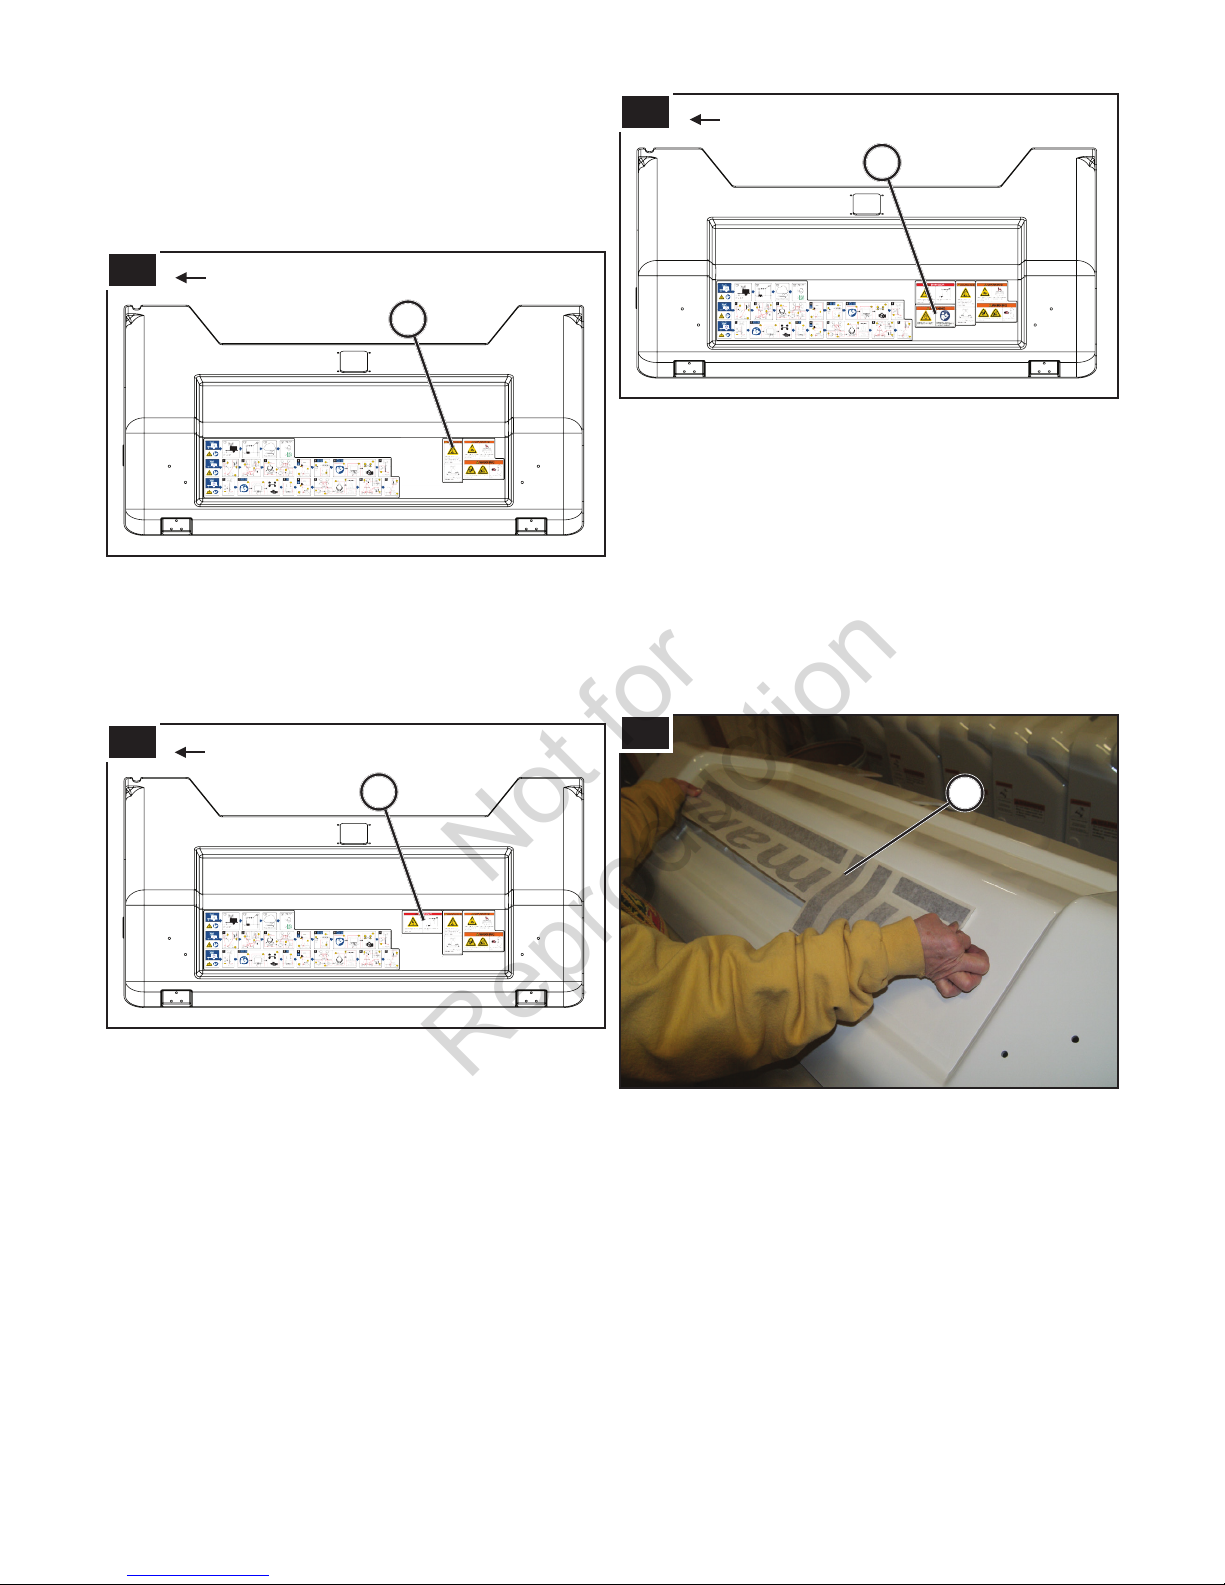
1. Place door on table with the raised Allmand letters
(Figure 1) facing towards you.
2. Locate the Allmand raised letter door decal (A, Figure
1, Ref. 1) and peel o the back of the decal. Center
and place the decal on the raised letters, and smooth
out the decal.
Kit Installation: Right Door
1
A
3. After smoothing out the entire decal, peel up the
edge of the masking paper. Pull it slowly and at at a
downward angle as shown in Figure 2. When pulling
the masking paper, make sure the decal stays in place
and does not tear.
2