Alkalite VersaBar 270 Manuel utilisateur
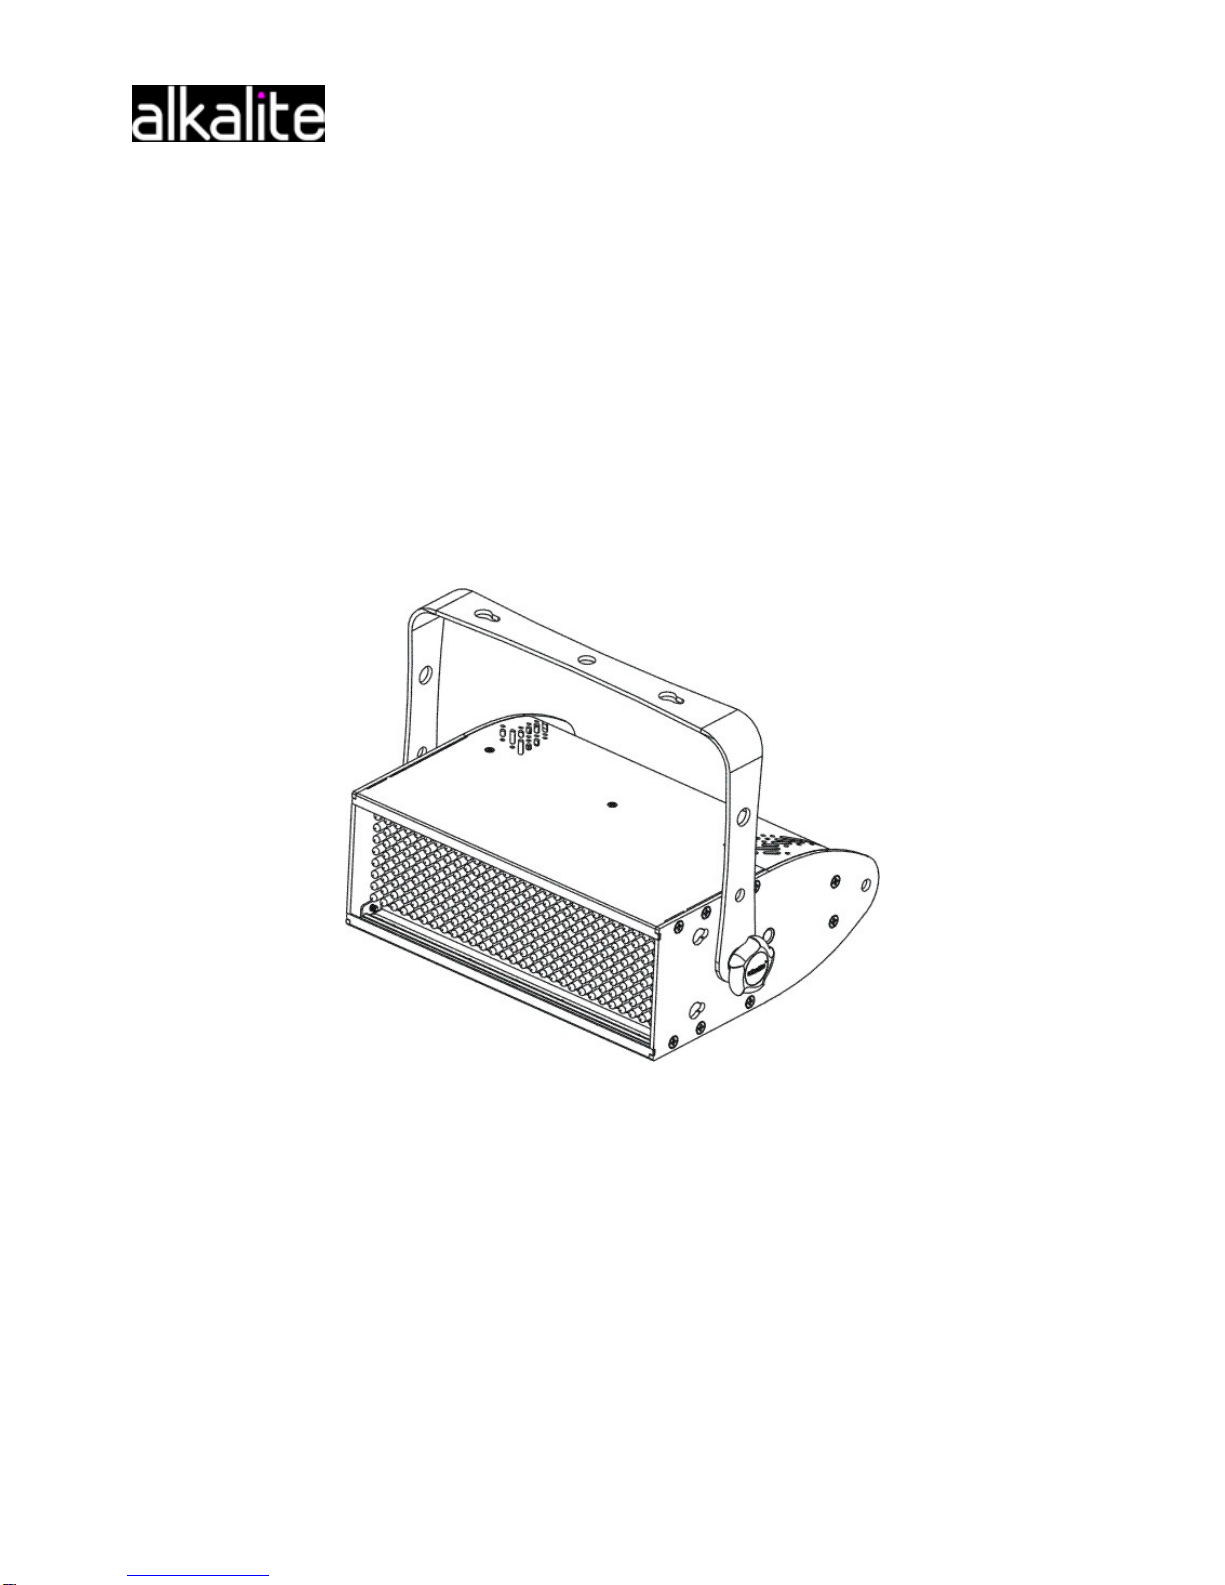
VersaBar 270
User Manual
Version 1.1

____________________________________________________________________________
VersaBar 270 User Manual Page 1of 19

Introduction
Thank you for purchasing VersaBar 270.
VersaBar 270 is a LED light fixture for professional use. Using the RGB color mixing technology
provide up to 16.5 million colors for use in stage production and fixed installation. Its optional
mounting kits offering many different ways to use this light fixture. This light fixture can be
operating stand-alone or using advance control via external DMX controller.
WHAT IS INCLUDED
z1 x VersaBar 270
z1 x Hanging bracket
zPower Cord
zUser manual
Carefully unpack the carton, check the contents to ensure that all parts are present, and have
been received in good condition. If any parts appear damaged or missing, notify the shipper
immediately and retain packing material for inspection. In the event that the fixture must be
returned to the factory, it is important that the fixture be returned in the original factory box and
packing.
1.1 Features
zDMX 512.
zStandard 5 channels and full function 8 channels DMX control.
zStand – alone operation:
Master/Slave.
Dimmable manual color mixing and preset colors.
Dimmable auto-chases with adjustable speed and fade.
19 auto chases.
zSpecial functions:
Check software version.
Test sequence for testing and demo purpose.
Factory reset.
DMX off setting.
zOptional bracket to make batten, blinder, light tube and multilateral shaping.
____________________________________________________________________________
VersaBar 270 User Manual Page 2 of19
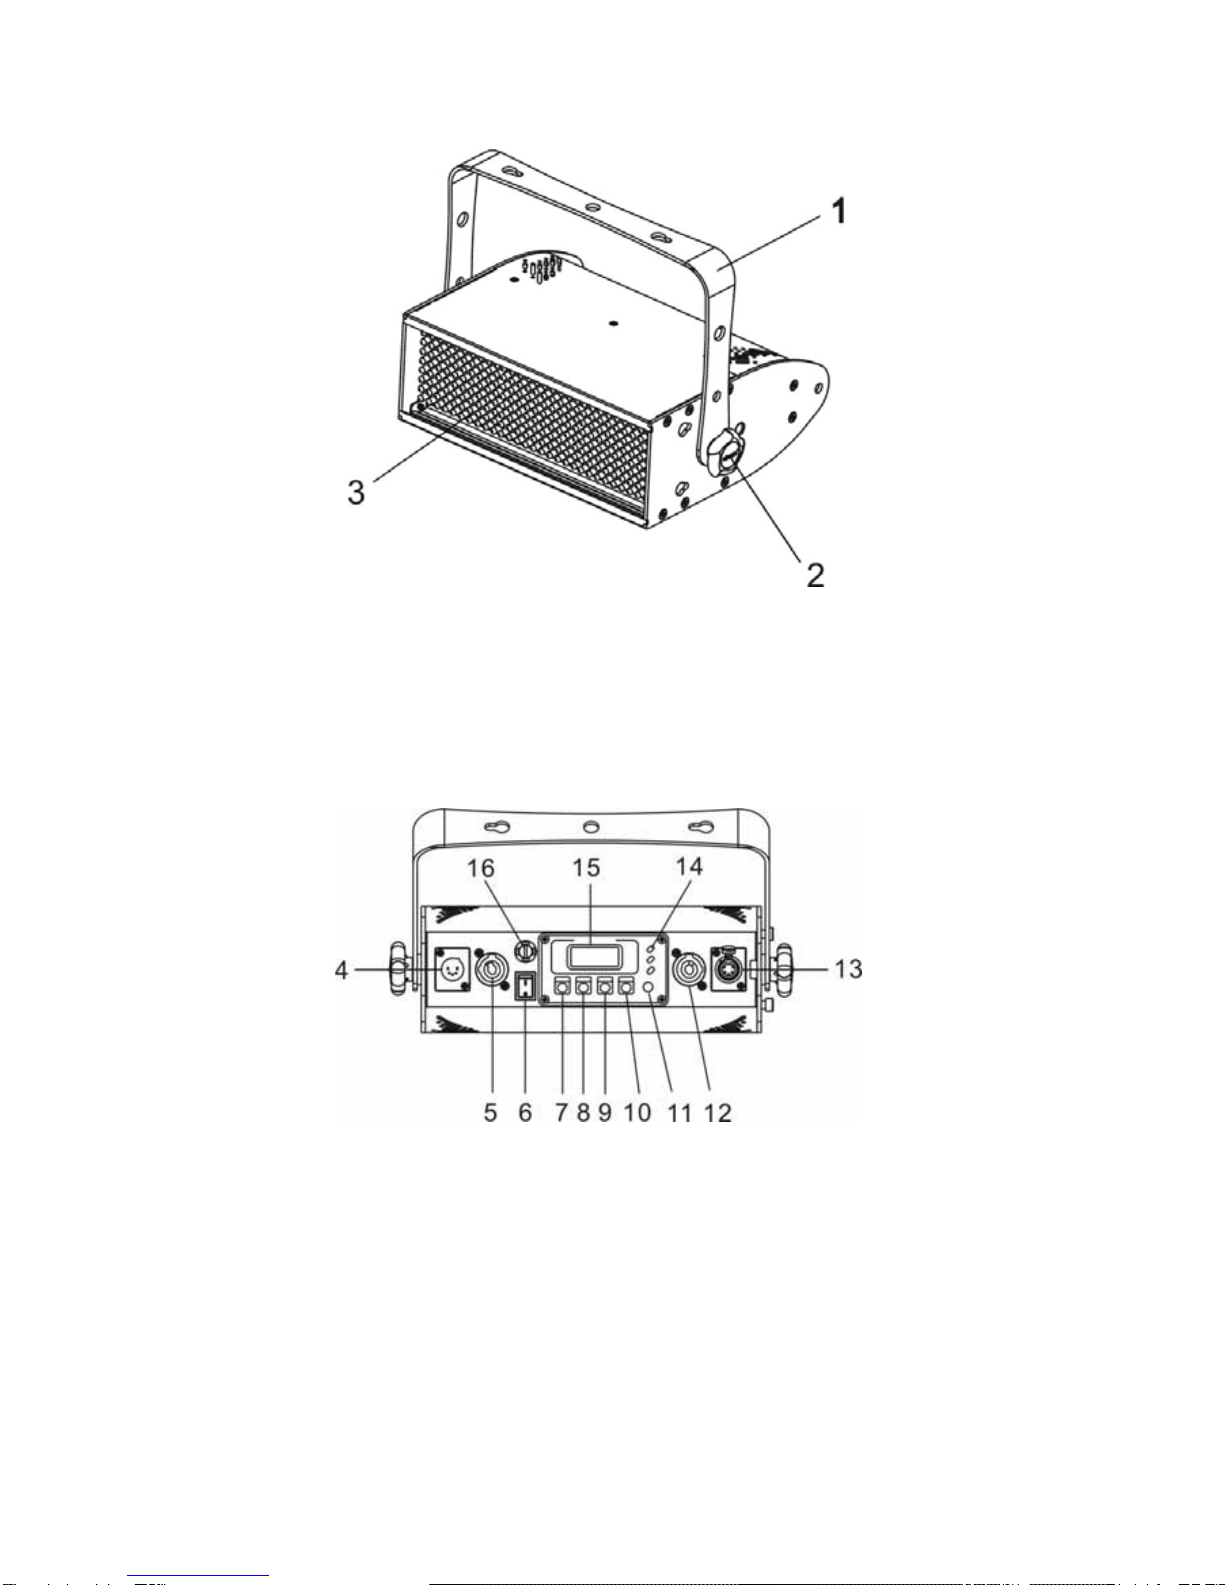
1.2 Overview
1
1. Mounting Bracket
2. Gear Screw
3. LED Module
4. 5-PIN DMX Input 11. Update Button
5. Power Input 12. Power Output
6. Power Switch 13. 5-PIN DMX Output
7. Mode Button 14. LED Status Indicator
8. F/S Button 15. LCD Screen
9. Up Button 16. Fuse Holder
10. Down Button
____________________________________________________________________________
VersaBar 270 User Manual Page 3 of19
1.3 Safety Instructions
CAUTION
UNPLUG MAINS BEFORE INSTALLING OR WIRING THE FIXTURE
User must be qualified to be involved with installation and maintenance of this product. User
must follow the safety instruction and warning notes written in this manual.
CAUTION
NEVER LOOK DIRECTLY INTO THE LIGHT SOURCE
IMPORTANT
zFor indoor use only
zKeep dry
zInstall only in well ventilated areas
zDo not attempt to open the controller or fixture, no user serviceable parts inside.
zBefore attaching the device, make sure the installation surface can hold a minimum
point load of ten times the device’s weight.
Installation
2.1 Connection to the mains
i. AC Power
VersaBar 270 is available in AC100-240V 50-60Hz and is supplied to match your local
voltage and frequency.
____________________________________________________________________________
VersaBar 270 User Manual Page 4 of 19
ii. Replacing Plug
The power cable must be fitted with a grounding-type cord cap (earthed type mains plug) that
fits your power distribution system.
Wire (EU) Wire (US) Pin Marking
Brown Black Live L
Blue White Neutral N
Yellow Green GND
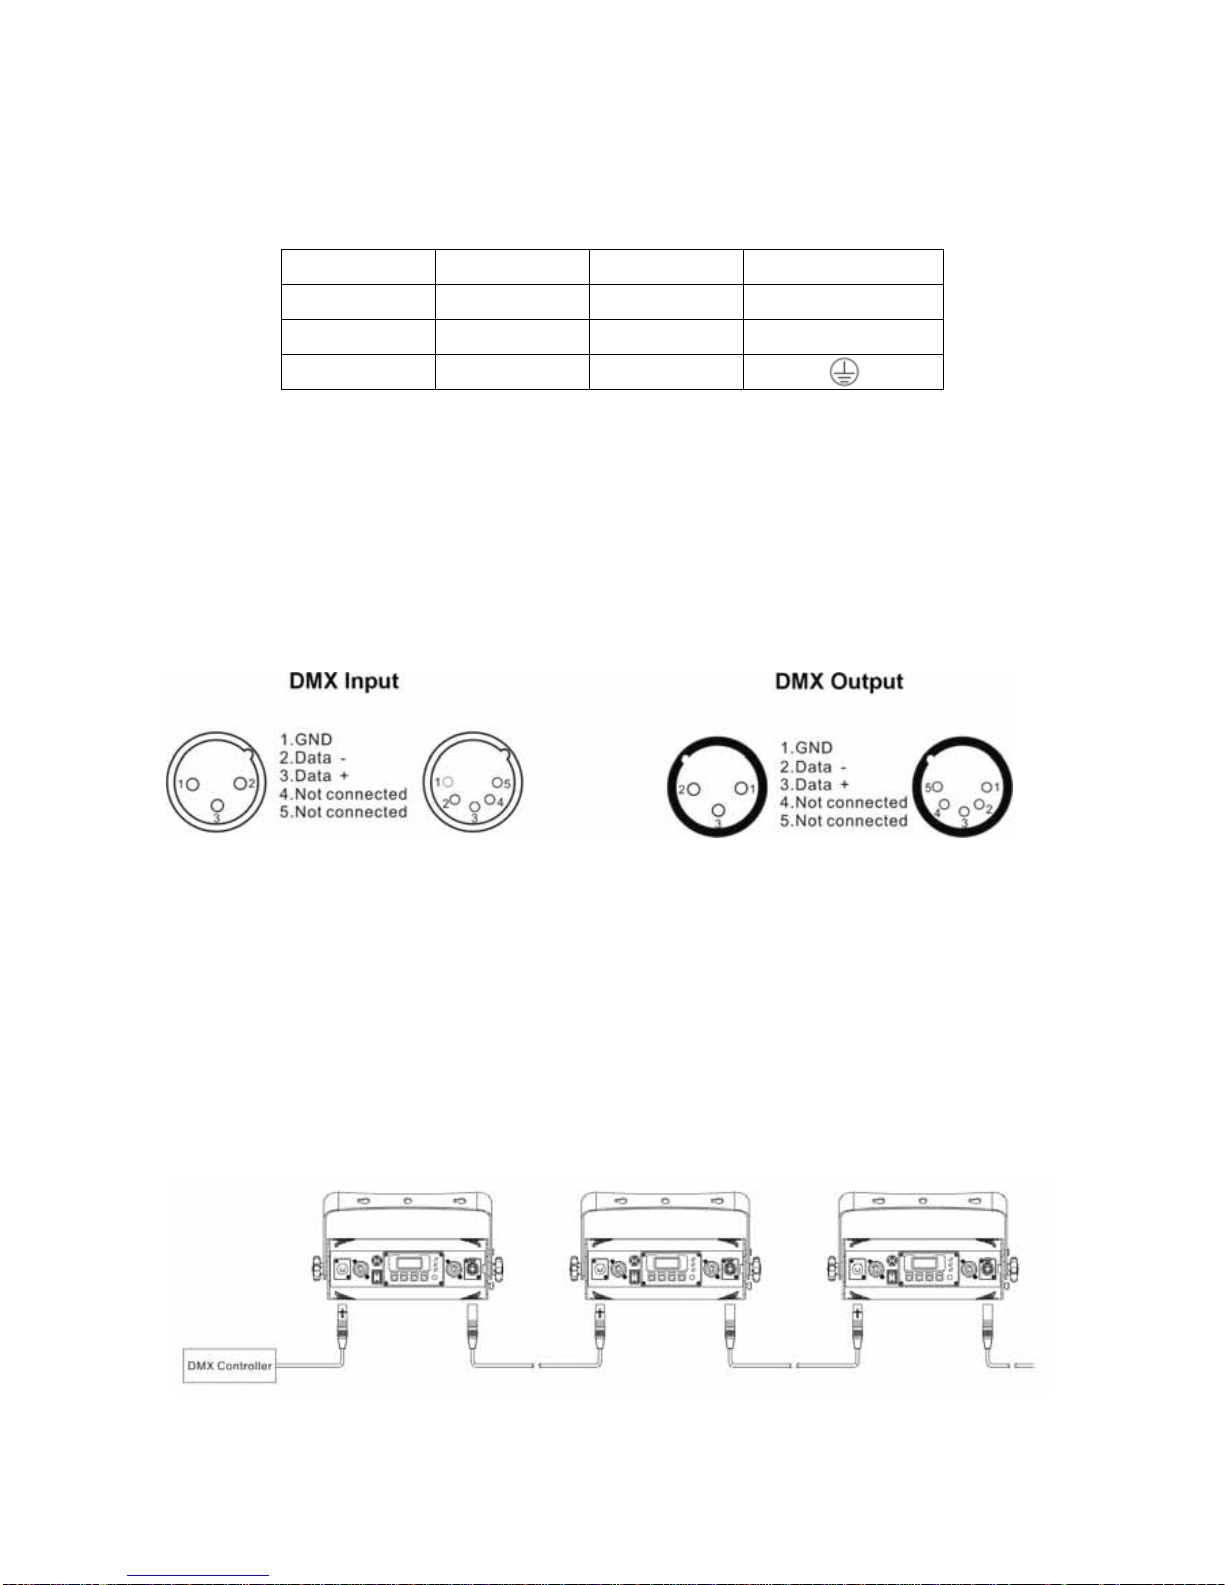
2.2 Connection between fixtures
The fixture is equipped with 5-PIN XLR sockets for DMX input and output. Only use a
shielded twisted pair cable designed for 3 or 5-PIN XLR plugs and connectors in order to
connect the controller with fixture or one fixture with another.
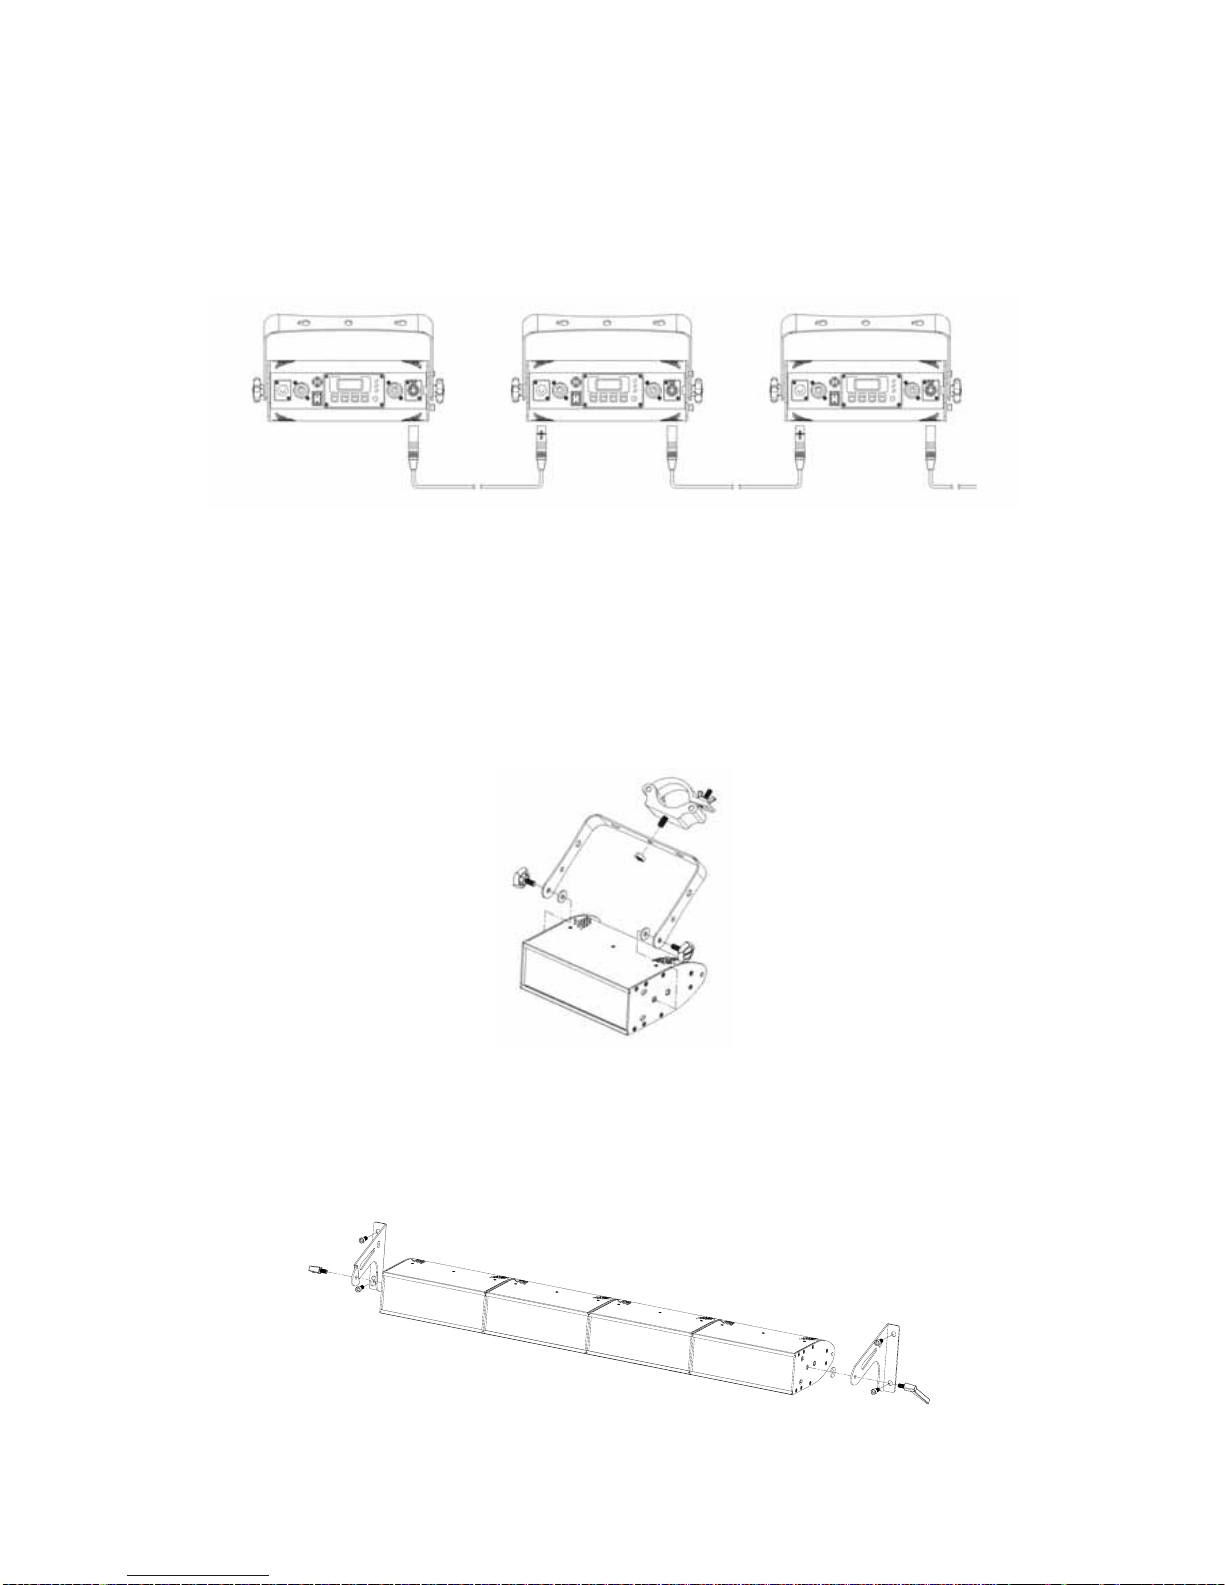
i. DMX Serial Data Link
If you are using the standard DMX controller, you can connect the DMX output of the
controller directly with the DMX input of the first fixture in the DMX-chain. Connect the DMX
output of first fixture in the chain with DMX input of next fixture. Always connect one output
with input of next fixture until all fixtures are connected.
___________________________________________________________________________
VersaBar 270 User Manual Page 5 of 19
ii. Master/Slave Data Link
Connect the DMX output of the master fixture in the data chain with the DMX input of first
slave fixture. Always connect output with the input of next slave fixture until all slave fixtures
are connected.
2.3 Mounting the fixture
i. Truss Mount
Fixture should be hung on truss structure using a mounting clamp. Always secure the fixture
with a secondary safety attachment.
ii. Wall Mount
Refer to below diagram for wall mounting instruction. Before attaching the device, make sure
the installation surface can hold a minimum point load of 10 times the device’s weight.
____________________________________________________________________________
VersaBar 270 User Manual Page 6 of19
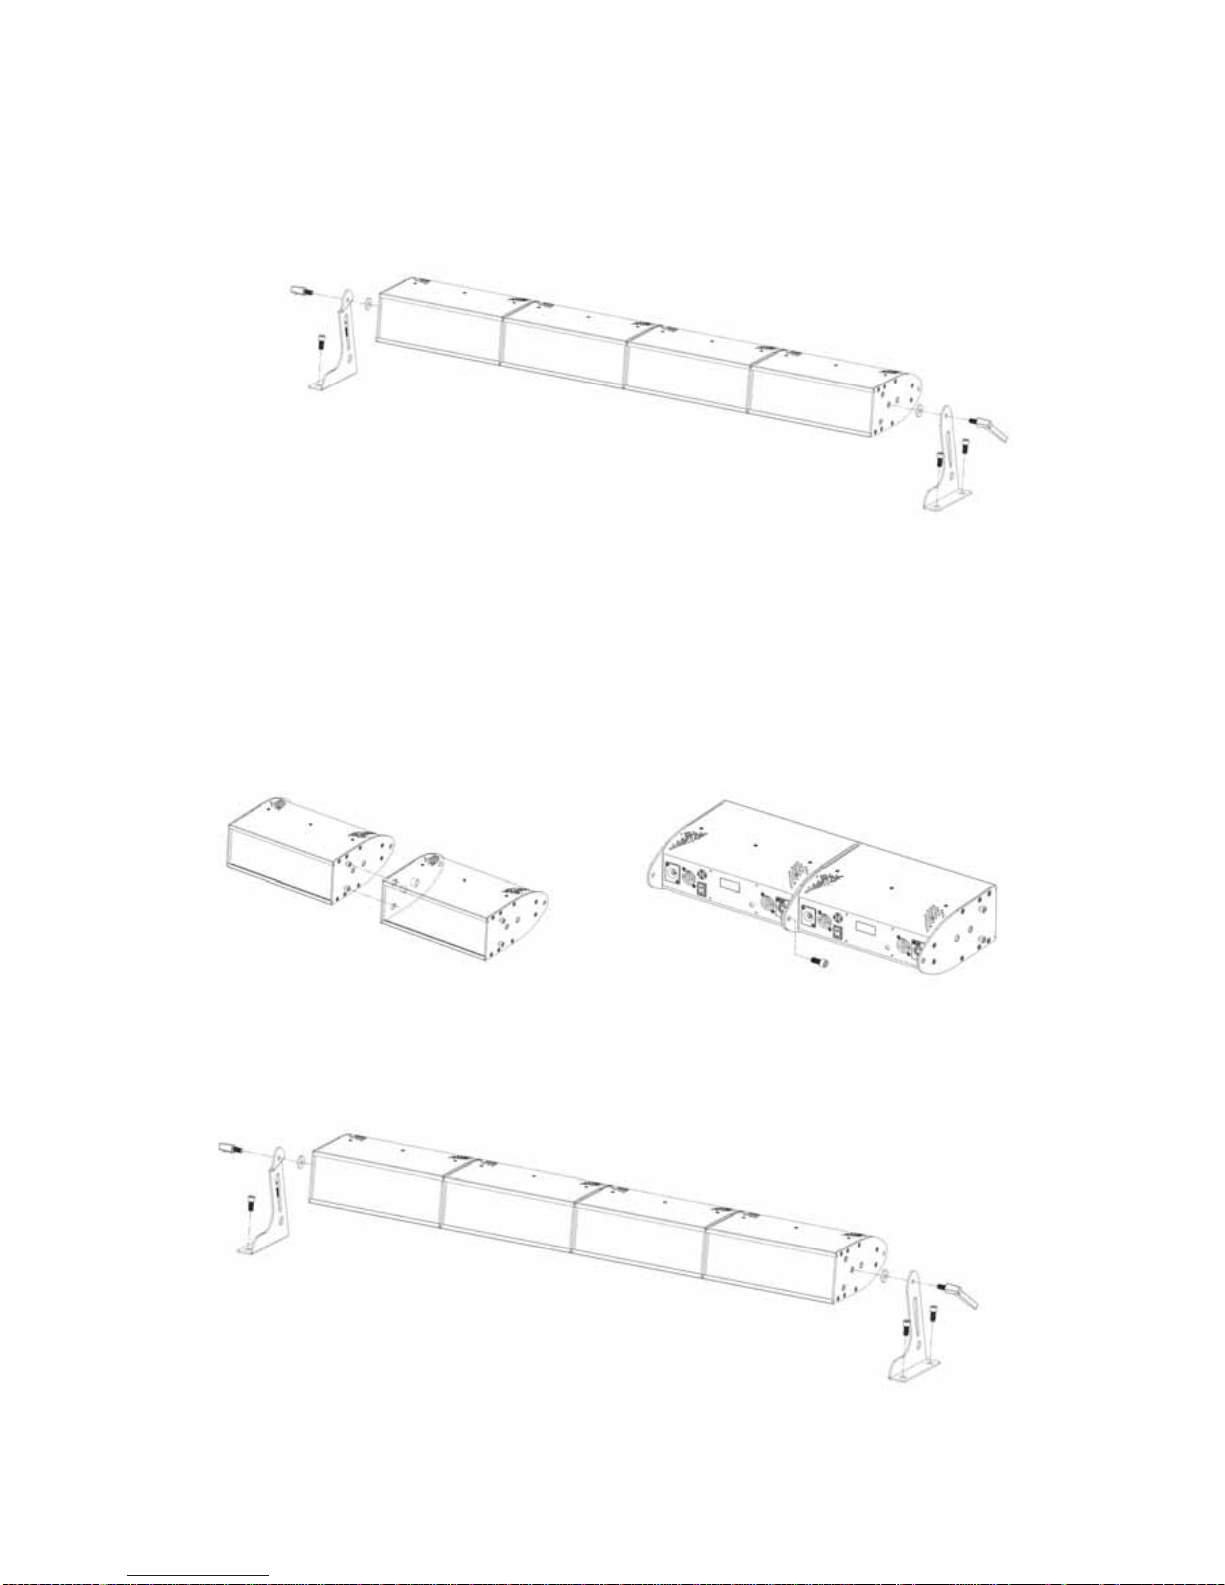
iii. Floor Mount
Refer to below diagram for floor mounting instruction.
2.4 Fixing
i. Batten Bracket
First attach fixtures together refer to instruction below, the structure design can combine
maximum of 5 fixtures together.
Then put on the batten stand on the end sides of fixtures.
____________________________________________________________________________
VersaBar 270 User Manual Page 7 of19

ii. Blinder Frame
Refer to diagram below to install blinder frame. First install the side plate with light fixture then
carefully install the hanging bracket.
iii. Hinge Kit
The hinge kit has 3 standard angles (60°, 72°, and 90°). It can also be adjusted manually from
minimum 55° up to maximum 90°. Follow diagram below to adjust angle.
____________________________________________________________________________
VersaBar 270 User Manual Page 8 of19

For extended use simply attach two hinge kits together to gain larger angle from 110° to 180°.
Refer to below instruction to attach two hinge kits together.
To make multilateral shaping first attach hinge kit to the fixture follow below diagram.
Link all the fixtures together using the hinge kit until it is finished. The hinge kit can also use
as internal angle, simply remove the locking screw and install on the other side.
____________________________________________________________________________
VersaBar 270 User Manual Page 9 of 19
Table des matières
Autres manuels Alkalite Projecteur

Manuels Projecteur populaires d'autres marques

VIZULO
VIZULO Micro Martin Guide de l'utilisateur

EuroLite
EuroLite LED IP FL-100 SMD Manuel utilisateur

Cooper Wheelock
Cooper Wheelock XB12 Manuel utilisateur

Allen + Roth
Allen + Roth 17624-000 Manuel utilisateur

ADJ
ADJ 4 STAGE PAK Manuel utilisateur

Cooper Lighting
Cooper Lighting EGL91SW233 Manuel utilisateur


