Aisoy Aisoy1 V4 Manuel utilisateur

User Guide
Aisoy1 V4 Scratch Edition
V1.0

Contents
Introduction 3
Who is this guide for 3
What’s in the box 3
What’s new on Aisoy1 V4 3
Overview 4
Aisoy1 V4 4
ACDC Connector 4
On/Off Button 4
Lights 4
Wifi Adapter 4
Mouth 5
SD Card 5
Getting started 6
Turn on your Aisoy1 6
Booting process 6
Connect to ethernet or wifi network 6
Connect Aisoy1 to your computer 7
How to start with Scratch tool 7
Register your Aisoy1 8
Coding your Aisoy1 9
Scratch editor overview 9
Bloques Aisoy1 10
Botserver 14
Botserver overview 14
Settings 15
Wifi 17
Understanding a little more your Aisoy1 18
AIROS 18
Botserver: managing your robot 18
Aisoy1 capabilities 18
Software updates 18
Hardware 18
- -2
Introduction
Hi!, welcome to the Aisoy1 V4 Scratchn Edition guide, where you will learn everything you need
to start enjoying your robot. We're going to explain"how to getting started with Aisoy1 and
Scratch. Then we will see the basics about its software and hardware.
Important: !This guide is alive!, we will keep it updated with your comments and suggestions,
please feel free to contact us if you consider that we must go deeper into any concept.
Who is this guide for
You might be reading this document because:
• You have recently bought an Aisoy1 V4 Scratch Edition and want to know everything about it
before using it.
• You own an Aisoy1 robot and want to know how to use it.
• Somebody told you about this guide and you have decided to read it before buying an
Aisoy1
• You have arrived here by mistake but you feel curious about what’s Aisoy1
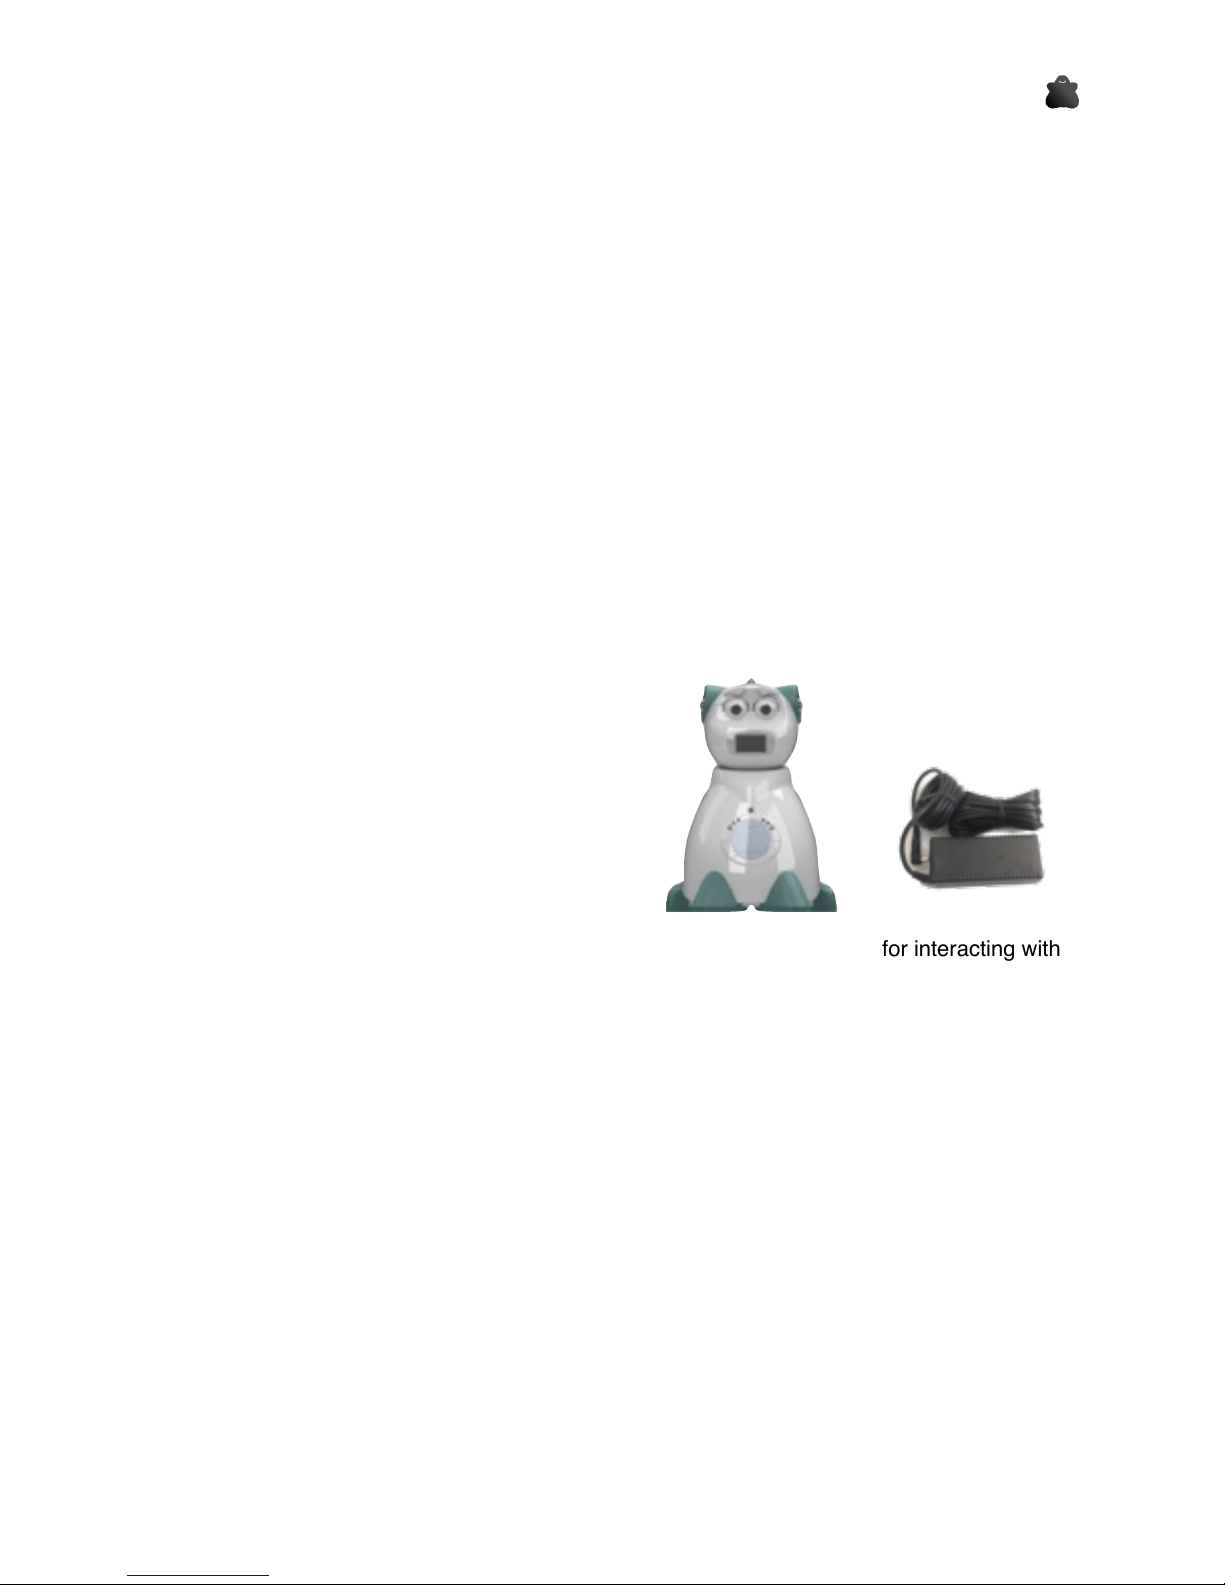
What’s in the box
The box contains the following:
1. Robot Aisoy1 with SD card and Wifi adapter.
2. ACDC adapter
3. Quick guide
What’s new on Aisoy1 V4
Aisoy1 V4 is a programmable social robot. It’s social because it is designed for interacting with
other robots and people, using natural ways of communication:
•Speak:"Aisoy1 has a voice recognition system and a text to speach system quicker than
previous one.
•Touch: Aisoy1 has an optimized touch sensor network for knowing if you are touching it in
its head or body.
•Mouth. Its mouth is an oled screen, where it can show characters, symbols, and any kind of
draw you can make with a 128x64 pixels of resolution.
•Back. We have re-disegned Aisoy1's back for doing it more compacted than V3 version and
maintaining the accessibility to Raspberry ports.
•Scratch. It is programmable with Scratch online 2.0 tool.
- -3

Overview
Aisoy1 V4
ACDC Connector
Aisoy1 V4 requires to be connected to power using the ACDC transformer.
On/Off Button
On/Off Button turns on/off your robot. For turning on your robot push it once. For shutting it
down, you need to maintain it pushed 3 seconds approximately.
Lights
Several lights on the side give you information about the state of your robot.
Wifi Adapter
Wifi Adapter has a light to show you if it is in use or not.
IMPORTANT: wifi network can be affect to Aisoy1 V4’s performance.
- -4
Eyelids
Eyebrows
Mouth
Speaker
Heart
Eyes
Touch Sensors
On/Off Button
SD Card
ACDC Connector
Wifi Adapter
USB Ports
Ethernet Connector
Lights

Mouth
Mouth is a oled screen with 128x64 resolution. It is used for showing robot’s state, mainly in the
turn on process.
SD Card
For Aisoy1 V4 can be run, it requires a SD Card with AIROS software inside
- -5

Getting started
Turn on your Aisoy1
Aisoy1 only requires that you connect to electric power the ACDC transformer included and plug
to ACDC connector. Then, you can turn it on. The process can take between 2 and 5 minutes,
depending of time to connect to wifi or ethernet network or not find anyone.
Booting process
First time you turn Aisoy1 on, Aisoy1 boots making special steps to prepare the file system in
order to use normally:
1. Files: The system prepares the definitive file system. Heart becomes pink.
2. Booting: It configures normal boot process. In the mouth will be printed the message
Loading… Heart becomes flickering in red.
Aisoy1’s normal boot process is as follow:
1. Initial load: Heart becomes pink. OS is starting and searching for a network. That process
can be slow depending of the network.
2. In the mouth will be printed the message Loading… The system is preparing the services to
start AIROS, your robot’s brain. Heart becomes blue.
3. Starting AIROS. In the mouth will be printed the message ROS Starting. Main services of
Aisoy1 are being launched. Heart becomes flickering in red. A % progress will updated when
services have been launched.
4. End booting. If everything is ok, heart becomes blue, Aisoy1 opens its eyes and it shows a
welcome message in its mouth similar to that: hello, my name is aisoy and my IP address is
xxx.xxx.xxx.xxx.
Right! Your Aisoy1 is ready and you can start using it.
Connect to ethernet or wifi network
In the booting process, Aisoy1 tries automatically to connect to a network, ethernet if it detects a
plugged cable or configured wifi. If it connects, it will show the assigned IP address in its mouth
when booting process is finished.
Access point
Aisoy1’s first time use or when Aisoy1 can’t find a network, Aisoy1 creates an own network
called AisoyAP, which you can connect it. Password for that network is aisoy1v4 and security
protocol is WPA/WPA2. Same way as it connects to a network, when booting process ends
Aisoy1 shows assigned IP in its mouth.
- -6
Configure a wifi network
To configure a wifi network, your Aisoy1 and your computer should be at the same network. In a
browser you should introduce the Aisoy1’s IP. Aisoy1 shows you the botserver’s login screen.
Introduce as user aisoy and as password aisoy1. In the section wifi you can configure a new wifi
network giving its name and password.
Connect Aisoy1 to your computer
Your Aisoy1 and your computer don’t connect physically. They only need to be at the same
network (ethernet or wifi) to be able to communicate between. Network can be yours at home or
created with your mobile as hotspot.
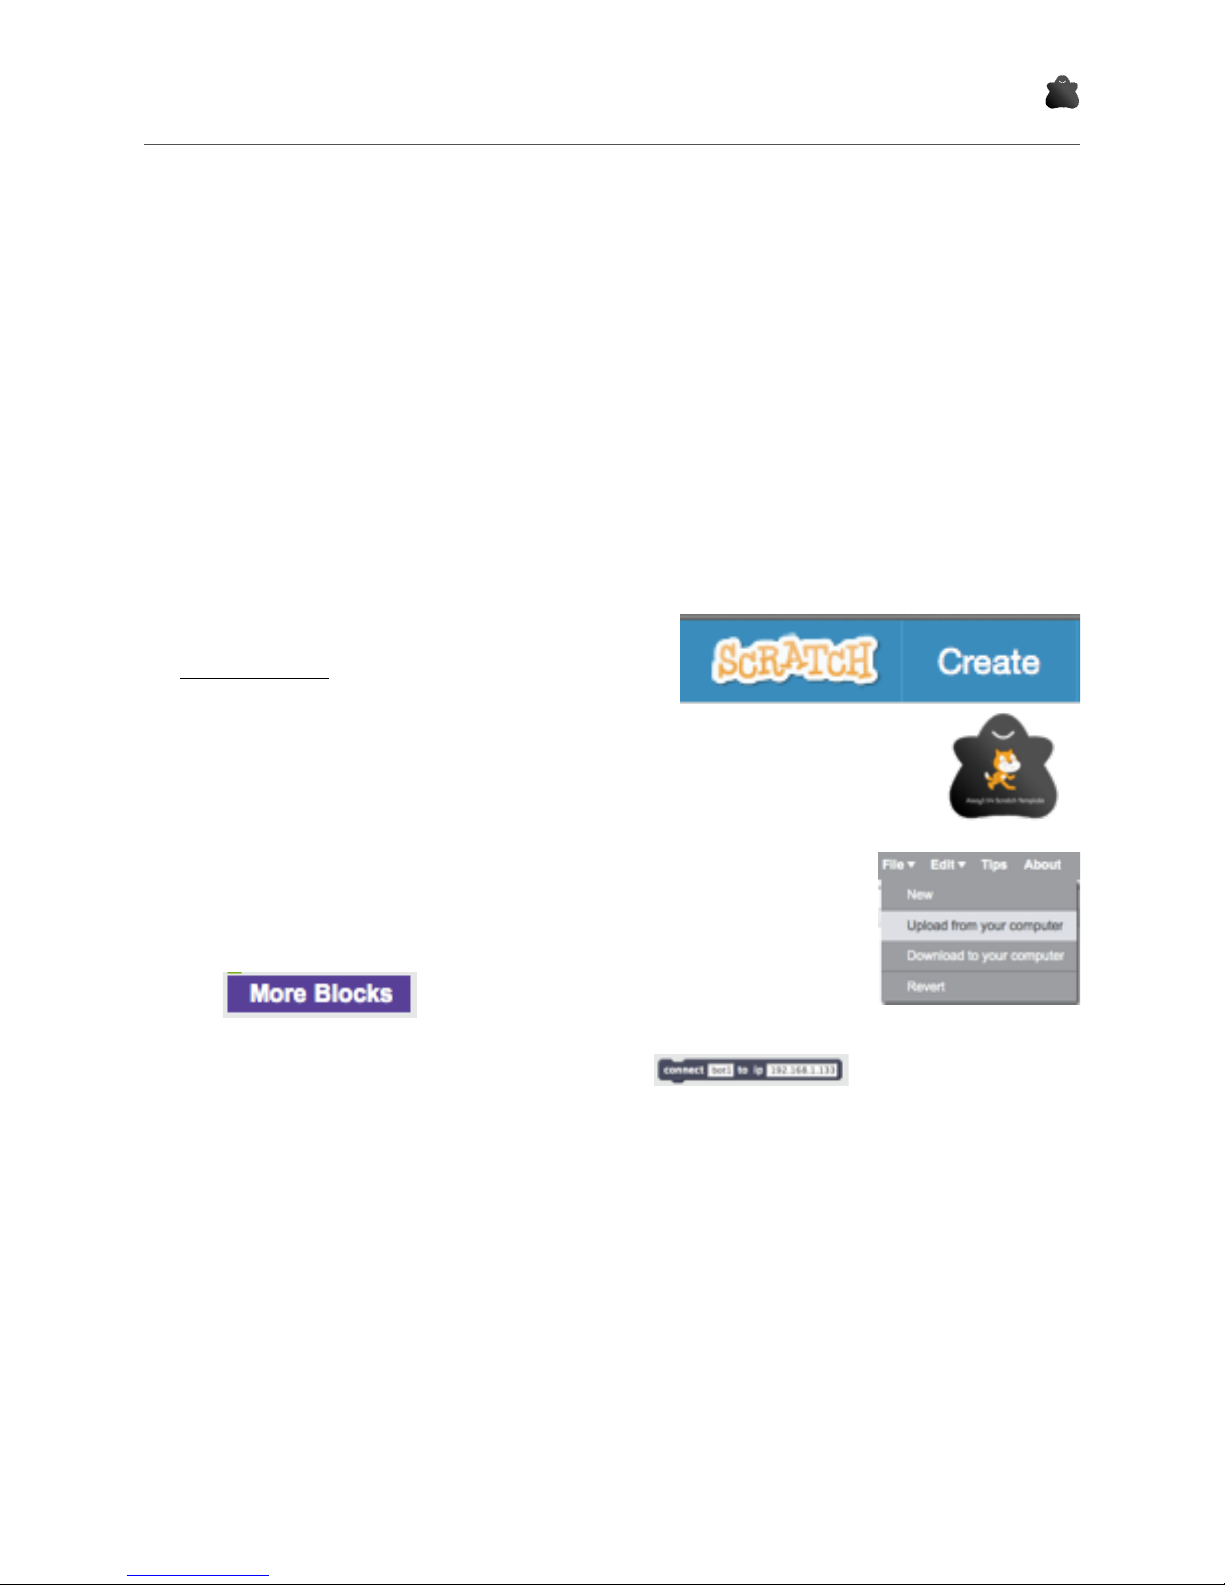
How to start with Scratch tool
When Aisoy1 and your computer are at the same network, you can start with Scratch tool
following the next easy steps:
• Go to Scratch online using this link:
scratch.mit.edu and click on Create.
• Download the last template available on our
online store. It’s free. Save it on a directory of
your computer.
• In Scratch, open the template you have downloaded doing click on
Archive and then Upload from your computer.
• Click on more blockes
• Last step is introduce IP address on this block and click it.
- -7
• If connection is ok, a pop up window informs you and yellow icon will change to green. Also,
you should see all available blocks to code your Aisoy1.
Next chapter explains all blocks.
Register your Aisoy1
You can register your Aisoy1 when you want it. It is only necessary to be registered for updating.
See section Register on chapter Botserver.
- -8
Coding your Aisoy1
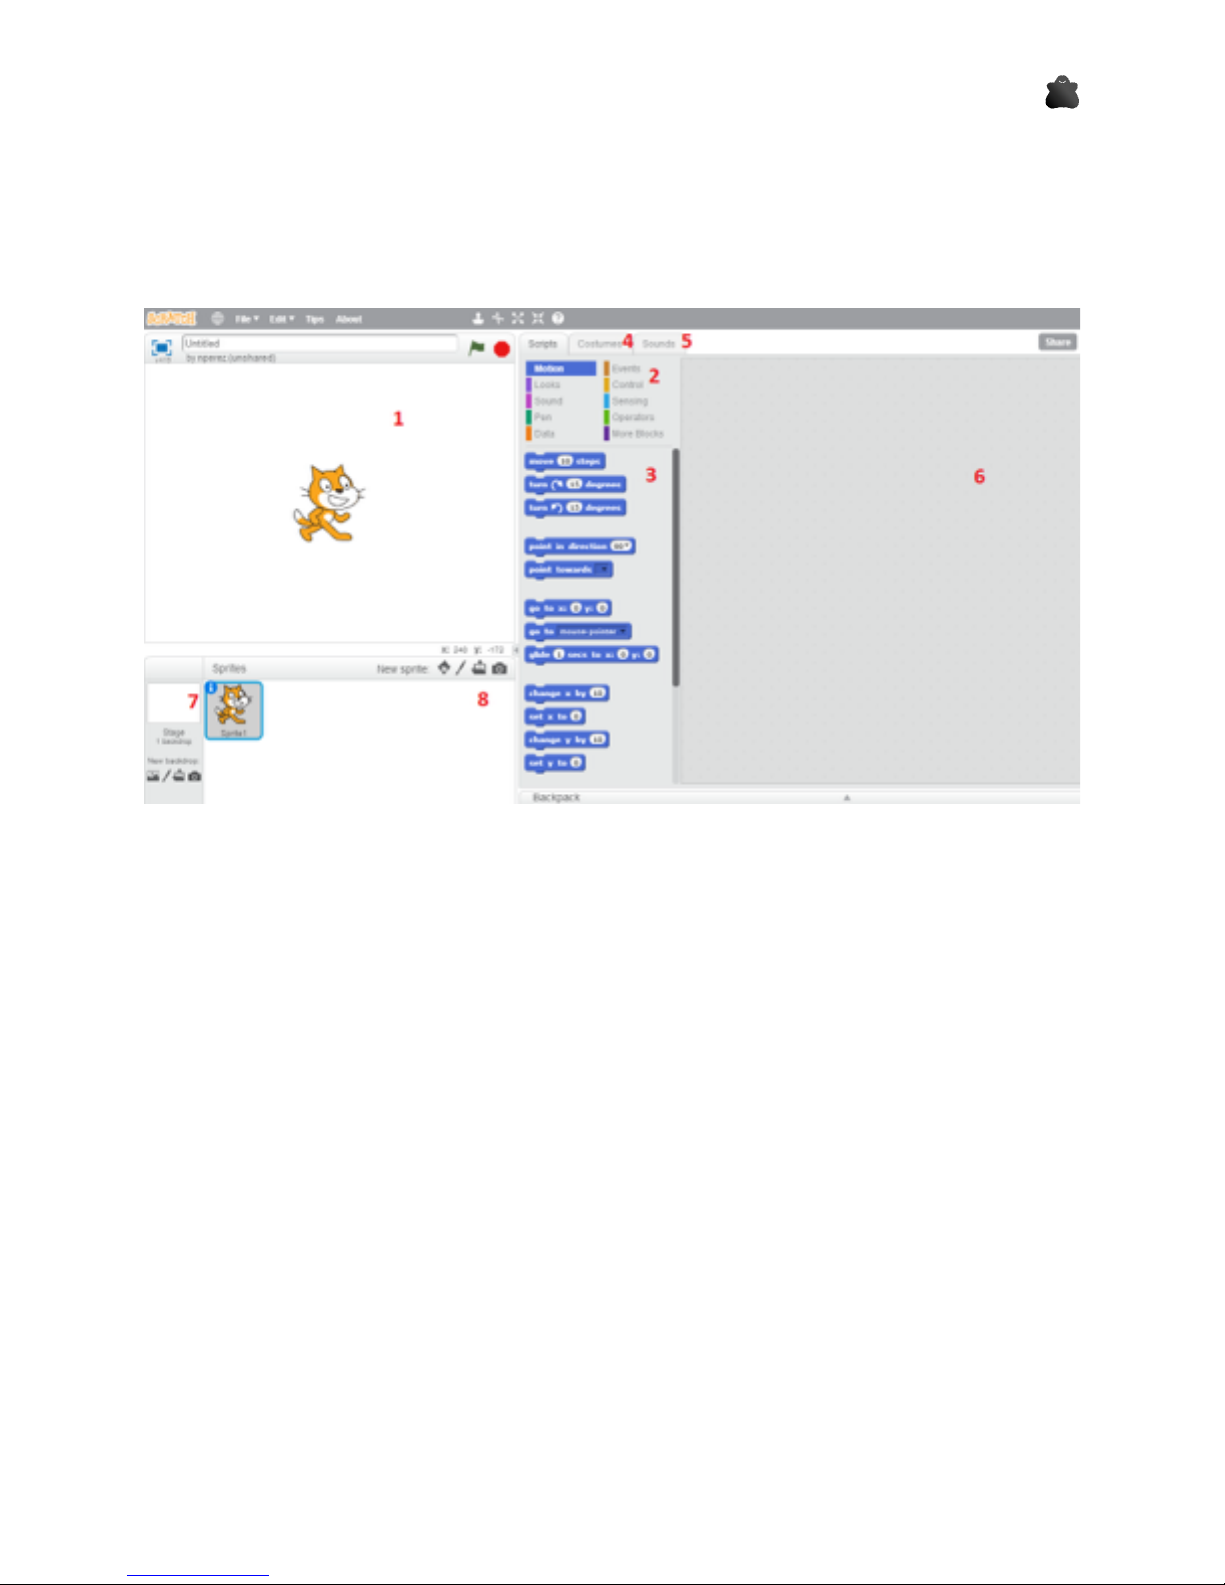
Scratch editor overview
Scratch editor is like:
5. Scratch Display. We could interact with it using specific blocks (change sprites, show
webcam…)
6. Types or Category blocks.
7. Specific blocks of selected category.
8. Costumes. To manage the different costumes of sprites.
9. Sounds. To manage the sounds to play at programm scripts.
10. The most important thing in Scratch. Programming area where we will put the different
program blocks.
11. Scene or background of Scratch display.
12. Sprites. To manage and select the different sprites of the current program.
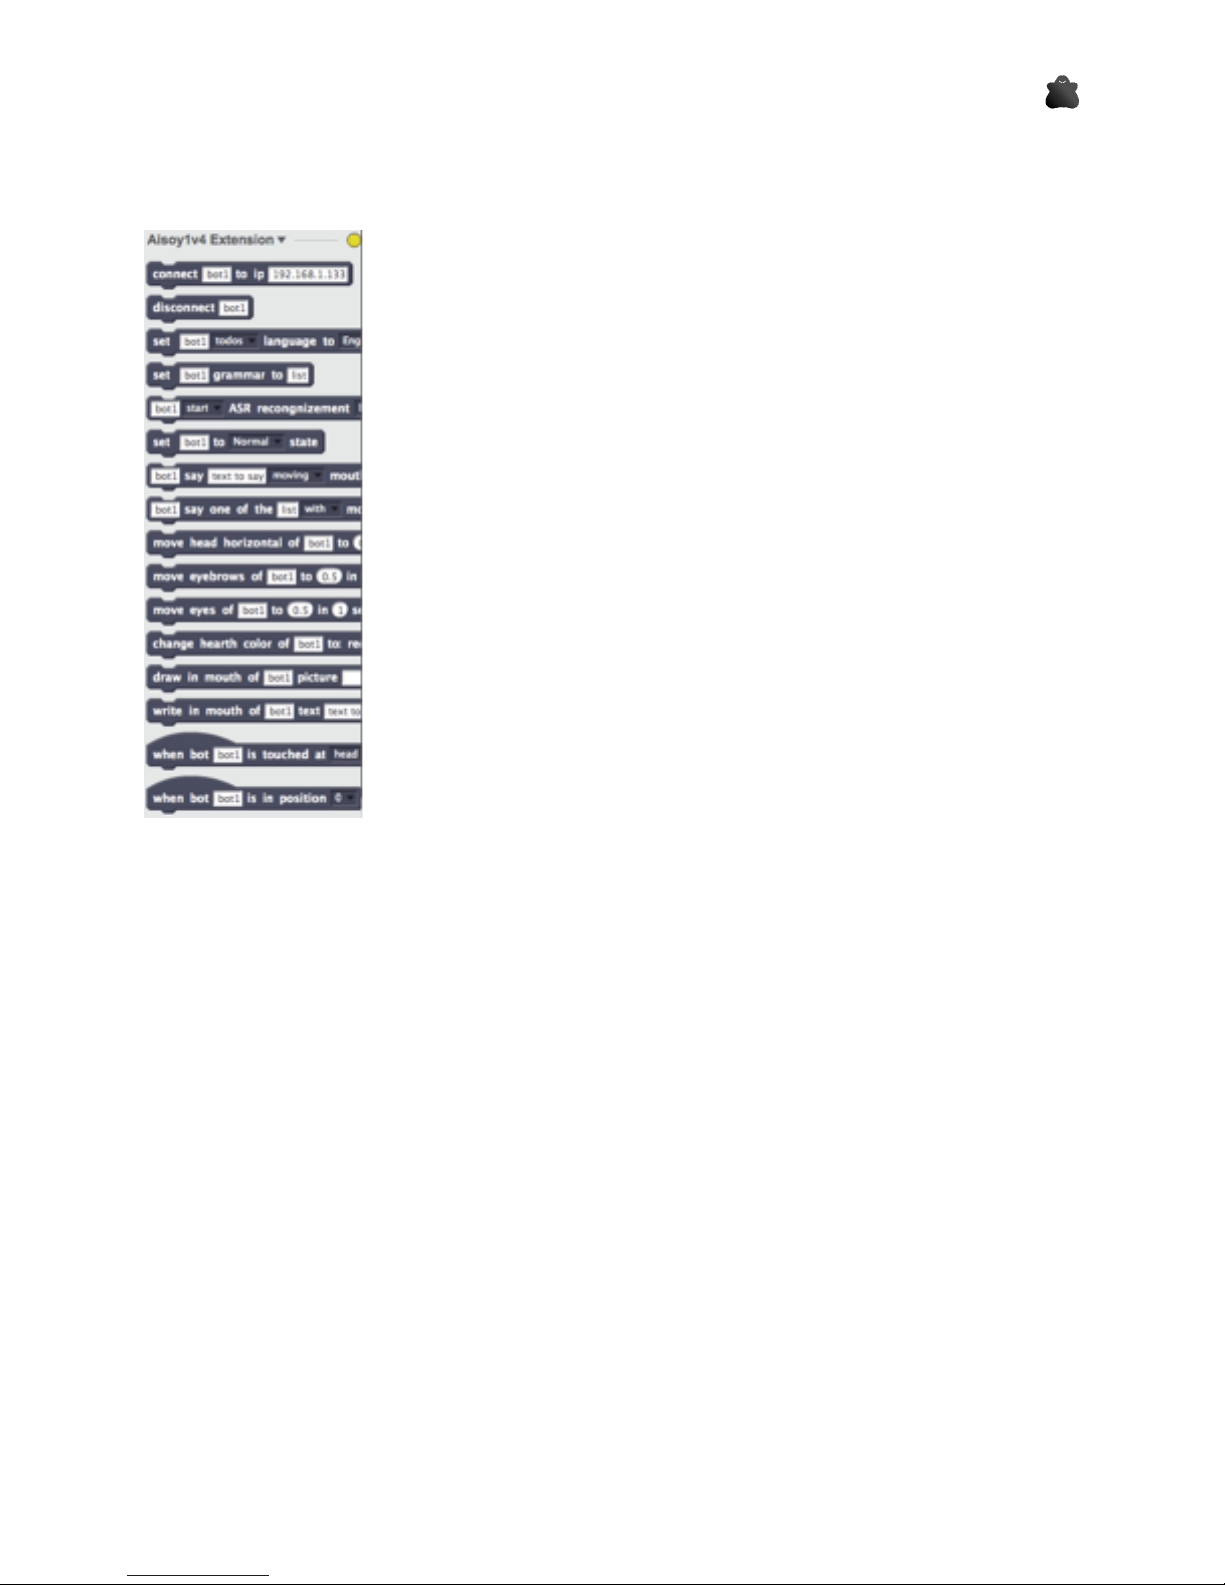
Now, we will introduce to Scratch the Aisoy Extension, that includes the new blocks to interact
with our Aisoy1 in the “More blocks” category.
- -9
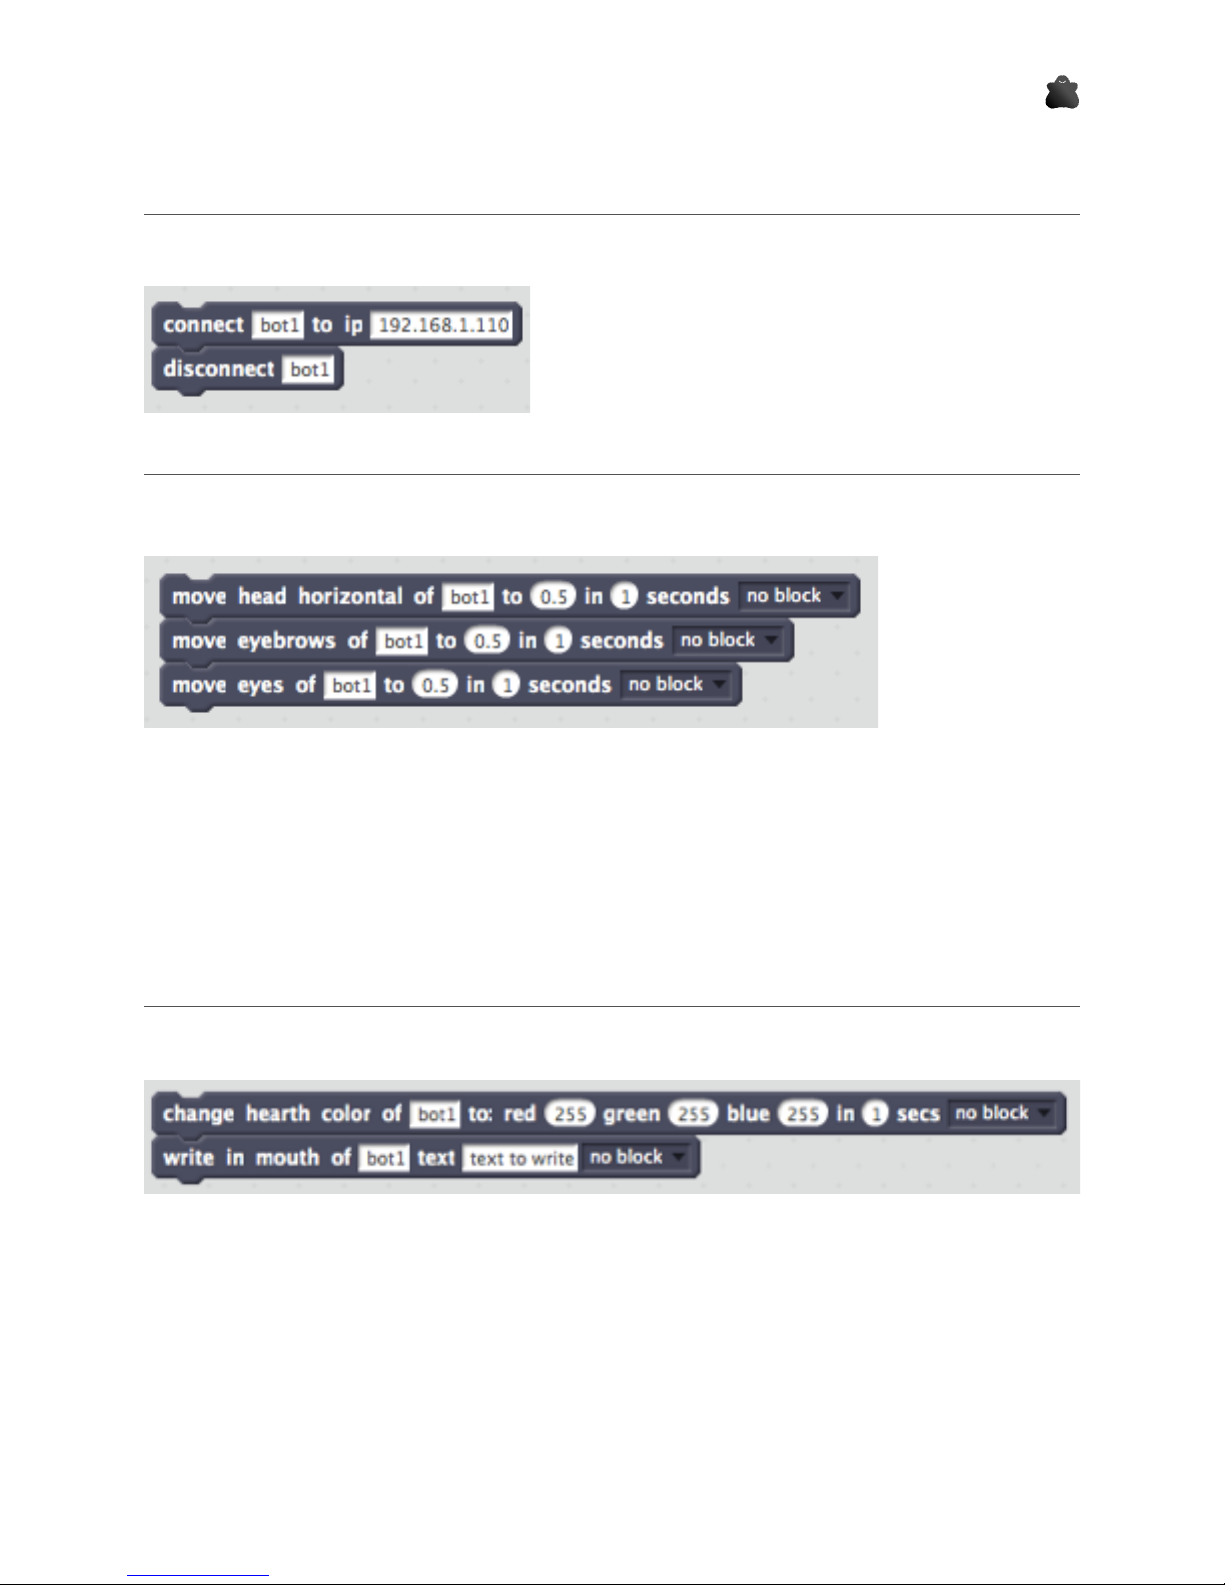
Bloques Aisoy1
Connection blocks
To connect the bot to Scratch, only we need is to drag
the connect block to the script area and put it our
Aisoy1 IP. After cliking it, we could see the green
indicator of extension that informs it has connected
one or more Aisoy1.
disconnect block disconnects the robot.
Movement blocks
There are 3 movement blocks:
•move head horizontal: It makes the bot move head horizontally, to a “specific
position” (between 0 and 1) in “specific seconds”. In this case, the bot will be in position “0.5”
after “1” seconds.
•move eyebrows: similar to previous one but for eyebrows.
•move eyes: the same for eyelips.
Visual expression block
There are 2 visual expression blocks:
•change hearth: This lend us change the heart color of our bot, using RGB color codification.
Here, the led will be in white after 1 seconds.
• write in mouth. This block provides a mechanism to show a text in the mouth.
- -10
Table des matières
Autres manuels Aisoy Robotique

Manuels Robotique populaires d'autres marques

STEMCenter USA
STEMCenter USA Pi-Bot v2.00 Manuel utilisateur

SunFounder
SunFounder PiDog Manuel utilisateur

Universal Robots
Universal Robots UR5 Manuel utilisateur

Universal Robots
Universal Robots E Series Manuel utilisateur

YASKAWA
YASKAWA MOTOMAN-MPL80 II Manuel utilisateur

EFORT
EFORT ECR5 Manuel d'instructions


