CAUTIOII . ILECTRICALLY OPERAIED PRODUCI
NOT RECOI4I\4ENDED FOR CHILDRIN UNDER 8 YIARS OF AOE AS WlTl.l ALL ELICTRIC PRODUCIS
PRECAUT|Ol\lS SHOULD BE OBSIRVED DURIl'lc llANDLINO AND U$E TO PRIVEIIT ELICTRIC SHOCI(
PARENTS PLEASE N()TE : lT lS REC0MMENDED THAT
THIS T()Y BE PERI()DICALLY EXAMINED F()R ANY
POTENTIAL HAZARDS AND SHOULD N()T BE USED
UNTIL APPROPRIATE REPAIRS ARE MADE.
P0wER PAcK RATTNG, |H;irlillivAc, 6012, 0.12A
The Fut'ure of Racing,
OWNER'S MANUAL
TOTY'
a
I . cAUTroN: uNpLuc powER pAcK BEFoRE
CLEANING TRACK
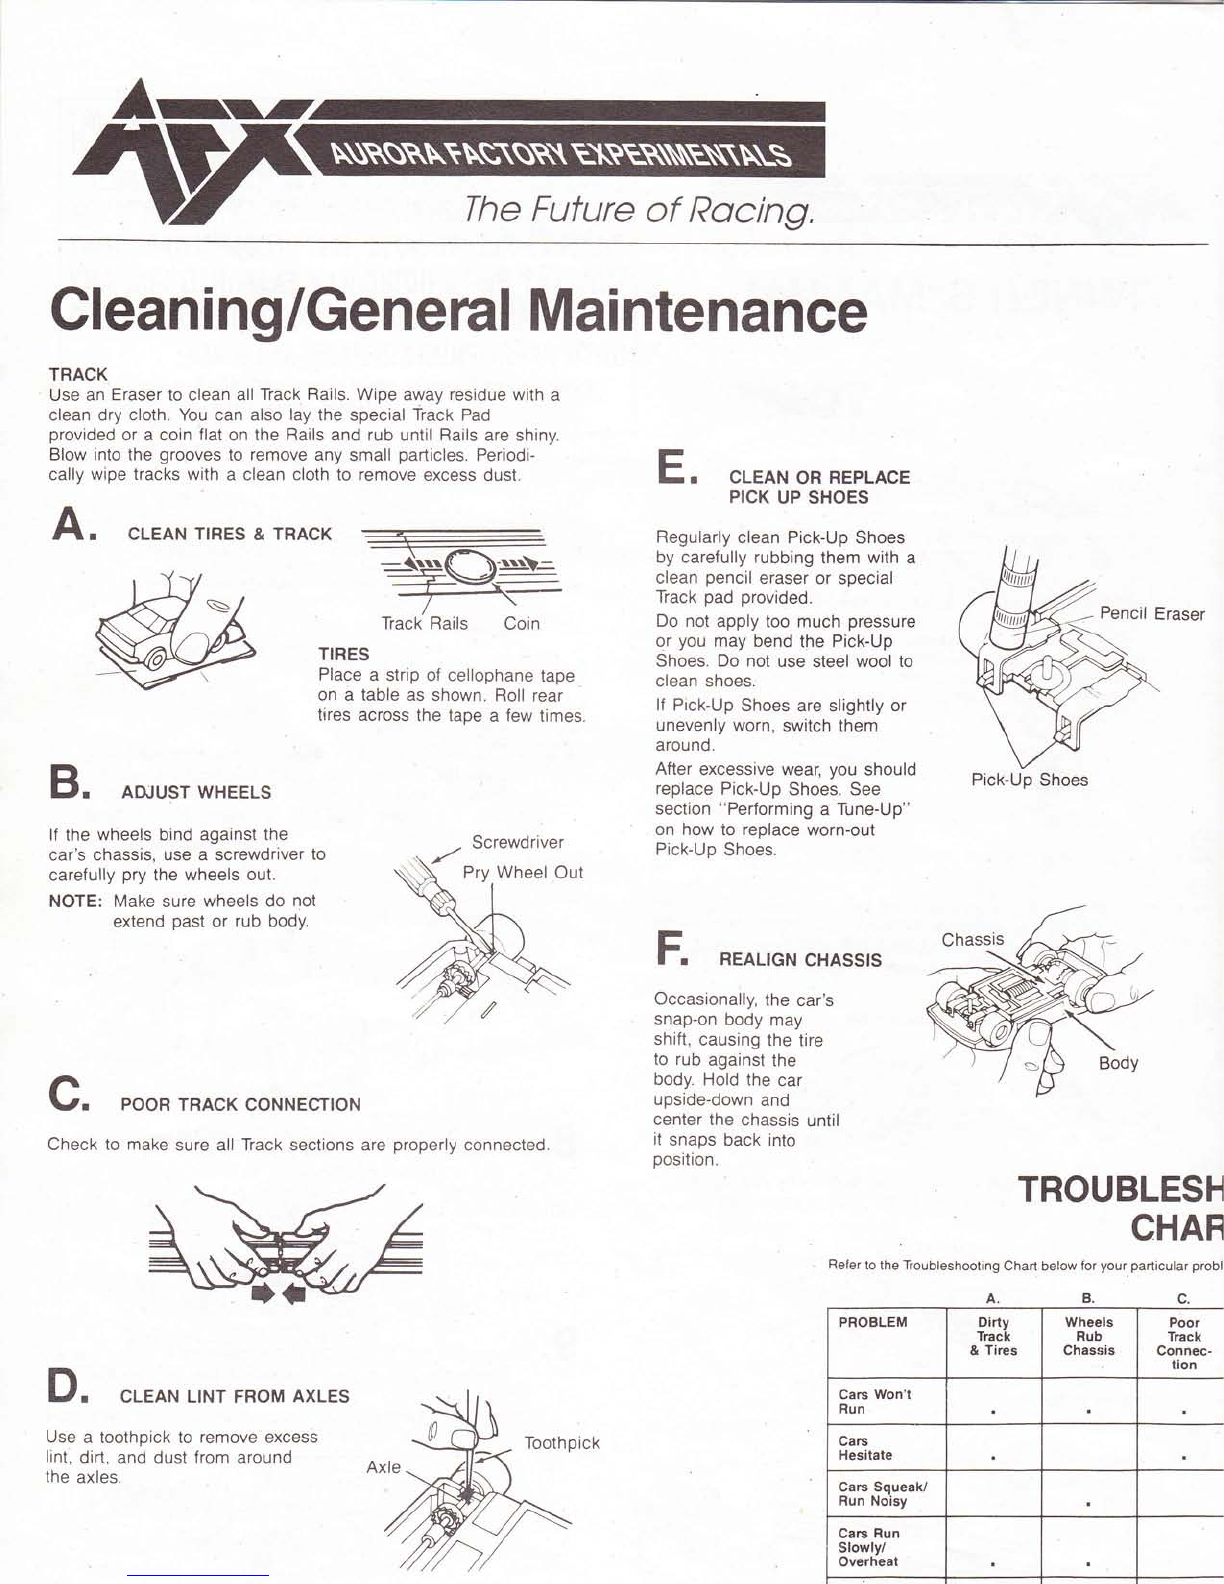
. Always clean the track before you start racing. Use an
eraser to clean the l?ack Rails, then wipe away residue
. with a clean dry cloth.
. Blow out any deposits that may have fallen in the track
grooves.
. . You may also use the special track pad provided or a
coin to clean the Track Rails. Simply lay a coin flat on
the Rails and polish until shiny.
o NEVER use steel wool to clean the Track.
Here are a few maintenance 'tems you may need which are not included jn this sel
. Eraser . Dry Cloth . Cellophane Tape o Coin . Toothpick . Small Screwdriver
NOTE: THE 2.WAY RACING PLUG ALLOWS YOU TO CHANGE
DIRECTION OF TRAVELI FLIP THE PLUG OVER TO
REVERSE FACING DIFECTION.
. On sets using Lapometers, inserl the plug with the arrow
pointing in the same direction as the arrows on the
Lapometer.
REMEMBER: Always disconnect Power Pack when not in. use
Never pull on wires. Always remove connections
by pulling the Plug.
7. . Slide the Accelerators Plugs into the Terminal Track.
. Slide the Power Pack 2-Way Racing Plug into the
. Choose a layout from the Layout Sheet.
o Assemble the straight or curved track on a flat, clean
surface. Do not assemble Track on carpeting.
. Push the pieces of Track together until they lock in place.
. Asseml:le pieces of Track to form the layout of your choice.
Terminal Track as shown.
. Plug the Power Pack into an
(1 10-120 Volts, AC). -- Accelerators
Terminal Tiack
Power Pack
Guide Pin
Slot
. Squeeze the Trigger on the Accelerator to make the car
accelerate. The more you squeeze the Trigger, the faster
the car runs!
. To reduce speed, simply decrease pressure on the Trigger
. Releasing the Trigger stops the car.
electrical wall outlet
2.
3.
4. r Pull the pieces apart to drsassemble
-
5..
A
O. . Snap the Trestles together as shown.
o Attach the Trestles
to Track as needed.
8. . Place cars on Track. Make sure Guride Pin fits into
Slot on Track.
NOTE: Operate only one car per lane.
Attach a Guardrail to each curve section by placing the
Guardrail Tabs under the Track, then snapping up into
place.
Bottom of Track
Trestle
t etP
^<2q
/. t4/
)2:,=-
!-----'-
Accelerator I
Plugs
2-Way Racing Plug
9.
Trigger
Accelerator