AEI Security & Communications DG180-S Manuel utilisateur

LR150-S
160109-1
xSender
MODEL: DG180-S
Wireless Video Sender System
PLEASE KEEP THIS I STRUCTIO MA UAL FOR FUTURE REFERA CE

DG180-S - Wireless Video Sender System
Please read this instruction manual carefully prior to installationPa e 02
TABLE OF CO TE TS
1. Introduction 3
2. Unpack Your xSender™ 4
3. Install The xSender™ Transmitter 5
4. Install The xSender™ Receiver 7
5. Using the xSender™ 8
6. AV Channel Settings 9
7. Troubleshooting: Picture Problems 10
8. Troubleshooting: Audio Problems 12
9. Troubleshooting: Remote Relay Problems 13
10. Technical Support 14
11. Upgrades & Accessories 15
12. Rear Panel Descriptions 16
INTERFERENCE WARNING
This device is liable to receive interference signals generated by Spread
Spectrum LA and stray microwave emissions from some Microwave
Ovens. Such interference will cease after the interfering equipment has
been switched off.
WAR I G
To prevent damage do not
expose this unit to rain or
moisture.

Please read this instruction manual carefully prior to installation Pa e 03
DG180-S - Wireless Video Sender System
I TRODUCTIO
Congratulations on purchasing the xSender™. This product represents state of the art wireless video
technology and exceptional value for money.
You can now enjoy crisp video and hi-fi stereo sound from your Satellite, Freeview, DVD or VCR in
another room in your home.
The xSender™ is designed to work with virtually any video source and is an ideal solution for trans-
mitting channels from a typical home entertainment environment.

DG180-S - Wireless Video Sender System
Please read this instruction manual carefully prior to installationPa e 04
STEP 1
Unpack your xSender™
All packs are computer weigh checked when packed. However, it is a good idea to check all kit con-
tents are present before proceeding with the installation.
Receiver
Transmitter
agic Eye 2 x Power Supply

Please read this instruction manual carefully prior to installation Pa e 05
DG180-S - Wireless Video Sender System
STEP 2
Install the xSender™ Transmitter
Connect the IR Emitter to the socket labelled IR
on the back of the DG180-S Transmitter.
3.
Insert the DigiConnector™ into the SCART socket
labelled ‘TV’ or ‘OUT’ on your source equipment
(Satellite, Freeview, DVD, VCR, etc.) and plug the
SCART cable leading to your TV into the back of it.
1.
Ensure that the A/V Channel switch on the back
of the DG180-S Transmitter is set to 1.
2.
The DG180-S Transmitter will send the sound and video from a connected source (Satellite, Freeview,
DVD, VCR, etc.) to the DG180-S Receiver, located in another room in your home.
Position the IR emitter on or in front of your
source equipment (Satellite, Freeview, DVD, VCR,
etc.) with the LED facing toward the equipments
remote control pick up point.
4.

DG180-S - Wireless Video Sender System
Please read this instruction manual carefully prior to installationPa e 06
continued...
Connect the Power Supply Unit (PSU) to the sock-
et labelled ‘PSU’ on the DG180-S Transmitter.
5.
Connect the Power Supply Unit (PSU) to an avail-
able mains socket.
6.
What’s the A/B switch for??
The Contrast (A/B) switch is present to compen-
sate for differences in equipment set-ups.
Once installation is
complete, if you
experience a poor
picture try
adjusting the
A/B setting.
Important Note: Avoid positioning the DG180-S ransmitter near to other wireless devices operating on
2.4GHz. hese can include Wireless Routers, Laptops, Games Consoles, DEC Phones or Bluetooth devices.

Please read this instruction manual carefully prior to installation Pa e 07
DG180-S - Wireless Video Sender System
STEP 3
Install the xSender™ Receiver
The xSender™ Receiver will pick up the signals being sent by your xSender™ Transmitter and out-
put them to a connected TV.
Connect the Power Supply Unit (PSU) to the sock-
et labelled ‘PSU’ on the DG180-S Receiver.
3.
Locate a vacant SCART socket on the back of your
receiving TV and insert the DigiSender® SCART
cable.
1.
Ensure that the A/V Channel switch on the back
of the DG180-S Receiver is set to 1.
2.
Connect the Power Supply Unit (PSU) to an avail-
able mains socket.
4.

DG180-S - Wireless Video Sender System
Please read this instruction manual carefully prior to installationPa e 08
STEP 4
Using the xSender™
To control your source equipment, use its origi-
nal remote control i.e. your Satellite remote,
Freeview remote, DVD remote, VCR remote, etc.,
while pointing it at the xSender™ Receiver.
4.
Switch on the source equipment (Satellite,
Freeview, DVD, VCR, etc.).
1.
Switch on the xSender™ Transmitter and
Receiver at the rear of the units.
2.
On the receiving TV, select the SCART channel
assigned to the SCART socket that you plugged
the DG180-S Receiver in to. This may be labelled
as SCART, AUX, AV, VIDEO, VCR or .
3.

Please read this instruction manual carefully prior to installation Pa e 09
DG180-S - Wireless Video Sender System
A/V Channel Settings
The xSender™ features 4 Audio/Video Channels. Each of these A/V Channels changes the frequen-
cy on which the xSender™ operates and is useful for when other wireless devices are present in your
home. Because the A/V Channel switch allows you to ‘fine tune’ the frequency on which your
xSender™ operates, it is possible to overcome most interference and reception troubles that may
occur.
For your xSender™ to function correctly it is very important that the A/V Channel is set the same on
both the Transmitter and Receiver.

DG180-S - Wireless Video Sender System
Please read this instruction manual carefully prior to installationPa e 10
TROUBLESHOOTI G
Picture Problems
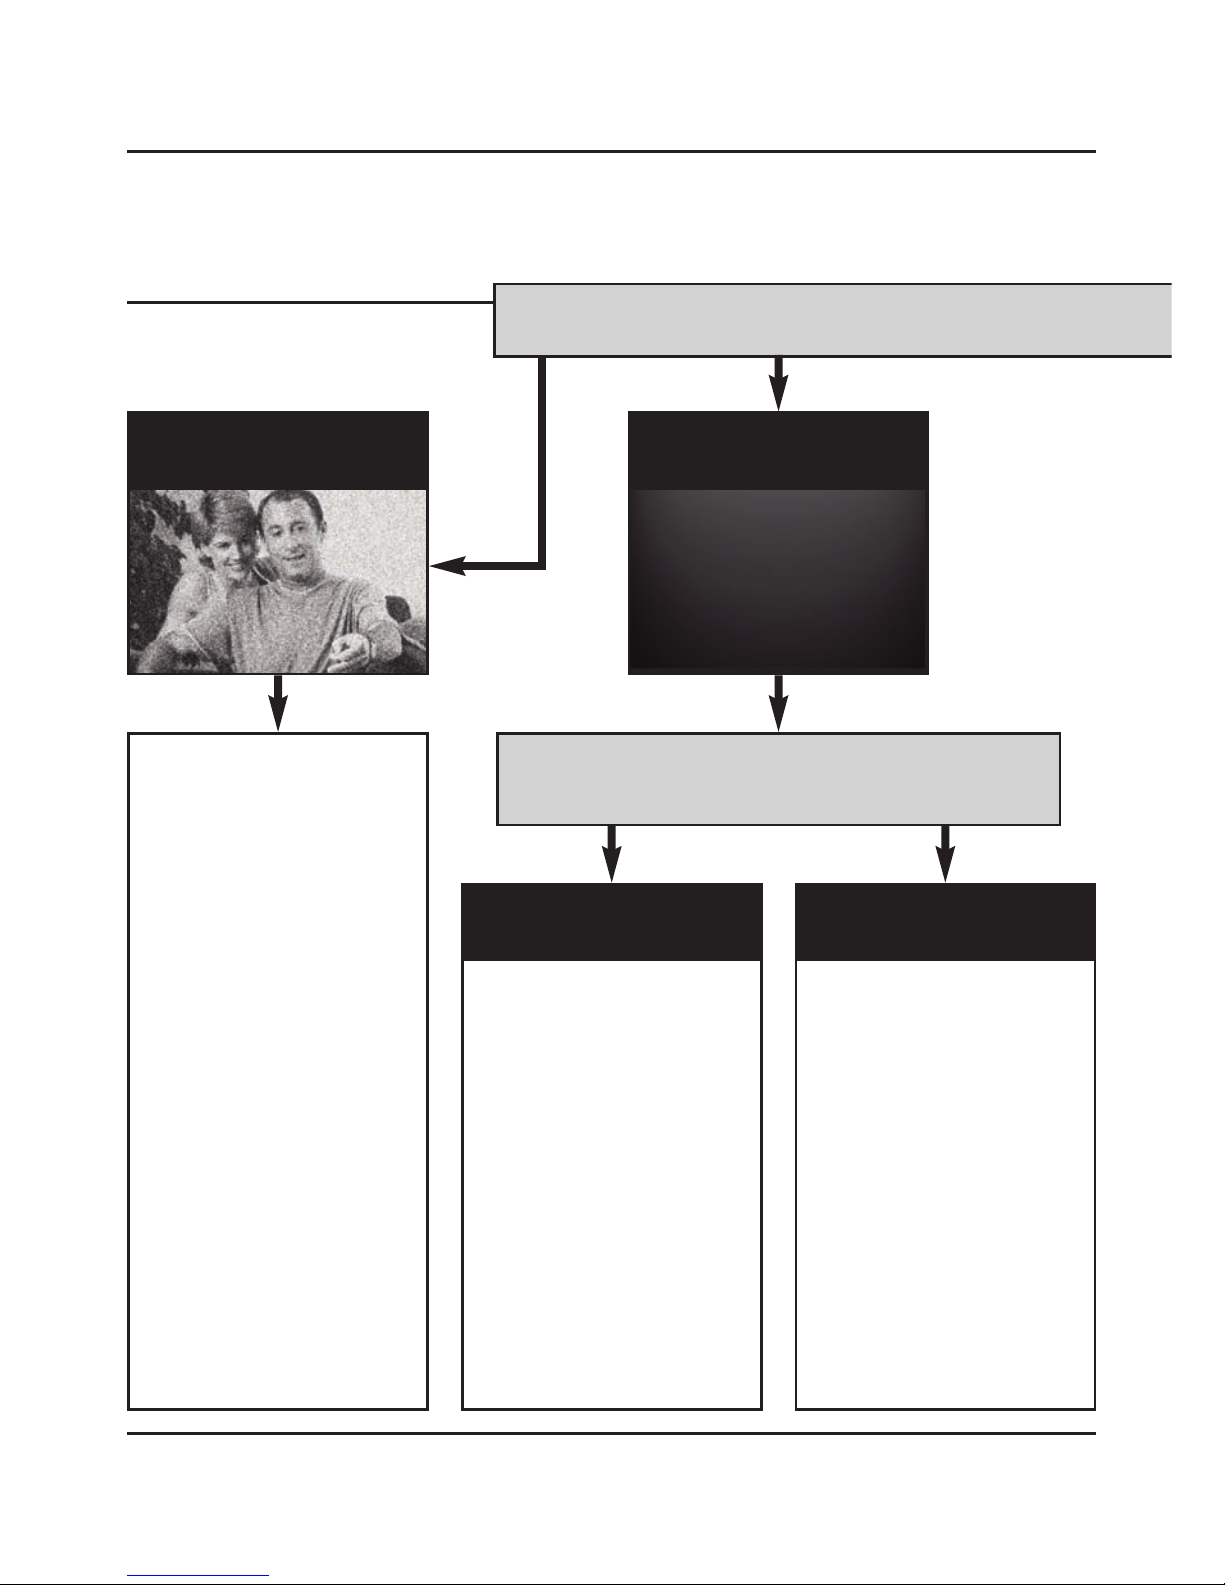
Q: What do you see on your second telev s on?
he picture is present but
poor quality
I still see a Black Screen...
WRONG AV CHAN-
NEL SELECTED
1. Switch the transmitter back
on.
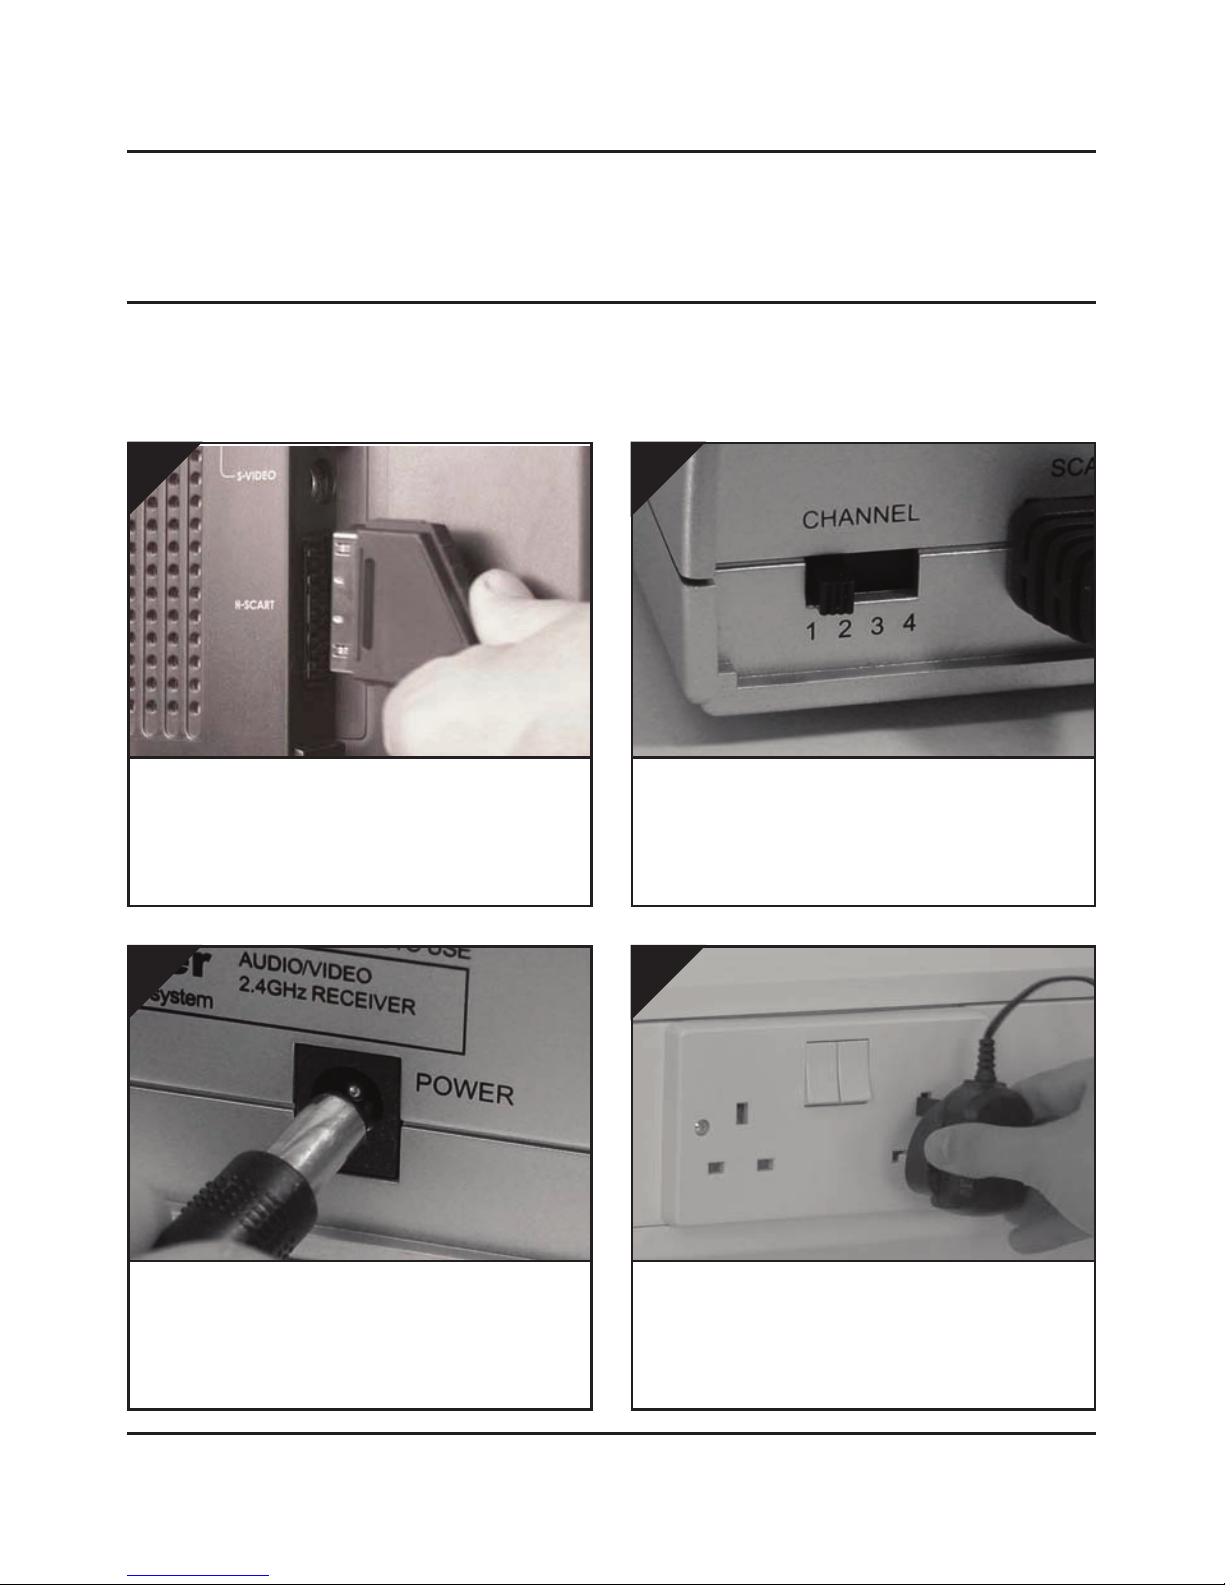
2. Ensure the correct SCAR
channel is selected on your sec-
ond television. Some televisions
feature multiple AV channels for
one or more SCAR , phono and
S-Video inputs.
3. If available try another SCAR
socket on the remote television
POOR RANGE
1. he picture & sound quality is
affected by the transmitter and
receiver’s location. ry position-
ing them in different locations.
he transmitter and receiver
must be connected to a mains
extension lead that can be
moved.
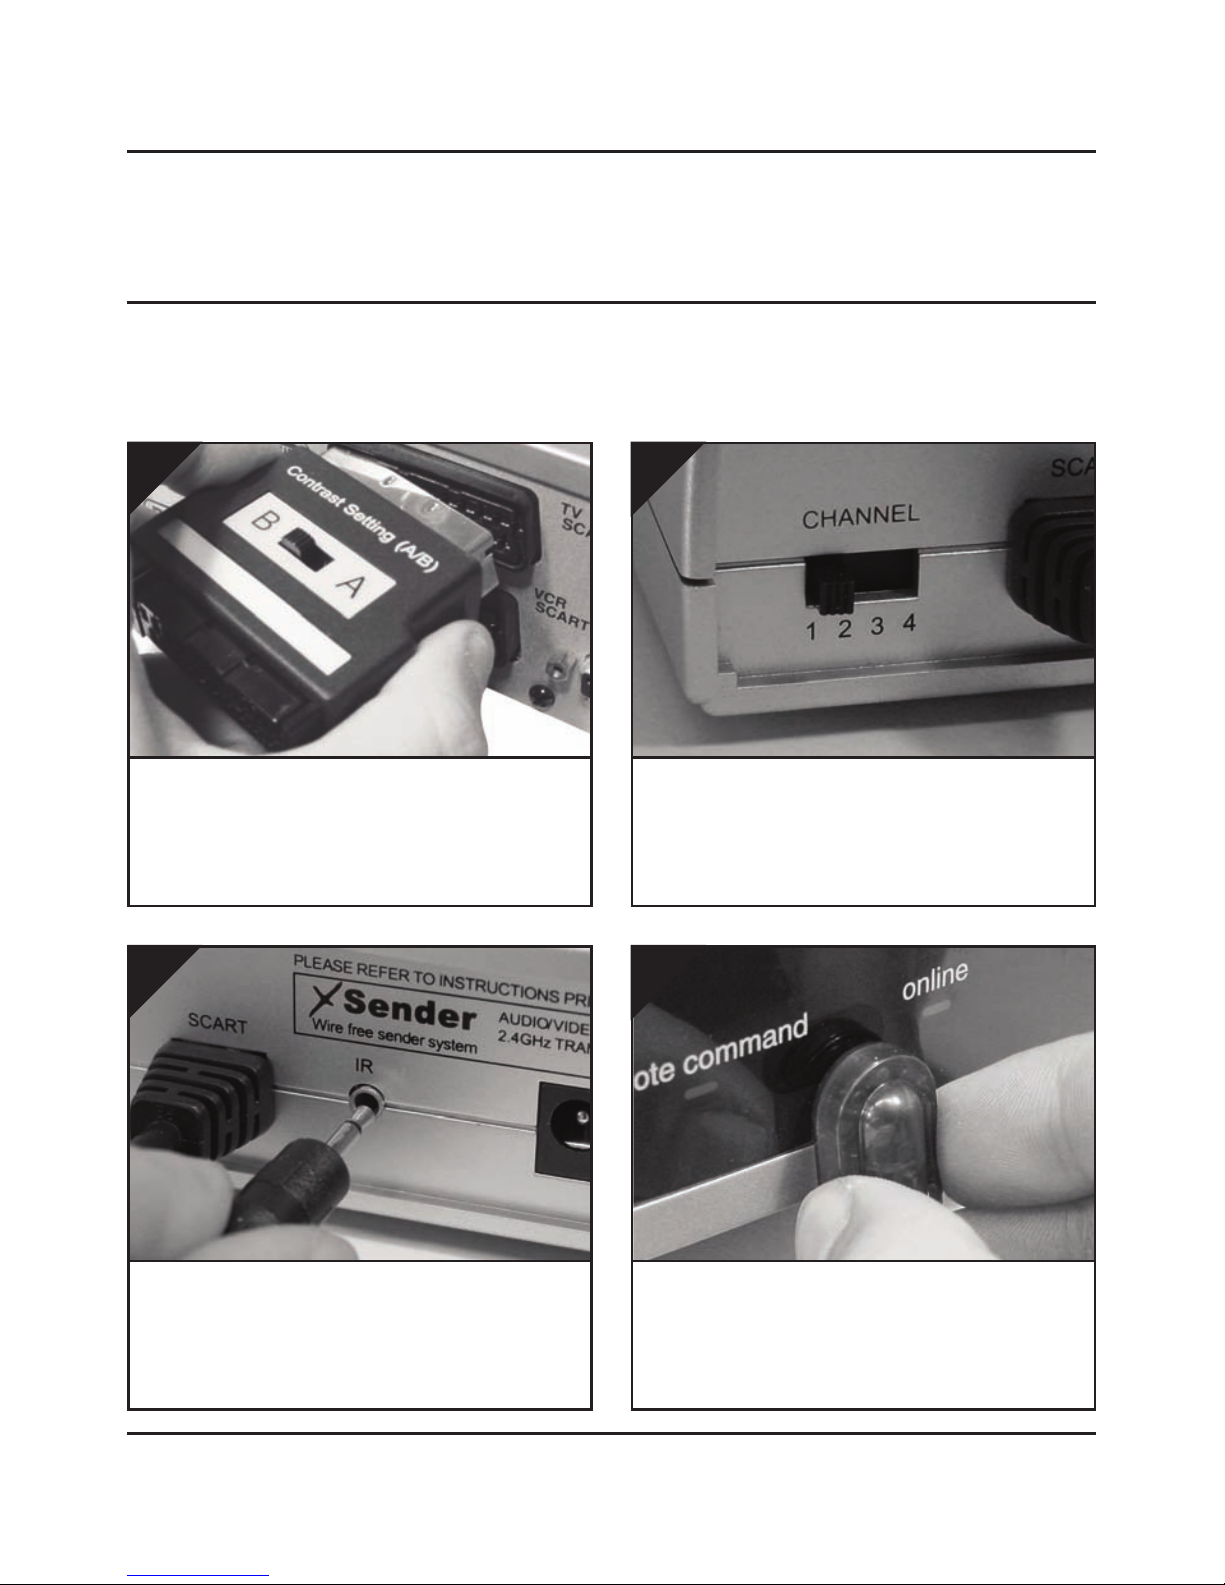
2. ry the 3 other available chan-
nels ensuring that the
audio/video channel is set to the
same on both the transmitter
and receiver
3. Ensure the units are within
the usable range, normally this
would be 40m when passing
through 2 average internal
walls. hicker or stone/granite
walls may lower the usable
range of this device.
RECEIVING BLANK
SIGNAL
1. Switch the transmitter on.
2. Ensure the transmitter is con-
nected to your source device.
3. Ensure that the source equip-
ment is switched on (such as
your satellite or freeview box)
I now see a snowstorm or
blue screen...
I see black or blank screen
Switch OFF your DigiSender® TRANSMITTER
What do you now see at the second TV?
Ce manuel convient aux modèles suivants
1
Table des matières


