ADS Technologies USBX-835 Manuel utilisateur

USB 2.0 Hard Drive Kit Manual
Convert Your Hard Disk Drive to USB 2.0
User's Guide : English, French, German, Spanish
USB 2.0 Hard Drive Kit
ADS Tech
North America Support Hours:
M-F : 8 am - 5 pm, PST
Email : [email protected]
website : www.adstech.com
Tech

USB 2.0 Hard Drive Kit
USB 2.0 Hard Drive Kit

USB 2.0 Hard Drive Kit
USB 2.0 Hard Drive Kit
Table of Contents
Copyright Notice
The USB 2.0 Drive Kit devices are innovative, hassle-free devices that were designed to let you use internal devices,
such as hard drives and CD-ROMs or DVD-ROMs, as external units. ADS Technologies respects the rights of copyright
owners and asks that you do the same. The Copy Right Act gives owners of copyrights the exclusive right to reproduce and
prepare derivative works as well as to publicly perform, display and distribute their works. This means that you must obtain
permission to engage in any of these activities when using works that are copyrighted by another person.
Apple and Macintosh are registered trademarks of Apple Computer, Inc. Microsoft, Windows, & Windows 98 are registered trademarks of Microsoft Corporation.
IBM is a registered trademark of the International Business Machines, Inc.
ADS is a registered trademark of ADS Technologies Inc. ADS Technologies (ADS) makes no warranty of any kind with regard to this material, including but not limited
to, the implied warranties of merchantability and tness for a particular purpose. The information furnished within this written document is for information purposes
only and is subject to change without notice. ADS Technologies assumes no responsibility or liability for any errors or inaccuracies that may appear herein. ADS
makes no commitment to update or to keep current information contained within this document. (rtt)
© 2003 ADS Technologies. All Rights Reserved
Drive Installation - English . . . . . . . . . . . . . . . . . . . . . . . . . . . . . . . . . . . . . . 1
Software Installation - English . . . . . . . . . . . . . . . . . . . . . . . . . . . . . . . . . . . .2
Drive Installation - French . . . . . . . . . . . . . . . . . . . . . . . . . . . . . . . . . . . . . . . 7
Drive Installation - German . . . . . . . . . . . . . . . . . . . . . . . . . . . . . . . . . . . . . . 9
Drive Installation - Spanish . . . . . . . . . . . . . . . . . . . . . . . . . . . . . . . . . . . . . . 11
Service & Warranty . . . . . . . . . . . . . . . . . . . . . . . . . . . . . . . . . . . . . . . . . . . . 13

USB 2.0 Hard Drive Kit
USB 2.0 Hard Drive Kit
Drive Installation:
Open the USB 2.0 Hard Drive Kit
enclosure by removing the top
from the kit.
Next, set the hard drive’s jumper
setting to “MASTER” or single drive
setting (Western Digital). For more
information about jumper settings,
please refer to your hard drive’s
documentation.
STEP 1:
Now install your hard drive into the
enclosure by rst connecting the
power supply cable and then the
at ribbon cable to your hard drive.
STEP 2:
Afterwards, gently separate the
metal support brace from the
plastic casing, keeping in mind to
not detach the wire that’s attached
to the fan. Screw in your hard drive
with the supplied screws to mount
it securely into the support brace.
STEP 3:

USB 2.0 Hard Drive Kit
USB 2.0 Hard Drive Kit
Reassemble all the pieces of the
Hard Drive Kit by replacing the
metal support brace into the
bottom of the enclosure as well as
the top of the enclosure. Now use
the other supplied screws to secure
your Hard Drive Kit.
The physical assembly of your Kit is
now complete.
STEP 4:
Software Installation:
USB 2.0 Driver Installation:
For USB 2.0 Hard Drive Kit
USB 2.0 allows a maximum speed of up to 480 Megabits per second – or 60 Megabytes per
second. To run at USB 2.0 Speeds, the host Computer needs to be USB 2.0 Enabled. Most
PC’s sold since early 2003 have USB 2.0 built-in. The POWER MAC G5’s and the latest Apple
PowerBook G4’s also have USB 2.0 built-in. If you plug the Drive Kit into a USB 1.1 Port, the drive
kit will only run at speeds up to 12 Megabits/s (1.5 Megabytes per second).
Aftermarket USB 2.0 PCI Cards and Notebook Cardbus cards are also available to add USB 2.0
Ports to your PC or MAC. Please check the ADS Tech website, www.adstech.com, for more details.
• For Windows XP, Windows 2000 and Windows ME, NO drivers are required. Simply plug in
your drive kit to an available USB Port.
• For Windows 98SE and Windows 98 Gold, Insert the Drive Kit CD rst then plug in your
Drive Kit to an available USB Port. The drivers are in the ROOT directory of the Drive Kit CD.
• For MAC OS 9.X, no drivers are required. Simply plug in your drive kit to an available USB Port.
• For MAC OS 10.X, no drivers are required. Simply plug in your drive kit to an available USB Port.

USB 2.0 Hard Drive Kit
USB 2.0 Hard Drive Kit
Turn the Drive Kit on:
Once the software has been properly installed, turn on your drive kit (switch on the back), plug one end of the
USB 2.0 cable into the Drive case. With the computer already turned on, plug the remaining end of the cable
into your computer’s available USB port.
If all the software was installed correctly, your drive kit should mount at this point. Some drives need to be
partitioned or formatted before they can mount properly.
Things to Remember:
• Partitioning and formatting software (HDST) for the MAC OS is included with your Drive Kit.
• Partitioning and formatting software for the PC is built-in to the Microsoft operating system. Please see
installation notes following this section.
• The Drive Kit is not a portable device it should be handled with care.
• Do not unplug the Drive Kit USB cable without safely un-mounting or ejecting the drive rst. To unmount in any
MAC OS, drag the DRIVE Icon to the TRASH BIN.
To eject in any Microsoft Operating system, look for this icon in the bottom right area of your SYSTEM TRAY,
click once then click the drive that you want to safely eject.
Windows XP and Windows 2000 Hard Disk Drive Installation
If the HARD DRIVE in your drive kit does not mount as a DRIVE LETTER after you have plugged-in and turned
on your drive kit, you would need to do the following:
• RIGHT CLICK on “MY COMPUTER”, Click on “Manage”
• Click on “DISK MANAGEMENT”. This will show all the drives in your system.
USB 2.0 Hard Drive Kit
USB 2.0 Hard Drive Kit
• If prompted to initialize your drive, go ahead and do so if it is a brand new Hard Drive. For older hard disk
drives that already have data in them, initializing erases the data on that drive.
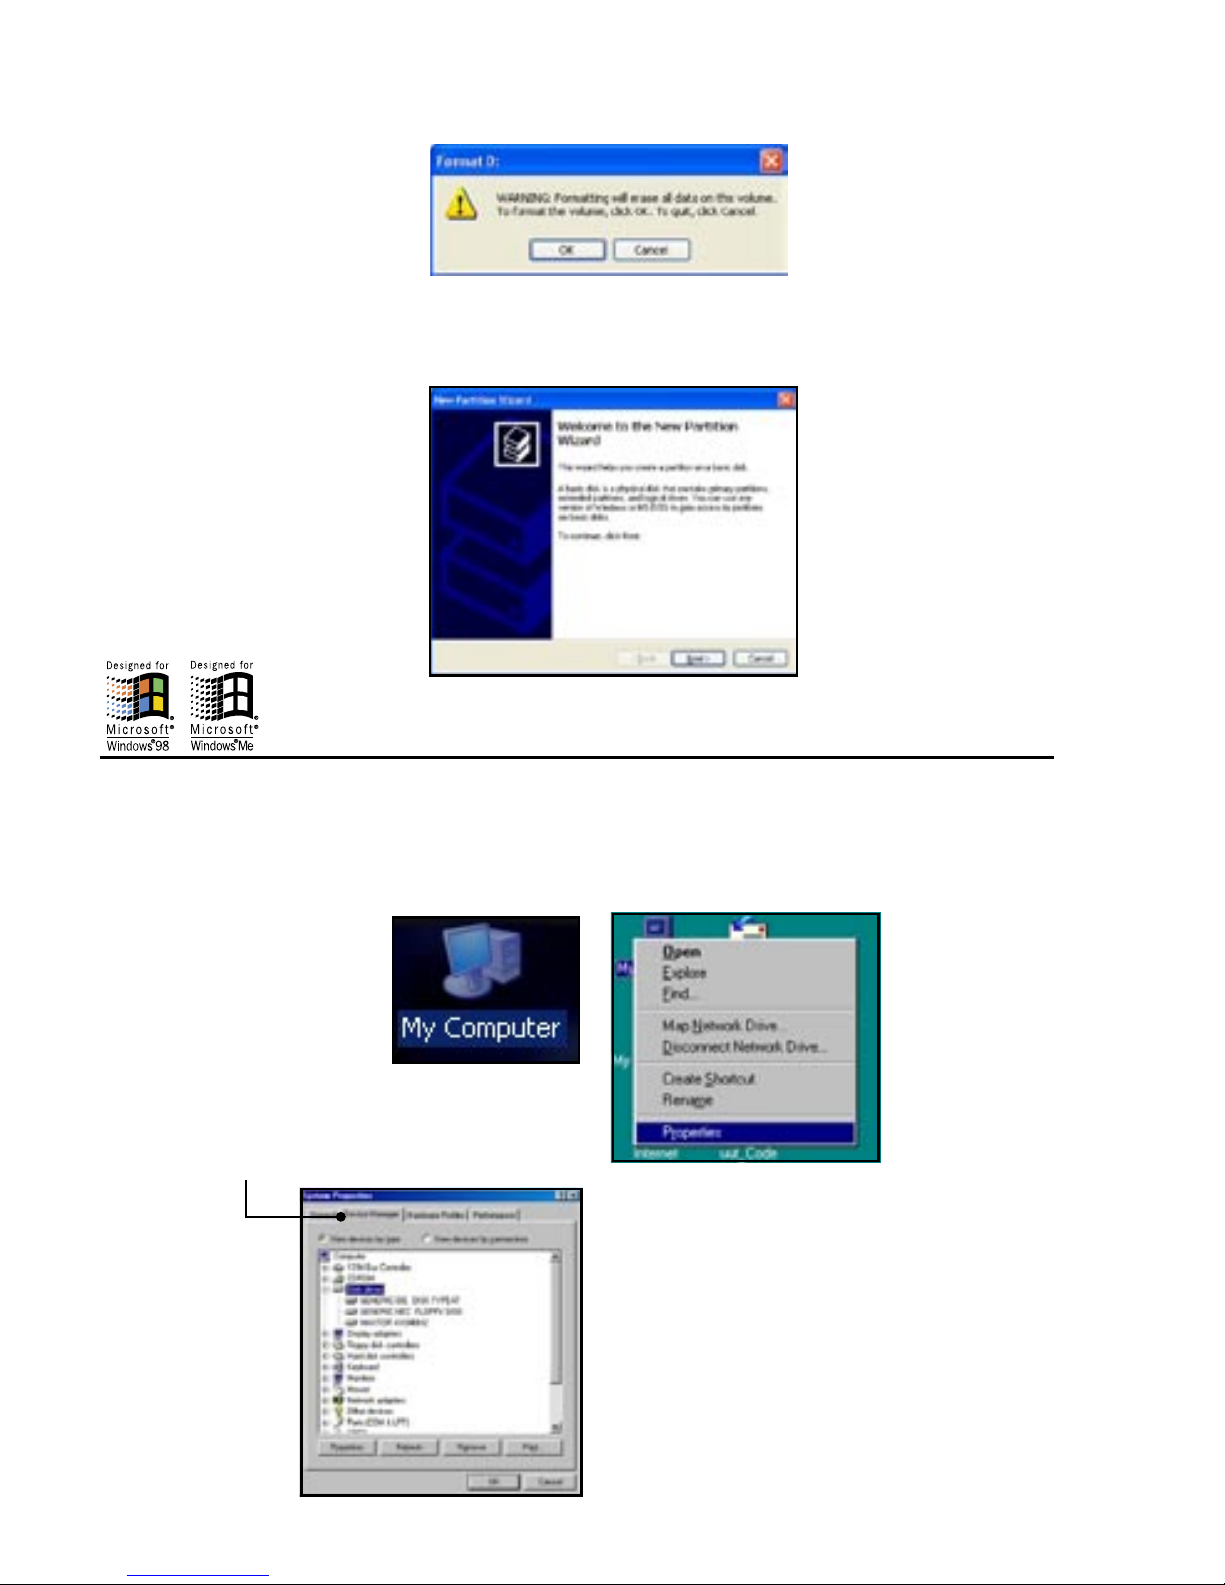
The USB 2.0 drive that you just initialized will now be listed in the drives section of the lower right side of
the window. Go ahead and right click on the drive and make a new partition. This will run a wizard that will
partition and format the drive and assign it a drive letter.
Windows 98SE and Win Me Hard Disk Drive Installation
If the HARD DRIVE in your drive kit does not mount as a DRIVE LETTER after you have plugged in and
turned on your drive kit, you would need to do the following:
• RIGHT CLICK on “MY COMPUTER”, then click on “PROPERTIES”
• Click on “DEVICE MANAGER”

USB 2.0 Hard Drive Kit
USB 2.0 Hard Drive Kit
• Check the REMOVABLE box
• Assign a DRIVE LETTER. Make sure you assign a drive letter that is not in use. The START and ENDING
DRIVE LETTERS should be the same letter also. If the drive letter M was selected for example as the starting
drive letter, letter M should also be the ending drive letter.
• Click “OK” then restart the computer
• After restarting, double click on “MY COMPUTER” , this will show the drive letter that was just assigned to
the USB 2.0 Drive kit. If this is a new drive, you can double click the drive to format the drive.

USB 2.0 Hard Drive Kit
USB 2.0 Hard Drive Kit
• Click on “DISK DRIVES”
• Double click on the drive that you just plugged in
(for example: if you plugged in a MAXTOR, you should click on the MAXTOR)
• Click on the “SETTINGS” tab

USB 2.0 Hard Drive Kit
USB 2.0 Hard Drive Kit
Installation du materiel pour le Hard Drive Kit - FRENCH
Ouvrez le boîtier de la caisse du
Hard Drive Kit et retirez le boîtier
hors de la caisse.
Ensuite, congurez les cava-
liers du Hard Drive Kit pour
« MAÎTRE » ou disque unique
(Western Digital). Pour plus
d’information sur la conguration,
regarder dans la documentation
du hard drive.
ETAPE 1:
Maintenant installez votre disque
dur dans votre Hard Drive Kit. Rac-
cordez le câble électrique avant le
câble ruban.
ETAPE 2:
Ensuite, séparez doucement le
soutien métal du boîtier plastique,
faite attention de ne pas détacher
le câble qui est xé au ventilateur.
Serrez votre disque dur avec les
vis fournies pour la monter solide-
ment dans le soutien.
ETAPE 3:
Table des matières
Autres manuels ADS Technologies Accessoires informatiques


