ADB i-Can 1110SV Manuel utilisateur

1110SV
USER GUIDE
1110SV

TABLE OF CONTENTS
Table of contents.................................................................. 2
Safety first..........................................................................3
Getting started..................................................................... 4
Unpacking your digital receiver...........................................4
Front panel......................................................................... 4
Basic connections ...............................................................5
Remote control..................................................................... 6
First installation ................................................................... 8
Language selection............................................................. 8
Channel numbering method ..............................................9
Using your receiver............................................................ 14
TV screen format.............................................................. 10
Channel banner ...............................................................11
Browsing through channels and programs........................11
Extended information....................................................... 13
Channel list ......................................................................13
Options menu ..................................................................14
Locked channels and programs......................................... 15
Main menu ......................................................................16
Viewer planner.................................................................17
Channel manager............................................................. 18
List organization............................................................... 20
For parents.......................................................................20
Your preferences ..............................................................23
Installation .......................................................................25
Program guide.................................................................... 31
Maintenance ....................................................................32
Before requesting service..................................................32
Troubleshooting ............................................................... 32
2

USER GUIDE
1110SV
3
This receiver has an external power supply that works in the range
100 to 240V AC, 50/60 Hz. Ensure you plug the power input lead
into a standard AC wall outlet, and not any DC power source. Re-
member that contact with the AC power supply can be lethal.
Ensure that all cables, including the power input lead, are inserted
properly into the receiver before connecting it to the AC power
supply. Similarly always unplug the receiver from the power supply
first, before disconnecting cables from the receiver or reconnecting
them.
Never attempt to repair or reconstruct the receiver yourself. You
can get a serious electric shock if you attempt to open the casing.
Be extremely careful if this receiver gets wet for any reason. Im-
mediately unplug it from the mains supply.
DO
•If any object falls into the casing, unplug the receiver and have
it checked by a qualified technician.
•Allow adequate air circulation around the unit to prevent internal heat
build-up. Do not place the unit next to a radiator or any heat source,
and make sure that the air vents are
left clear.
DO NOT
■Do not expose the receiver to extreme temperatures, direct
sunlight, or high humidity.
■Do not place any objects on top of the receiver since that
could restrict air circulation.
■Do not place the receiver on fabric furnishings, carpets or
other flammable materials.
This digital receiver has been manufactured to meet international
safety standards. However, safety precautions must be followed
to ensure the safe and reliable operation of the device.
Please take note of the following guidelines to avoid the
risk of an electric shock.
SAFETY FIRST
Thank you for purchasing an i-CAN 1110SV!
Removing the cover of the receiver may lead to a
severe and potentially fatal electric shock

GETTING STARTED
4
UNPACKING YOUR DIGITAL RECEIVER
FRONT PANEL
LED INDICATOR
Green - operating mode.
Red - standby mode.
The LED blinks when your device is receiving signals from the
remote control.
SMART CARD SLOT
Smart Card allows you to view scrambled TV channels. Gently
push the card into the slot. Its chip should face downwards
and the symbol of an arrow should face inwards.
Two Nagra Smart Cards (e.g. Mediaset and Pangea) cannot be
used at the same time. If you are using two Cards, it does not
matter to which slot you place a Card first.
If you are using just one Card, it still does not matter which
slot you use.
Receiver Remote Control Power Supply BatteriesRF Cable Telephone Cable

USER GUIDE
1110SV
5
BASIC CONNECTIONS
The following connections need to be made in order for the receiver to work properly.
Plug in all cables before connecting the receiver to the power supply.
Similarly always unplug the receiver from the power supply first,
before disconnecting cables from the receiver or reconnecting them.
!
Power
socket
TV
DVD Recorder
Home Cinema
Telephone
socket

REMOTE CONTROL
6
Button Action
Sets the remote control to operate your receiver.
Sets the remote control to operate your TV.
In normal viewing and Channel Banner mode,
brings up Digital Teletext if available.
Switches your receiver between standby and
operating modes.
Navigate through external applications. They are
also used to perform a few additional functions in
some screens.
Switches your receiver between the TV and Radio
modes.
Displays and hides the Main Menu.
Displays and hides the Applications window.
Button Action
Displays the Options menu with focus on display
format option.
In viewing mode, it alternates between the current
and previous channel within the same Channel
List. In different screens, it returns to the previous
screen.
Returns to normal viewing.
In the Channel Banner, they switch between the
current and next program information. In different
screens, they highlight items or change values.
In the Channel Banner, they browse through
channels. In different menus, they shift highlight.
Displays and hides the Electronic Program Guide.

USER GUIDE
1110SV
7
Button Action
In various menus and screens, it selects the
currently highlighted item or confirms your
choices.
In the Channel Banner, if the icon is
displayed, it tunes to the channel which name is
displayed or sets a Reminder when the
information about the next program is displayed.
Switches between the Channel Banner, Channel
Banner with Extended Information and viewing
mode in a circular manner.
Adjusts the volume level.
Mutes the sound. Pressing this button once again
restores the previously set volume level.
Button Action
Tunes to the next/previous channel. In some
menus, they scrolls pages up and down.
Allow you to tune to a desired channel, select
menu items and enter the PIN code (the default
PIN code is 1234).
Displays and hides the window with the currently
selected channel list. In this window, you can
change channel lists and tune to a desired
channel.
Displays the Options menu where you can change
audio, subtitle and teletext language as well as
display format. You can change an option only
if its alternatives are broadcast with a particular
program.

Once you have connected you receiver properly and plugged it
to the mains, the LED indicator on the front panel will light up.
Then, after a few seconds the Welcome Screen will be displayed
on your TV screen. Wait until the Welcome Screen disappears and
the Language Selection screen appears.
Note: If you do not select the below items yourself, after 10
seconds, the receiver selects the highlighted item itself and goes
to the next step (screen).
LANGUAGE SELECTION
The Language Selection screen allows you to select the language
for any information displayed on the screen.
Press to highlight the on-screen language and press
to make your selection.
Afterwards, the confirmation screen will appear. Press to
confirm your choice of the language.
The language selected in this window is also automatically
assigned as the language of Primary Audio, Primary Subtitles and
Teletext Language. Please note that you can also change the on-
screen language in the Language Options screen (Main Menu ->
Your Preferences).
FIRST INSTALLATION
8

USER GUIDE
1110SV
CHANNEL NUMBERING METHOD
You can arrange your channels in two ways:
If you choose Automatic Channel Numbering, the channels will be
organized as the broadcaster ordered them (usually thematically).
If you choose Normal Channel Numbering, the channels will be
numbered in the order that they are found during the Channel
Search process.
If you want to change the default antenna configuration settings,
press the button to open the Antenna Configuration screen.
When changing the settings, please remember that at least one
LNB must be assigned to Hotbird Satellite (see also page 28).
CHANNEL SEARCH
After you have selected the numbering method and pressed
the channel search will start automatically. When this procedure
is completed, you will be informed about the total number of
channels found. Afterwards, press to tune to the first TV
channel.
If the channel searching procedure has not been completed
successfully, an error message will appear. Then, you can press
to go back to the Channel Numbering Method or to enter
the Antenna Configuration screen.
9
USING YOUR RECEIVER
10
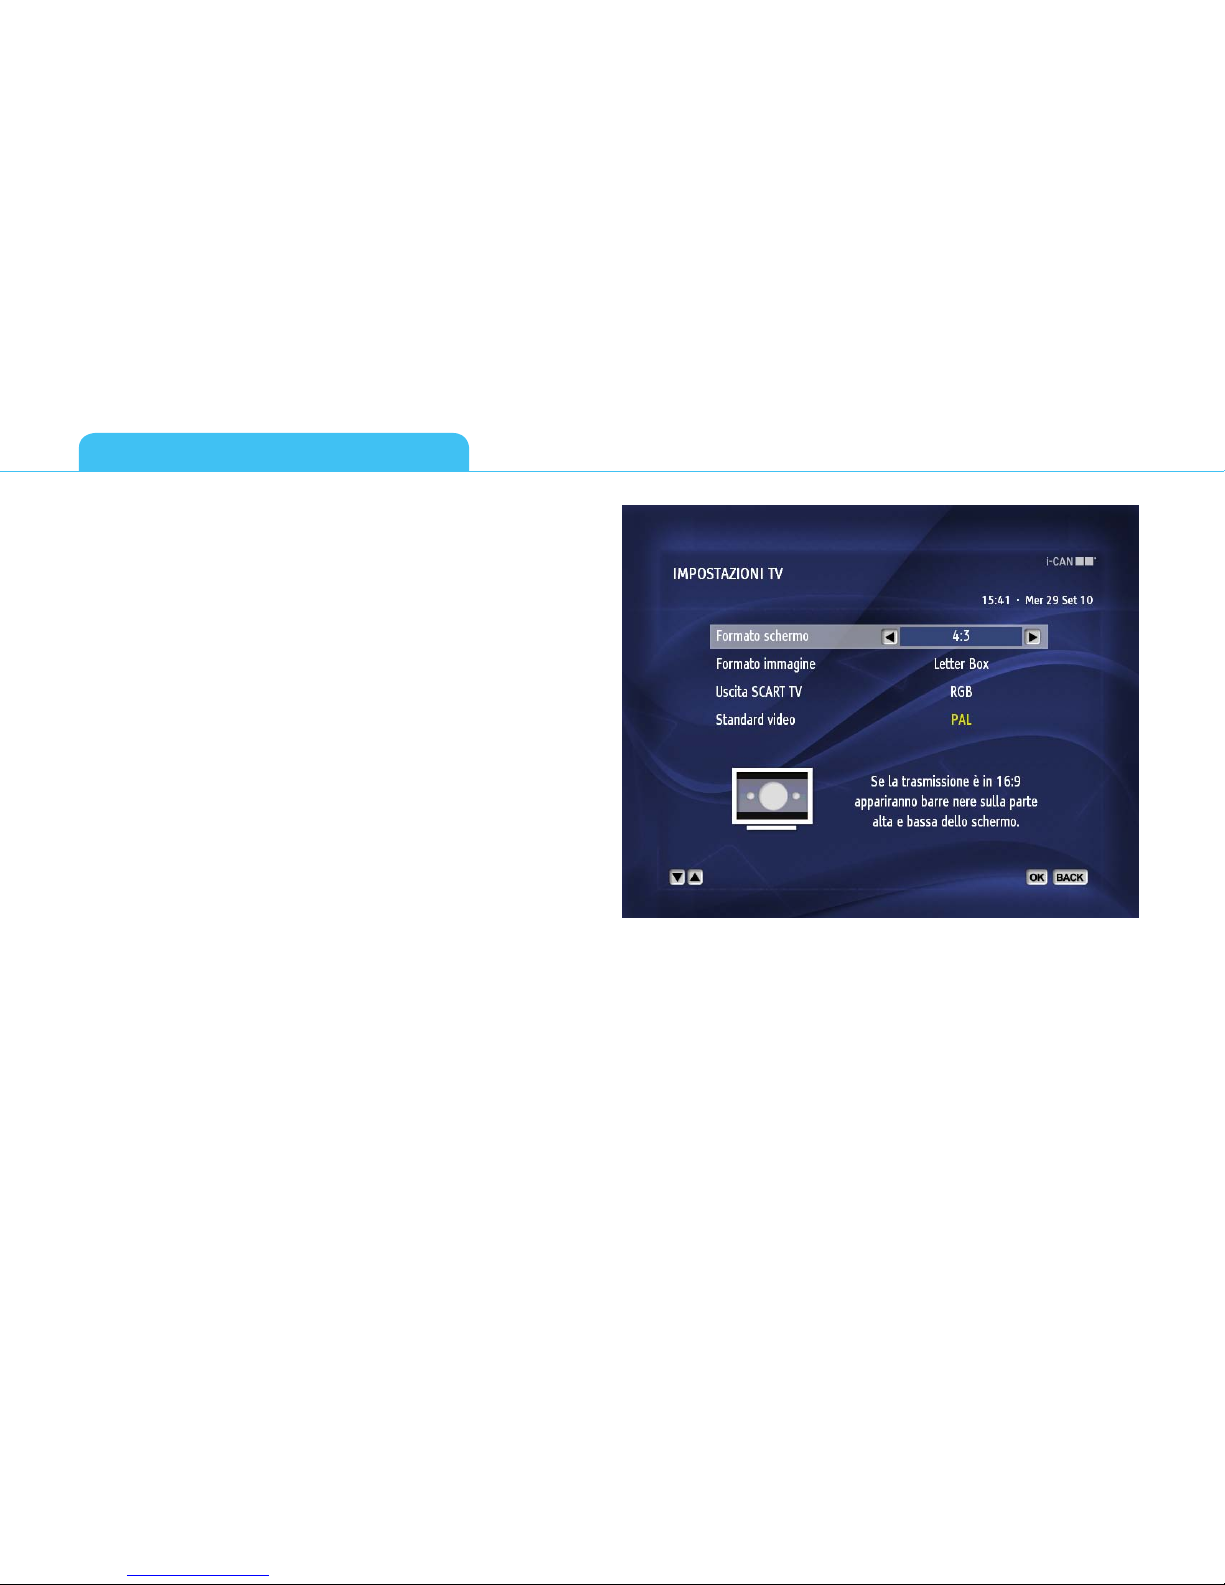
TV SCREEN FORMAT
When you are setting up a new receiver for the first time, by
default, the receiver sets TV Screen Format to 4:3. It means that if
the screen format of your TV is 4:3, there is no need to modify TV
Screen Format setting in the receiver’s menu.
However, if the screen format of your TV is 16:9, go to the Main
Menu, Installation, Settings, TV Settings and change the TV Screen
Format option to 16:9.
Table des matières
Autres manuels ADB Récepteur


