ActionTec zControl Manuel utilisateur

USER MANUAL
zControl


Introduction III
Introduction
This manual will guide you through the setup of your ActionTec
zControl, the breakthrough system that will make your home con-
trol and home monitoring easy and enjoyable!
Please make sure you read all instructions before proceeding with
the installation.
Your package contains the following items:
(1) ActionTec zControl
(1) Power supply
(1) Stand for putting the zControl in a vertical position
(1) Ethernet cable
(1) Accompanying CD (includes complete User Manual)
(1) Quick Start Guide
It may also contain any or all of the following items:
(1) Panasonic BL-C10A, BL-C20A, or other IP Camera
(1) Z-Wave Appliance module
(1) InTouch occupancy sensor CA9000
(2) Z-Wave Lamp modules
(1) Intermatic Wireless Handy Remote Controller
Now it’s time to activate and register your ActionTec zControl, get familiar with the User Interface, and learn how
to configure your home control and home monitoring devices.

Table of ContentsIV
Table of Contents
3Accessing the User Interface
1Inspecting Your zControl
4Overview: Basic UI Features and Elements
2Connection, Registration, and Activation
3.1 UPnP Access
1.1 Inspecting the Ports on Your zControl
4.1 Administrator Mode
2.1 Connecting to the Internet
4.5 Scenes
3.2 IP Address Access (Advanced)
3.3 Mobile Device Access
1.2 Inspecting the LEDs on Your zControl
4.2 Settings
2.2 Registration
4.6 Schedules
4.3 Devices
2.3 Activation
4.7 Monitor
4.4 Rooms
4.8 Dashboard
4.9 Mobile UI
5
1
8
2
5
1
8
2
9
6
6
1
8
2
9
9
4
9
9
9
10

Table of Contents V
5Managing Z-Wave Devices
7Advanced UI Features
8Suggestions
9Troubleshooting
6Installing Home Monitoring Devices
9.1 Unable to Register with Portal Server
9.5 zControl Becomes Unresponsive or Online LED Is Not Solid Green
5.1 Adding Z-Wave Devices
7.1 Device Management
9.2 Unable to Access zControl UI
9.6 Unable to Control My Z-Wave Appliance Module
5.2 Adding Z-Wave Devices (UI method)
5.3 Removing Z-Wave Devices
7.2 Rooms, Scenes, and Schedules
7.3 Monitoring
7.5 Messages
7.6 Controlling Multiple zControls
7.4 Triggers
6.1 Installing Motion/Occupancy Sensors
6.2 Installing UPnP Cameras
6.3 Installing non-UPnP Cameras
9.3 Unable to Control Device
9.7 Unable to Control My Z-Wave Lamp Module
9.4 Browser Becomes Unresponsive
9.8 Motion detector Is Not Being Detected
14
18
27
28
16
28
29
14
18
28
29
14
15
18
22
24
25
23
16
16
17
28
29
29
30

Table of ContentsVI
9.9 Motion Detector Takes Too Much or Too Little Time to Return to “No motion” State
10.1 Preparing the zControl to Use the Remote Controller
9.10 Unable to Access my Panasonic IP Camera
10.2 Setting Up the Intermatic CA-09 Remote Controller
9.11 Unable to View My Panasonic IP Camera Video
10.3 Programming the zControl to Use the Remote Controller
9.12 Why Do I Have an Upgrade Notification Message on My zControl Interface?
9.13 Cannot Add New Z-Wave Devices to My zControl
9.14 Understanding the LEDs
30
33
30
33
30
34
31
31
32
10 Appendix A - Remote Controllers (Advanced Setup) 33

1
Inspecting Your zControl
1 Inspecting Your zControl
1.1 Inspecting the Ports on Your zControl
Let’s take a look at the back of your zControl to see all of the ports and their uses.
(2) USB ports – reserved for your future USB devices; the USB ports can be used for external, local storage›
such as an external hard drive or memory stick
Ethernet port – connects the zControl to your network (for example, to an Ethernet hub or directly to your›
gateway/router) by means of the included Ethernet cable
Reset button – restarts your zControl›
WARNING: Normal functionality will be interrupted until the zControl has fully restarted
12VDC 1.4A – connects to your power supply›
1.2 Inspecting the LEDs on Your zControl
You’ll notice several LEDs on the front of your zControl.
These LEDs provide information on the zControl’s status. In general, when you see green,
everything is working correctly. When choosing a location for your zControl, remember to
make sure that the LEDs are easily visible. For more information on the LEDs, consult the
LED matrix on the last page of this manual.
Connection, Registration, and Activation2
2 Connection, Registration, and Activation
2.1 Connecting to the Internet
Plug one end of the provided Ethernet cable into the1. Ethernet port of your zControl, and the other end into
your router
Plug one end of the power cable into the2. 12VDC 1.4A port of your zControl and the other end into a wall socket
or power strip. The Power LED on the front of the zControl will turn solid green
The3. Ethernet LED on the front of the zControl will blink green until the zControl has obtained an IP address,
at which point the Ethernet LED will turn solid green. This can take up to two minutesNOTE: Your zControl is
pre-configured to receive IP address automatically via the DHCP mechanism used in most home networks. If
no DHCP server is present on the network, your zControl will default to the IP address 192.168.1.55.
Once the zControl is connected to the local network, it will connect to the Internet automatically. You’ll know it’s
connected when the Online LED on the front of the zControl starts blinking green.
You’ll need the zControl to have Internet connectivity so that you can Activate and Register it online. Once you’ve
successfully Registered and Activated your zControl, the Online LED will turn solid green.
2.2 Registration
Now that your zControl is on, connected to your local network, and has Internet connectivity, it’s time to Register
with the Portal Server.
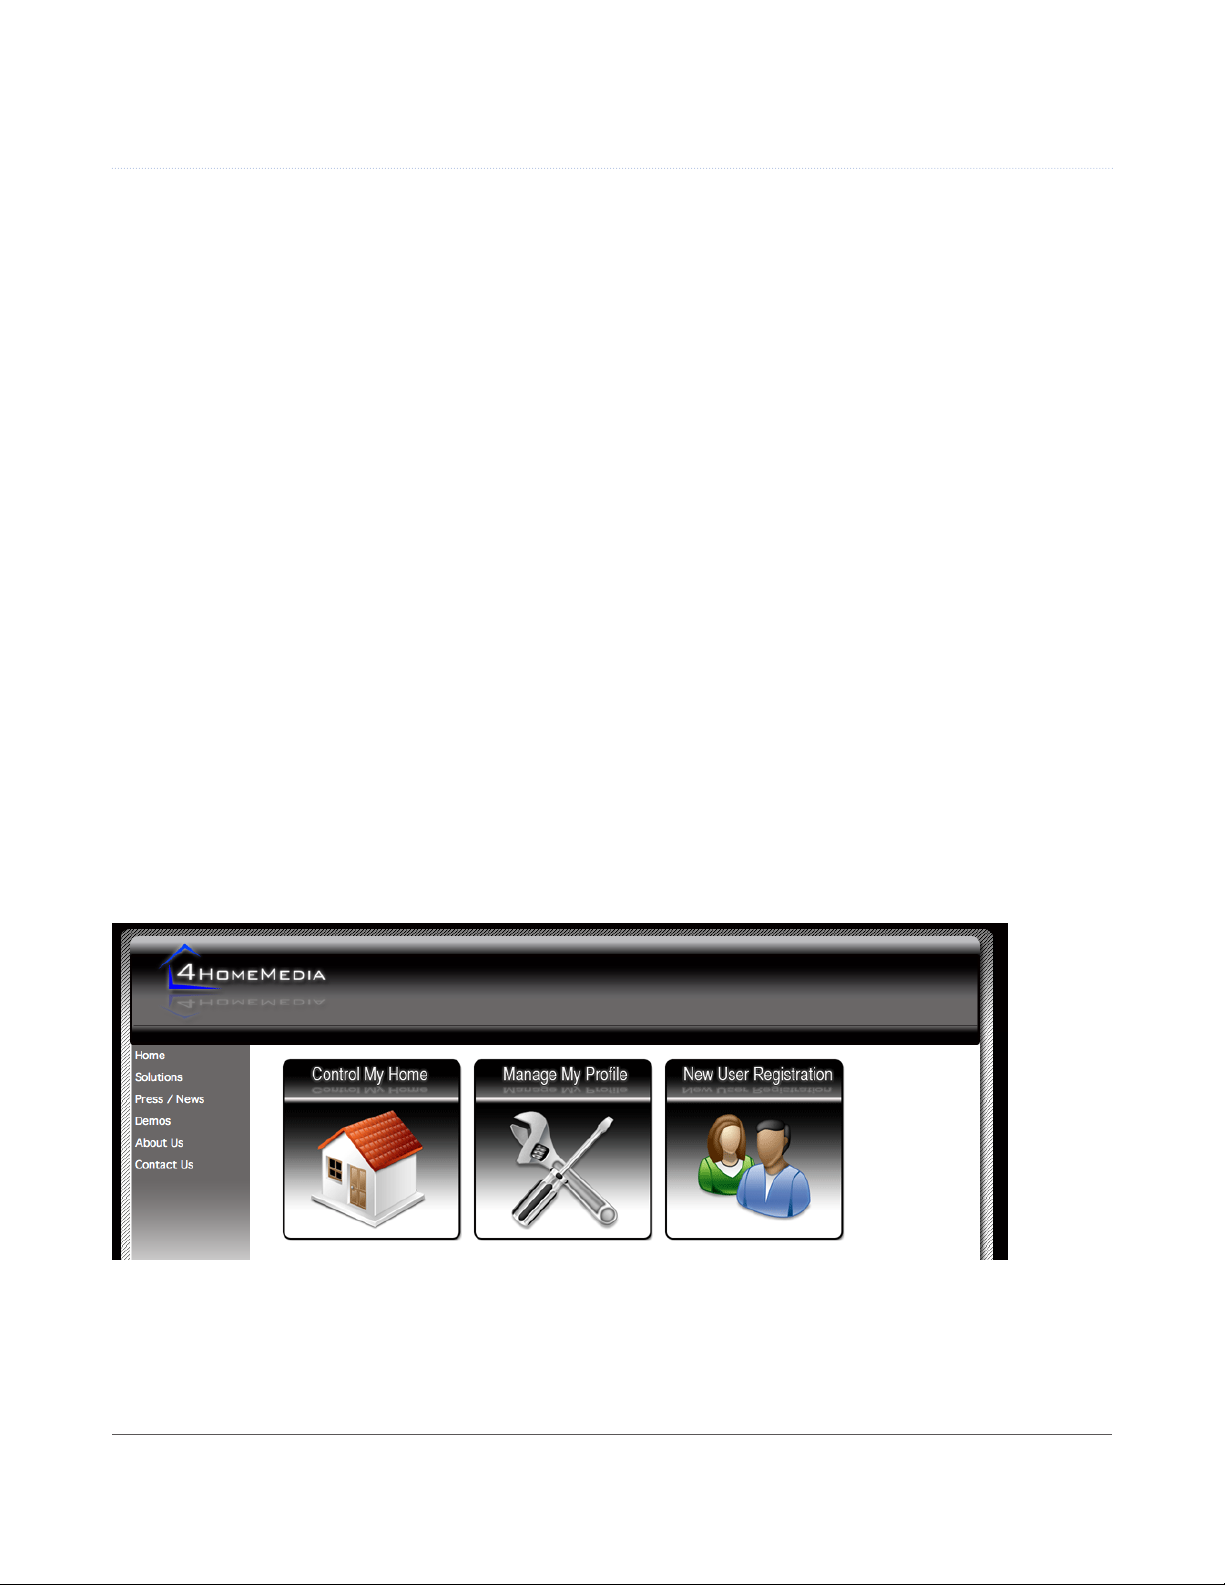
Open your preferred web browser and go to http://digitalgardeneronline.com/zControl. You’ll see this screen:

3
Connection, Registration, and Activation
Click on New User Registration. You’ll see a screen like this one:
Provide all of the required information and whatever optional information you like.
NOTE: Make sure you write down your login name and password in a safe place.
Upon successful Registration, you should see the following screen:

Connection, Registration, and Activation4
2.3 Activation
Activation will allow you to start using your zControl, access your zControl User Interface, and receive upgrades
and new services as they become available.
Open a browser window and go to http://digitalgardeneronline.com/zControl again, click on Manage My Prole,
and log in. From the menu on the left side of the screen, click on the Activate ControlPoint option. On that screen,
you’ll need to provide
A friendly name that you want to use to identify your zControl (note: underscores are not allowed). We recom-›
mend giving your zControl a unique and distinctive name.
For example: “John Smith’s ControlPoint”
Your zControl’s MAC address, which can be found on the label on your zControl›
For example: 00:06:D3:A8:00:15 OR 0006D3A80015
Your time zone (note: you’ll need this to be correct to take advantage of zControl’s›Schedule feature)
For example: PST if you live in the Pacific Time Zone
After you click Continue, you’ll see this screen:
Once the Activation process is complete, your browser will be automatically redirected to the User Interface. We
recommend that you add the User Interface to your Bookmarks/Favorites.
NOTE: Some browsers will do this automatically.
Table des matières


